How to Make a Family Tree in Excel
A family tree is also known as a pedigree chart. It is a conventional chart representing family relationships in a tree structure. Family trees are commonly used in social work and medical industries, where they are also known as genograms. If you want to help your child make a family tree for a school project or you are an aspiring genealogist, then you probably want to know how to make family trees. Creating a family tree seems like a tedious task, but it is quite fun. You can use Microsoft Excel and other similar software to learn how to make these charts.
Today, we will tell you how you can create a family tree in excel in just a few simple steps!
How to Make a Family Tree in Excel
Step 1 – Open MS Excel and Open a New Sheet
First of all, launch MS Excel software on your device. For the purpose of this tutorial, we will be using Microsoft Excel 2013. Once MS Excel is open, select a blank spreadsheet.
Step 2 – Build a Family Tree
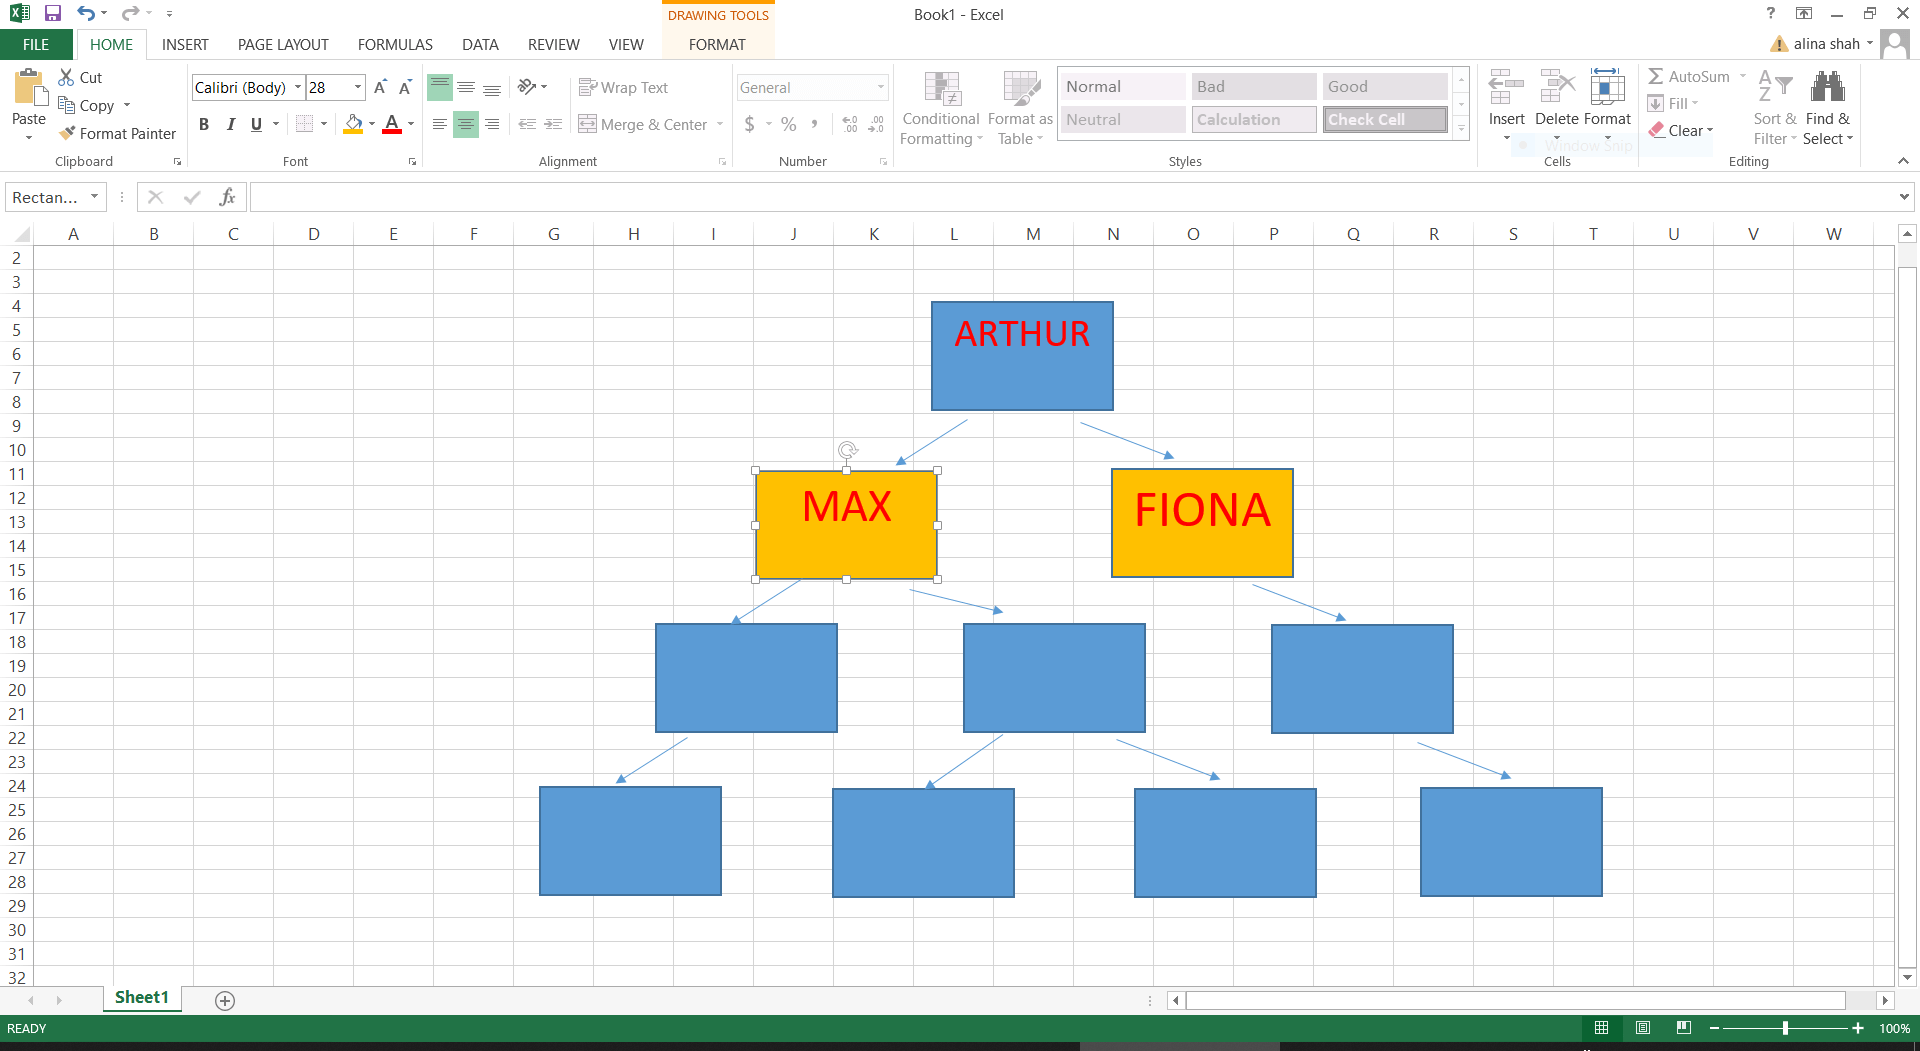
To create a family tree in MS Excel, go to the Insert Tab on the ribbon menu and click on it to launch different tools. Now click "Shape" to choose different shapes that you can use to create a simple family tree. You can select rectangular, triangular, and circular shapes. Insert the shape to the spreadsheet by selecting and dragging them onto the sheet. You can alter the shape by clicking on it and adjusting the corners.
A family tree shows a connection between different relationships, so to showcase doors relationships, we will be using lines to join the shapes together. To add adjoining lines, go to the Insert tab again, click on "Shapes", and select any line from the section of the line.

Step 3 – Enter Text
A family tree is incomplete without names and labels. To add text on your family tree, double-click on the shape you have entered and start typing. You can edit the font size color and style of text according to your requirements.
Step 4 – Finalize and Save
Once your basic family tree is complete, you can also add more details and features by using different tools available in the menu ribbon. When the family tree is finished, save your file by clicking on "Save" in the File Tab.
How to Make a Family Tree in Edraw Max
Edraw Max Online is a great alternative to create family trees quickly and in a fun way. This one software offers multiple drawing tools for different types of visual content creation.
Some benefits of Edraw Max Online include:
- Simple to use – It is easy to use software with a user-friendly interface and simple drawing tools.
- Cross-platform – Edraw Max Online is compatible with different operating systems, i.e., Mac OS X, Linux, and Microsoft Windows. It also has a desktop app.
- Affordable – Subscription plans of Edraw Max Online are very affordable for individuals and come at a very low price as compared to other drawing tools.
- Symbol library – It offers an extensive library of different types of symbols for both technical and simple drawings.
- Templates – Edraw Max offers thousands of templates available for quick and easy customization.
Now that we know what Edraw Max Online is and how beneficial it can be, let's see how you can use this versatile drawing tool to create family trees. Follow the step by step guide to learn how to make a family tree in excel using Edraw Max.
Step 1 – Launch Edraw Max
Launch the browser and go to edrawmax.com/online.

Step 2 – Launch Drawing Tab
Select the blank sheet from Edraw Max and wait for the drawing tab to launch.
Step 3 – Make Family Tree
Click on << on the left corner to launch the Symbol Library. Now select the desired shape and drag it onto the blank page. Keep arranging your shapes to form a family tree.
To insert lines, scroll down in the Symbol Library and select different joining lines. You can also automatically add text and connection points by going to the Symbol Tab in the menu ribbon and clicking on “Add connection points automatically”.

Steps 4 – Customize
To add custom features and symbols, click on the icon placed next to the symbol library on the left side of the screen. Once the symbol library launches, search for "Family Tree" and click on the go. Different family tree shapes and illustrations well load, which you can use to customize your family tree.
Use the navigation pane on the right side of the screen to edit and format background, text, images, and other features.
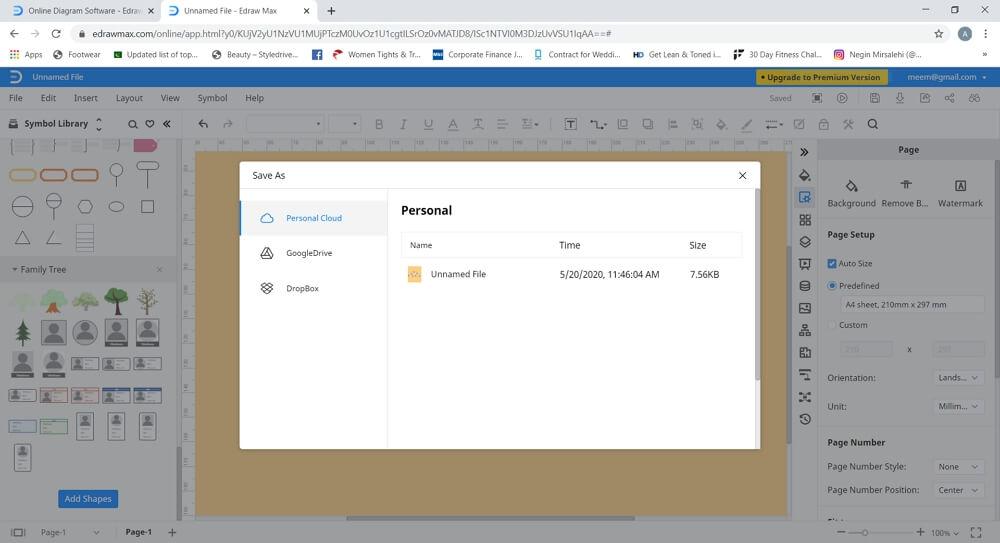
How to Save Your Family Tree
When the family tree is complete, you can save it by going to the File Tab and clicking on "Save". Your file will be automatically saved on the Edraw cloud of your account. Edraw Max Online also offers the Export option in the File Tab, which allows you to save your document in common file formats such as pdf, word, excel, or graphics.
You can also save your file on cloud storage services like Google Drive and Dropbox by clicking on save as in the file tab.