
Templates Community /
Reflected Ceiling Plan Revit
Reflected Ceiling Plan Revit
Ashley
Published on 2021-10-29

 Desktop

1. Introduction
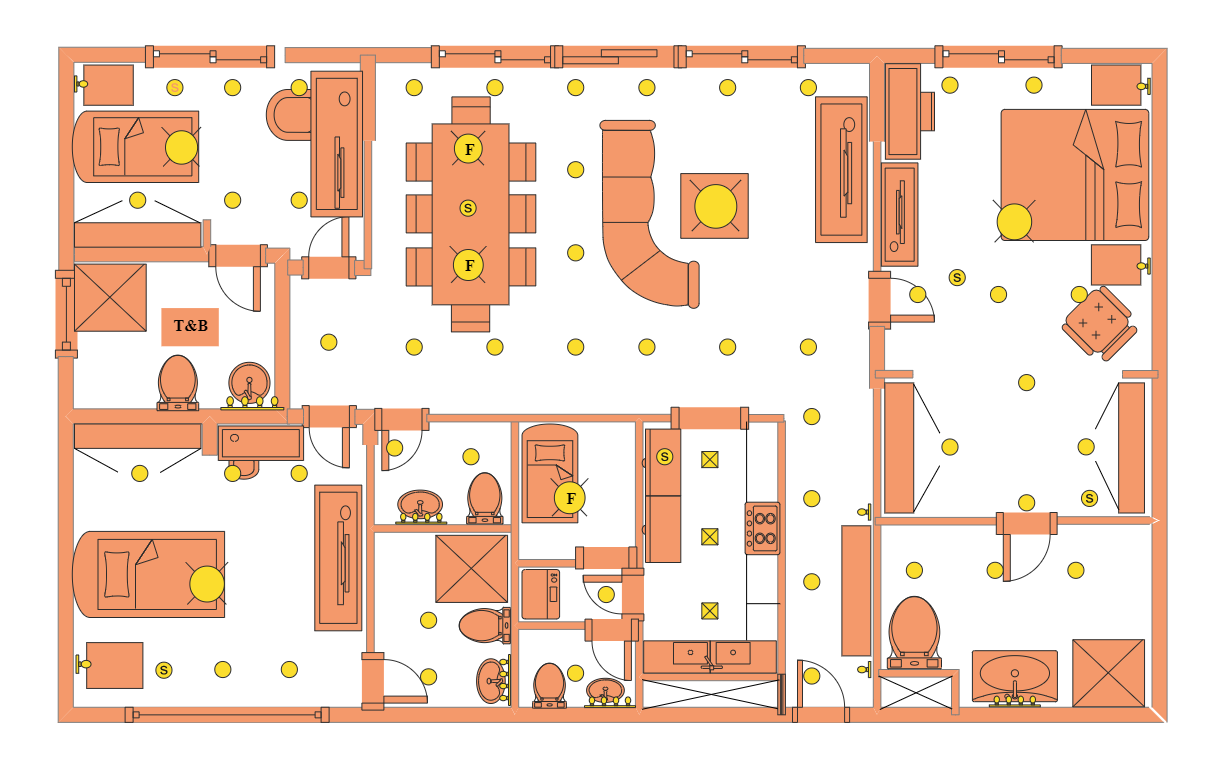
Two of the bedrooms have the same exact illumination which includes 1 ceiling light outlet, 6 light surfaces mounted, and 2 light surfaces mounted inside the bathroom. The other bedroom has 1 ceiling fan and 1 light surface mounted and another 1 inside the bathroom. The separate bathroom has 2 light surfaces mounted. The reception includes 1 ceiling light outlet and 2 ceiling fans over the dining table in addition to 15 light surfaces mounted.
2. What is Reflected Ceiling Plan
A Reflected Ceiling Plan (or RCP) is a survey drawing that depicts things that are positioned in or on the ceiling.
Features that are decorative.
Lighting.
Speakers.
Vents in the ceiling.
There is air conditioning.
Signs directing you to the exit.
Fixtures for evacuating.
Sprinkler systems are a type of sprinkler system that is used to
Alarms
3. How to Create a Reflected Ceiling Plan
Step 1: Understand your layout.
Make a scale drawing of the various rooms using either software or graph paper. Make sure to add things like cabinets, counters, a stove, a bed, and other symbols.
Step 2: Make a detailed plan ahead of time.
Focus on your electrical strategy after you've finished with your layout. Before being plastered, laid out, and fixed, the wirings pass through the ceilings, walls, and floor.
Step 3: Begin with the layout of the interior.
Place your fan, AC switches, and light around your exits and entries. Place your outlets close to the counters and tables now. Then select where you'll put your large equipment, such as your television, computer, washing machine, printer, and so on.
Step 4: Go over your strategy in detail.
Once you've finalized your layout, print it out and go around your house with it in your hands. Because there are no walls or power, the configuration is flexible; therefore, envision turning on and plugging in appliances. This will allow you to install switches and outlets in the most convenient locations.
Tag
floor plan
Floor Plan Collection
Share
Report
8
1.5k

Post
Recommended Templates
Loading
