How to Make a Decision Tree in Excel
A Decision Tree is a diagram with a tree-like structure. It helps to understand the possible outcomes of a decision or choice. It is also a way to show a flowchart of an algorithm based on only conditional statements. We have an action at the top, and then there are many results of the work in a hierarchy, showed as leaves & branches.
You can create a decision tree in Excel. This article is a step-by-step guide on how to create a decision tree in Excel and EdrawMax.
How to Make A Decision Tree in Excel
There are two ways of making a decision tree in excel, and the first is to use basic shapes and lines to make a decision tree in Excel, while the other is to use a ready-made decision tree template.
First, let’s start with the basic shapes and lines!
Step 1:
Open Microsoft Excel on your computer.
Step 2:
Insert the data into the spreadsheet for which you want to create a decision tree.
Step 3:
There are two ways to create a decision tree in Excel. One is to use basic shapes and arrows, and the second is to use the SmartArt Graphics.
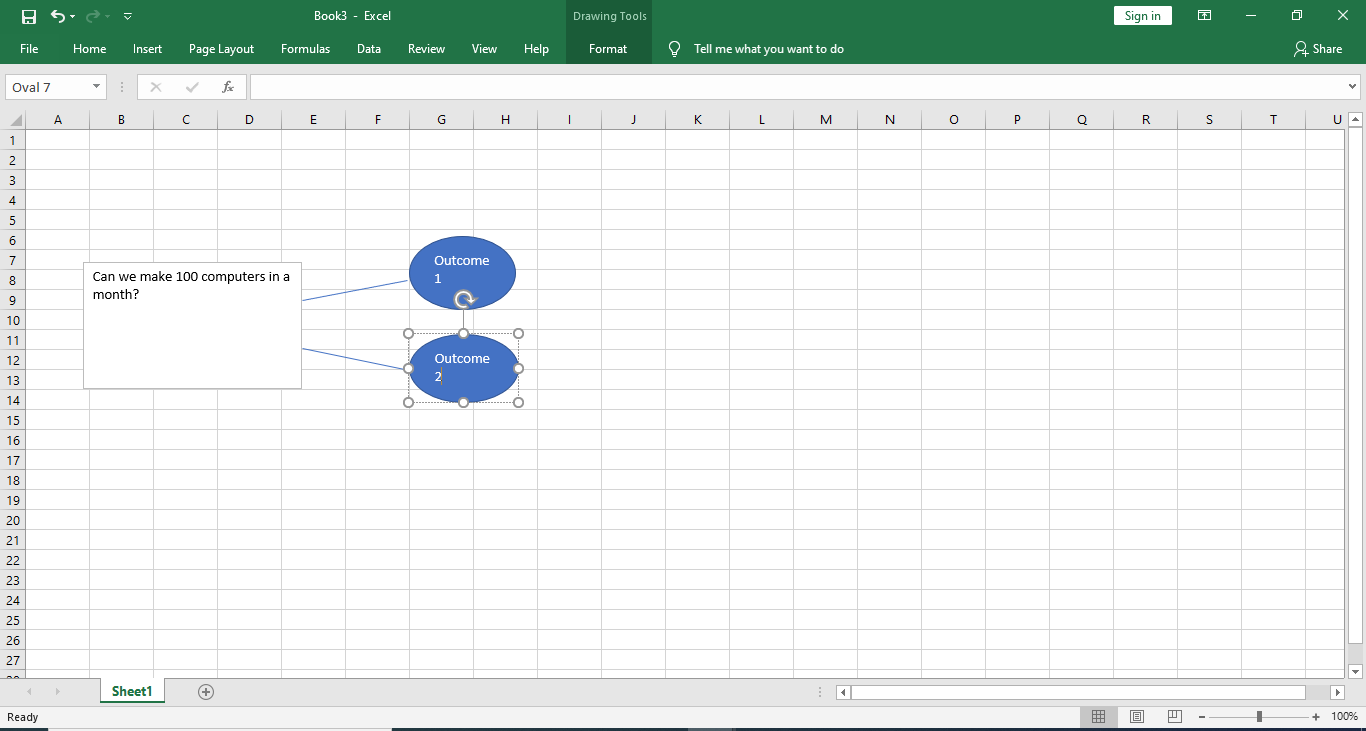
First, we will create a Decision Tree using basic shapes and lines. Click the Insert tab and then select Text Box from the Text section. After selecting the Text Box, you will be able to draw the Text Box using the cursor. Insert your question in the Text Box. You can see a text box with a question in the picture below.
Step 4:
Now you need to draw outcomes/answers to the question. It is up to you how many answers/outcomes you have for a question/decision.
To insert a line, click Insert and then select Shapes from the Illustrations. Next, choose a Straight line. After inserting a straight line, attach a box/oval for the 1st outcome. Now add more ovals for other results. You can see two outcomes from the Decision in the picture below.
Keep using the connectors to draw more outcomes. Now, we will see the second method to draw a Decision Tree in Excel.
Step 1:
Open Excel on your computer.
Step 2:
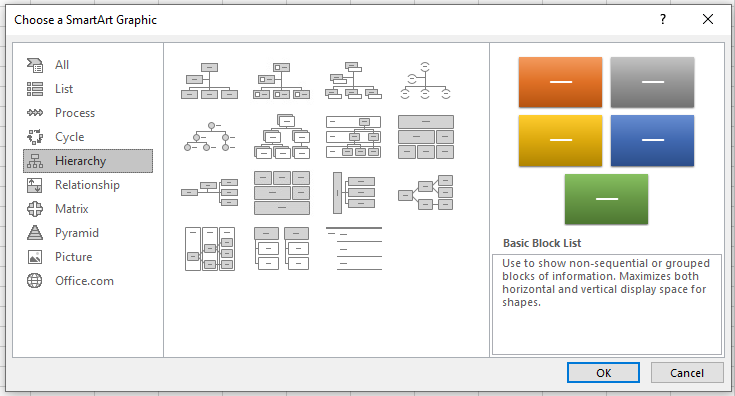
Click the Insert tab and then select SmartArt Graphics from the Illustrations section. A dialogue box will open, which is shown in the picture below.
Step 3:
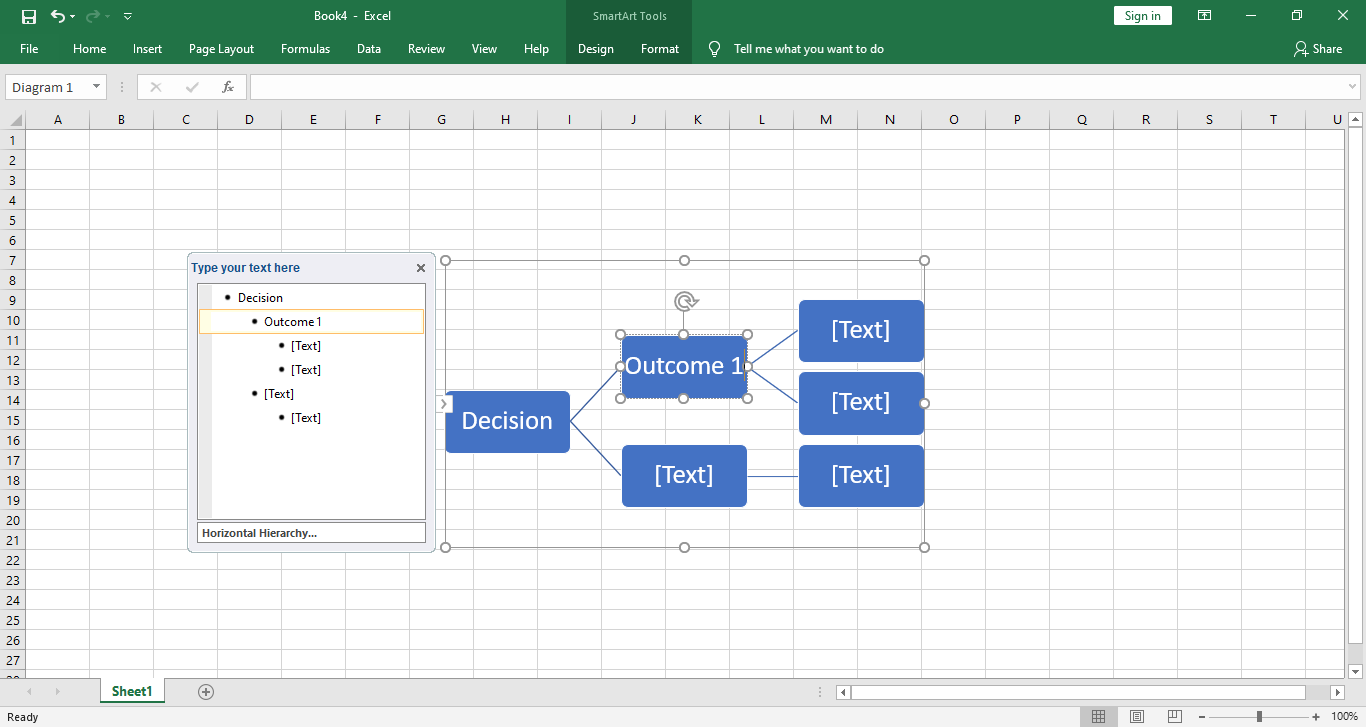
Now, go the Hierarchy tab, and select the Horizontal Hierarchy. Once you click the OK button, the Horizontal Hierarchy SmartArt Graphic will open in the Excel window.
Step 4:
In the Excel window, you can edit the Decision Tree. Click the placeholder text inside the Decision boxes and replace them with your content. You can also use the small editor box beside the SmartArt Graphic to edit the content. You can see the decision tree edited in the image below.
How to Make A Decision Tree in EdrawMax
Step 1:
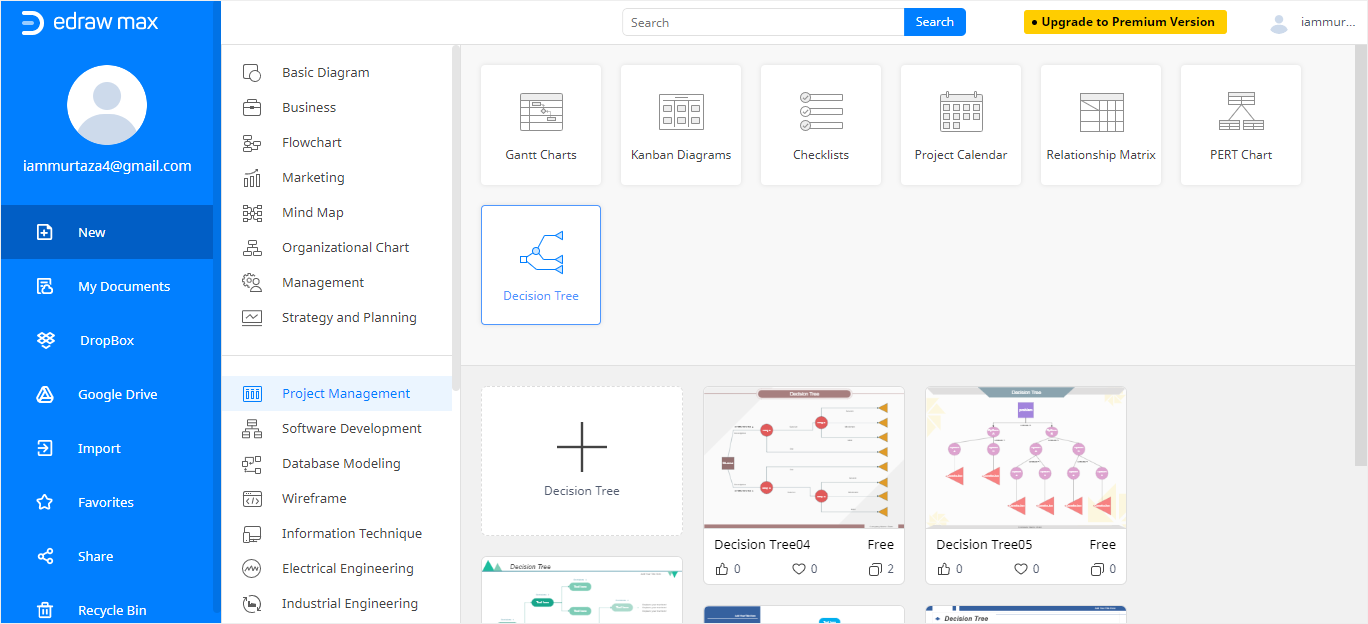
After you log in to EdrawMax, click the New tab showing below your email address. Next, select the Project Management tab.
From the Project Management menu, select the Decision Tree tab. Then, some templates will show up in the below section. You can choose any template or you can also choose to create a Decision Tree from scratch.
To make a decision tree from scratch, click the large + sign.
Step 2:
You can select any template from the available option. When you click a template, it will revamp in the EdrawMax online editor. You’ll be able to edit the template according to your requirements. You can see a decision tree template open in the editor in the below image.
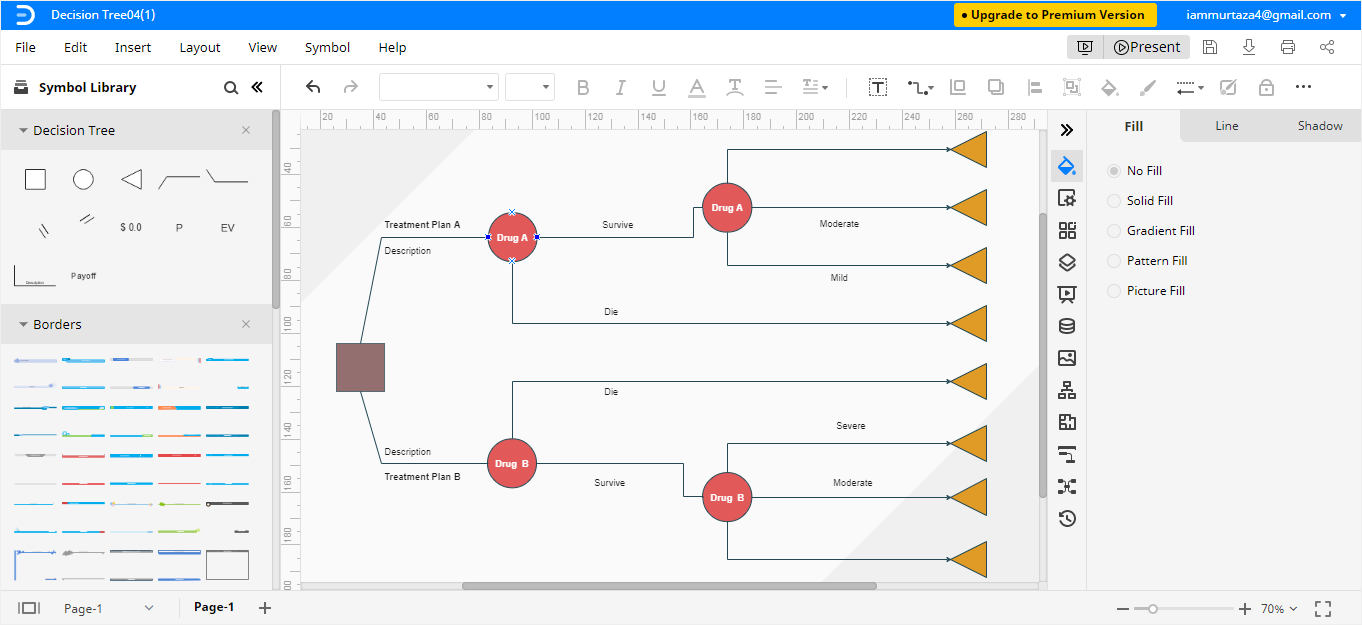
Step 3:
Now that you’ve opened the template in the editor window, you can edit the template as per your needs. To replace the pre-set content in the decision tree nodes, click the placeholder text and type whatever you want in the place of pre-set content.
You can add or delete the nodes as well. If you want to draw another branch or node, then click on the node, which you want to set as the parent node and drag the cursor to the child node.
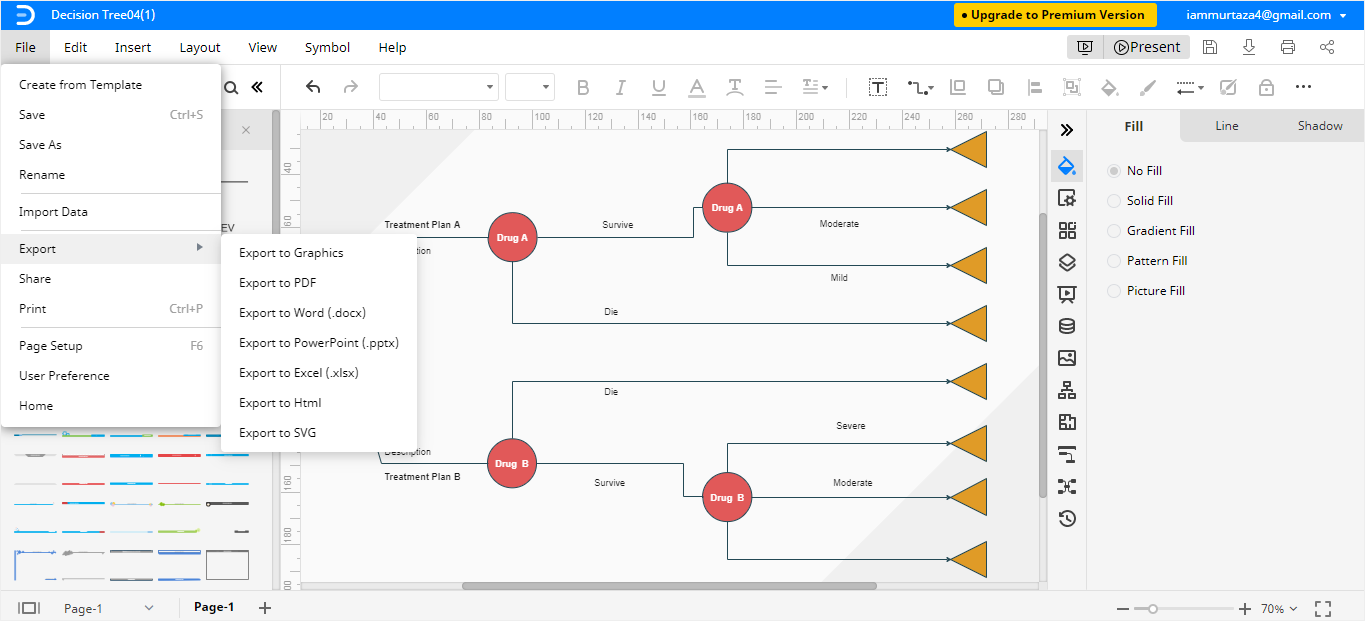
How to Save An Edraw Diagram as An Excel File
After you have created a Decision Tree in EdrawMax, you can save it in different formats. If you want to save your Decision Tree in Excel format, it is an easy process of two steps. Follow the below steps to save your Decision Tree in Excel format.
Click on File in the top left corner, from the drop-down menu select Export. From the Export menu, select Export to Excel (.xlsx) and your Decision Tree will be saved as an Excel file to your computer. You can save and export your Edraw files to Dropbox and Google Drive as well.
You can see the Excel format option in the below image.