A Guide to Understand Moon Phases with Diagram
The earth revolves around the sun in its orbit. At the same time, the moon is revolving around the earth. The moon gets lit up with the reflected sun rays. However, due to the revolution, the brightness varies. Thus, resulting in the main four phases of the moon. The students must have a thorough idea about the moon's phases.
1. The Moon Phases
The moon and earth's orbital positions change is the reason behind the lunar phases. From the earth, one can see only the sun-lit part of the moon. The shapes of that bright part are known as moon phases or lunar phases. It takes 29.53 days or a synodic month for the main four lunar phases. Each of the lunar phases stays for 7.4 days.
1.1 How Do the Moon Phases Work
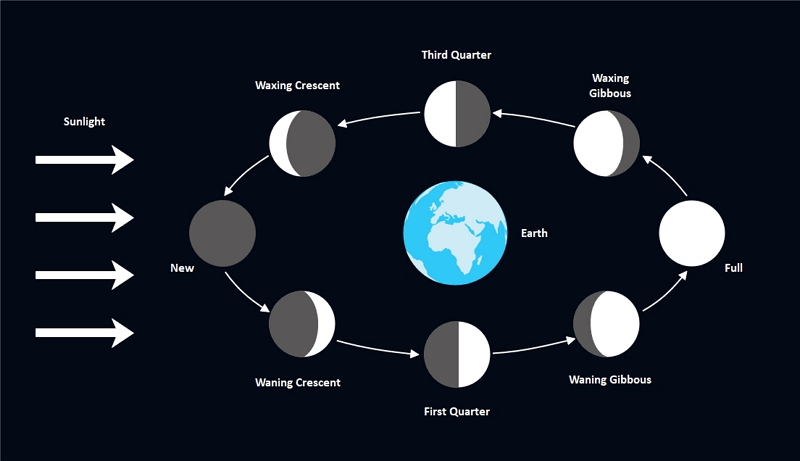
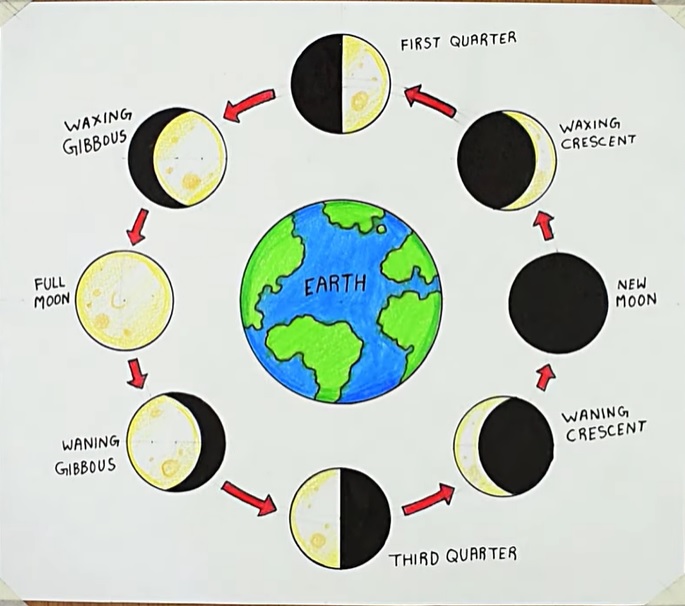
As the moon rotates, its dayside and night side also changes. There are eight phases, and the elliptical shape of the moon's orbit is the reason for the changes occurring. Based on the position of the sun, moon, and earth, the moon has different phases. They are:
- New moon:
- Waxing crescent:
- First-quarter:
- Waxing gibbous:
- Full moon:
- Waning gibbous:
- Last Quarter:
- Waning Crescent:
During this phase, the moon stays invisible as the bright side of the moon faces away from the earth.
After the new moon, people can observe a tiny part of the moon from the earth known as the waxing crescent.
Most of the illuminated part of the moon faces away from the earth during this time. The moon gradually starts rising more and more after this.
The first quarter moon has half of its illuminated side visible from the earth. During this time, the moon rises at noon, and it stays in the sky till midnight.
Most of the moon's bright side comes to the view leaving only a tiny part dark.
Full moon is bright and can be seen when the lit-up part of the moon entirely faces the earth. The full moon stays in the sky from sunset to sunrise.
After a full moon, the bright side of the moon gradually starts to decrease. This time, the opposite part of the moon is reflecting the light, hence is illuminated.
The moon in the final quarter is half-illuminated and half dark. During this, the moon rises at midnight and stays in the sky till noon.
Most of the illuminated side of the moon faces the sun during this time. Hence a dimly lit slice of the moon is only visible.
 Source:EdrawMax Online
1.2 When Are the Harvest Moon and Blue Moon
Harvest moon:
The autumnal full moon is also called the harvest moon. Primarily, the full moon of late September or early October for some years is the harvest moon. The bright moonlight allows the farmers to work longer who stay busy harvesting their crops during the fall. This practice of harvesting in the moonlight is the reason behind the name of the harvest moon.
Blue moon:
“Once in a blue moon” is a frequently used phrase indicating the rarity of occurrence. When there are two full moons in a single month, the second full moon is called the blue moon. There is an approximate time of 3 years between two blue moons, which means an average of around 33 months. It is not very common to get two full moons as most of the months only have 30 days.
1.3 What is The Earthshine
Earthshine is when the moon may be in its crescent phase, but still, the supposedly darkened part of the moon is dimly visible. The sunlight gets reflected on the earth's surface and falls on the moon to dimly brighten up that darkened part.
2. How to Draw the Moon Phases
The students can take the help of a moon phase drawing to study the changes that occur during these phases. For that, they can make a moon phase drawing by hand, but the process is time-consuming.
2.1 How to Create Moon Phases from Sketch
Creating such a diagram by hand can be difficult. The students can follow these steps to make their moon phase drawing:
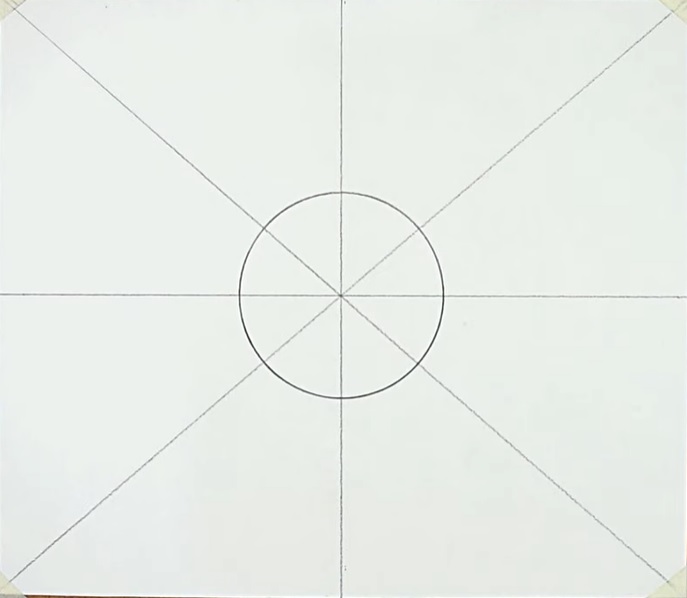
Step 1: The students need to divide the page into eight equal parts by joining the corner and top-bottom of the page before they start with the moon phase drawing. Then they have to draw three circles considering the intersection of the lines as the center. One of the circles is comparatively smaller than the other two, while the two circles have very close diameters.
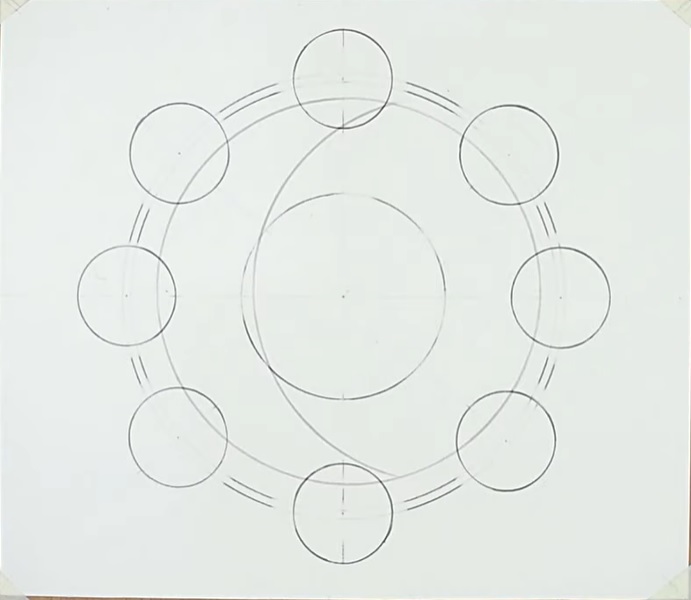
Step 2: In the next step, the students have to draw other circles on the outer circle considering the intersection of the same and lines as their centers. Thus, the students will get a total of eight small circles and one big one. After that, all the lines present inside the circles are removed.
Step 3: The circle in the middle represents earth, and the others represent moon phases. Shade the right half of the top-most circle with a black pen, this first quarter phase. The next (in a clockwise direction) has only a thin slice on its left colored in yellow, and the rest part black shaded. It is the waxing crescent. The circle after this one is entirely black, and it is known as the new moon.
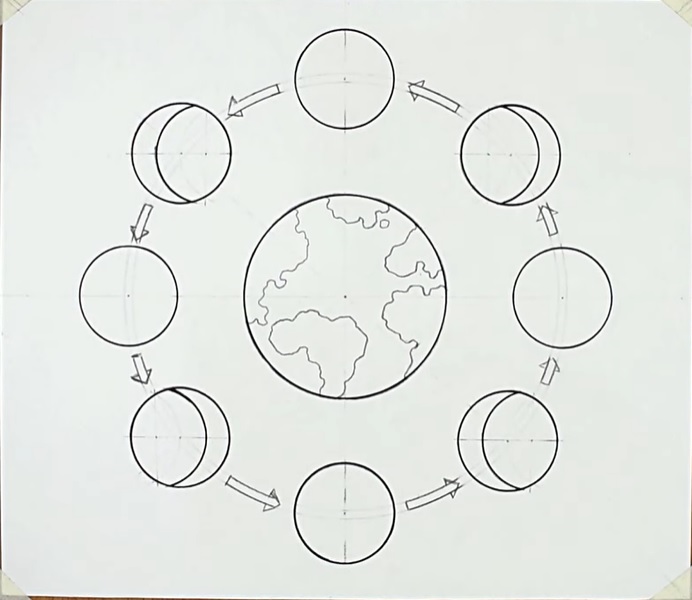
Step 4: The next circle has a thin slice at its right, colored in yellow, and it is called a waning crescent. Then for the next, it has its left half colored in black. It is known as the third quarter phase. The sixth circle has a dark slice at its right side and is waning gibbous.
Step 5: Then the seventh circle is colored yellow and white, which represents the full moon. The last one has a thin slice at its left side colored in black representing the waxing gibbous. Then the students need to put arrows in between the circles in an anti-clockwise manner.
2.2 How to Create Moon Phases Online
Creating a moon phase drawing is challenging and time-consuming. The sun, earth, and the moon's position need to be correct. Only then can students aptly draw the phases. The students may fail to generate a high-quality moon phase drawing. Thus, they must use the EdrawMax Online tool. The tool is user-friendly, and the students can effortlessly work on it without any prior experience. Here are a few simple steps which they need to follow to create a moon phase drawing:
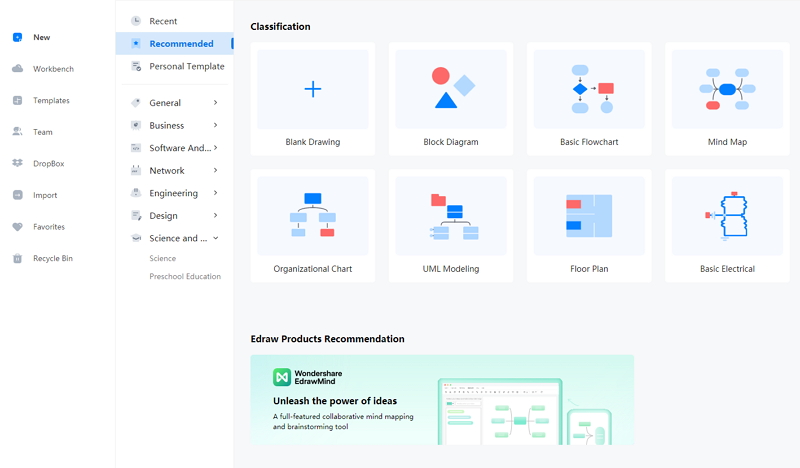
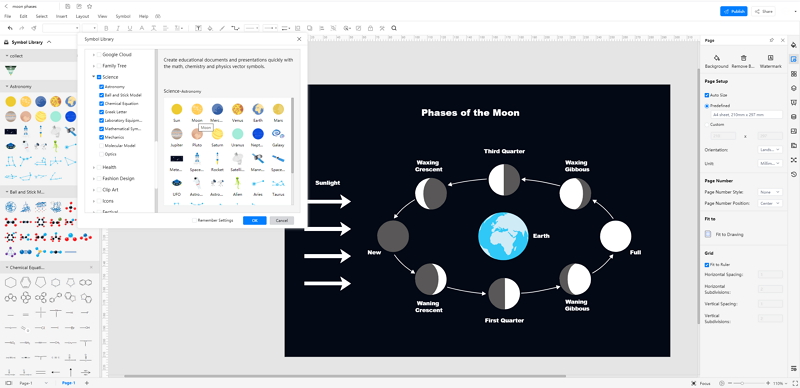
Step 1: To start with the process, the students need to open the EdrawMax Online tool. The tool is easy to use. Hence, it has become a trusted diagramming companion of many users. The students have to open New and then click on 'Science and Education.'
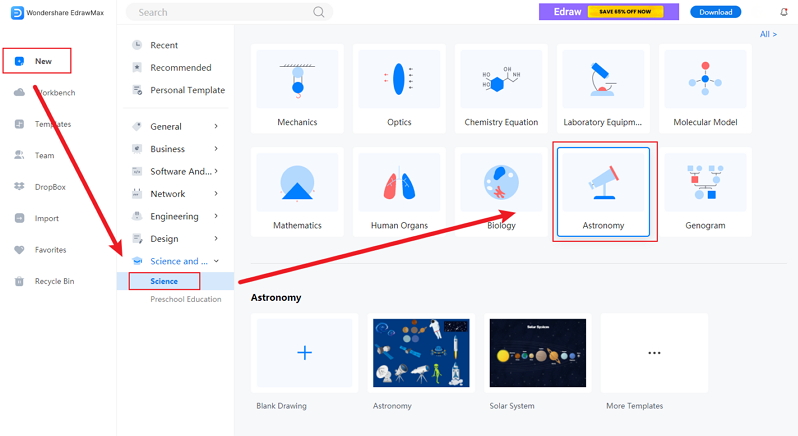
Step 2: The students can use the EdrawMax Online tool for creating various diagrams for their lessons. To create a moon phase drawing, they need to go to the astronomy section of EdrawMax. They can select the moon phase drawing from the tab and then edit it as per their requirement.
Step 3: After selecting the template they require, the students should modify it as per their choice. The tool gives the students some hassle-free options to edit their diagrams. They can work on those images according to their preference to create a high-quality moon phase image.
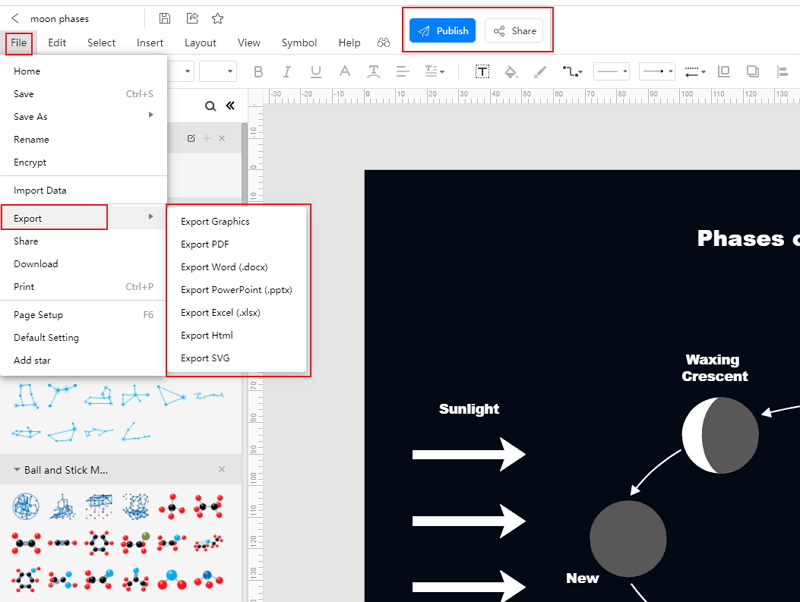
Step 4: Once the students finish their diagram, they can save it in different file formats. They can also export it to use in their lessons, dissertation papers, and projects.
3. Daytime Moon
The moon is visible in the darkness of night, but it is present in the daytime sky as a pale object. During the first and last quarter, the moon can be seen clearly in the daytime. It happens because it stays high above the horizon in the sky, at an angle of 90 degrees from the sun. Due to the position, the sunlight gets reflected off of the moon to make it visible during the day.
Other than the New moon and Full moon, the moon is visible in the daytime during all the phases. On the New moon, the moon stays invisible to the people of earth. At the time of the full moon, it remains below the horizon during the daytime. Thus, the daytime moon is not visible.
4. Conclusion
The position of the moon, earth, and the sun determine the phases of the moon. The students need to understand the moon phases. It will help them to have a deeper understanding of the solar system, tides, and eclipses. To study the lunar phases, they can use a moon phase drawing. For that, they must use the EdrawMax Online tool. It can help them to create a perfect moon phase drawing for their lessons or projects.
In conclusion, EdrawMax Online is a quick-start diagramming tool, which is easier to make artery and vein diagram and any 280 types of diagrams. Also, it contains substantial built-in templates that you can use for free, or share your science diagrams with others in our template community.
Related Articles


