How to Draw and Change a Swimlane Diagram in Visio
Introduction to Swimlane Diagram

A graphical illustration to demonstrate the processes of multiple departments in an organization to achieve a common goal or produce a product is called a Swimlane diagram. Usually, there are two orientations of Swimlane diagrams, namely vertical and horizontal, and depending on the number of divisions your organization has. The length of the process each sector practices, you can choose either of the layouts. When using a decent diagramming tool like Microsoft Visio, Swimlane diagram preparation becomes extremely simple and quick.
Some of the other most commonly used diagramming tools include:
- Microsoft Visio (already mentioned earlier)
- SmartDraw
- Creately
- EdrawMax
- EdrawMax Online
How to Draw a Swimlane Diagram in Visio
It is easy and fun to create a swim lane diagram in Visio. The process of drawing such a chart in the app is explained below:
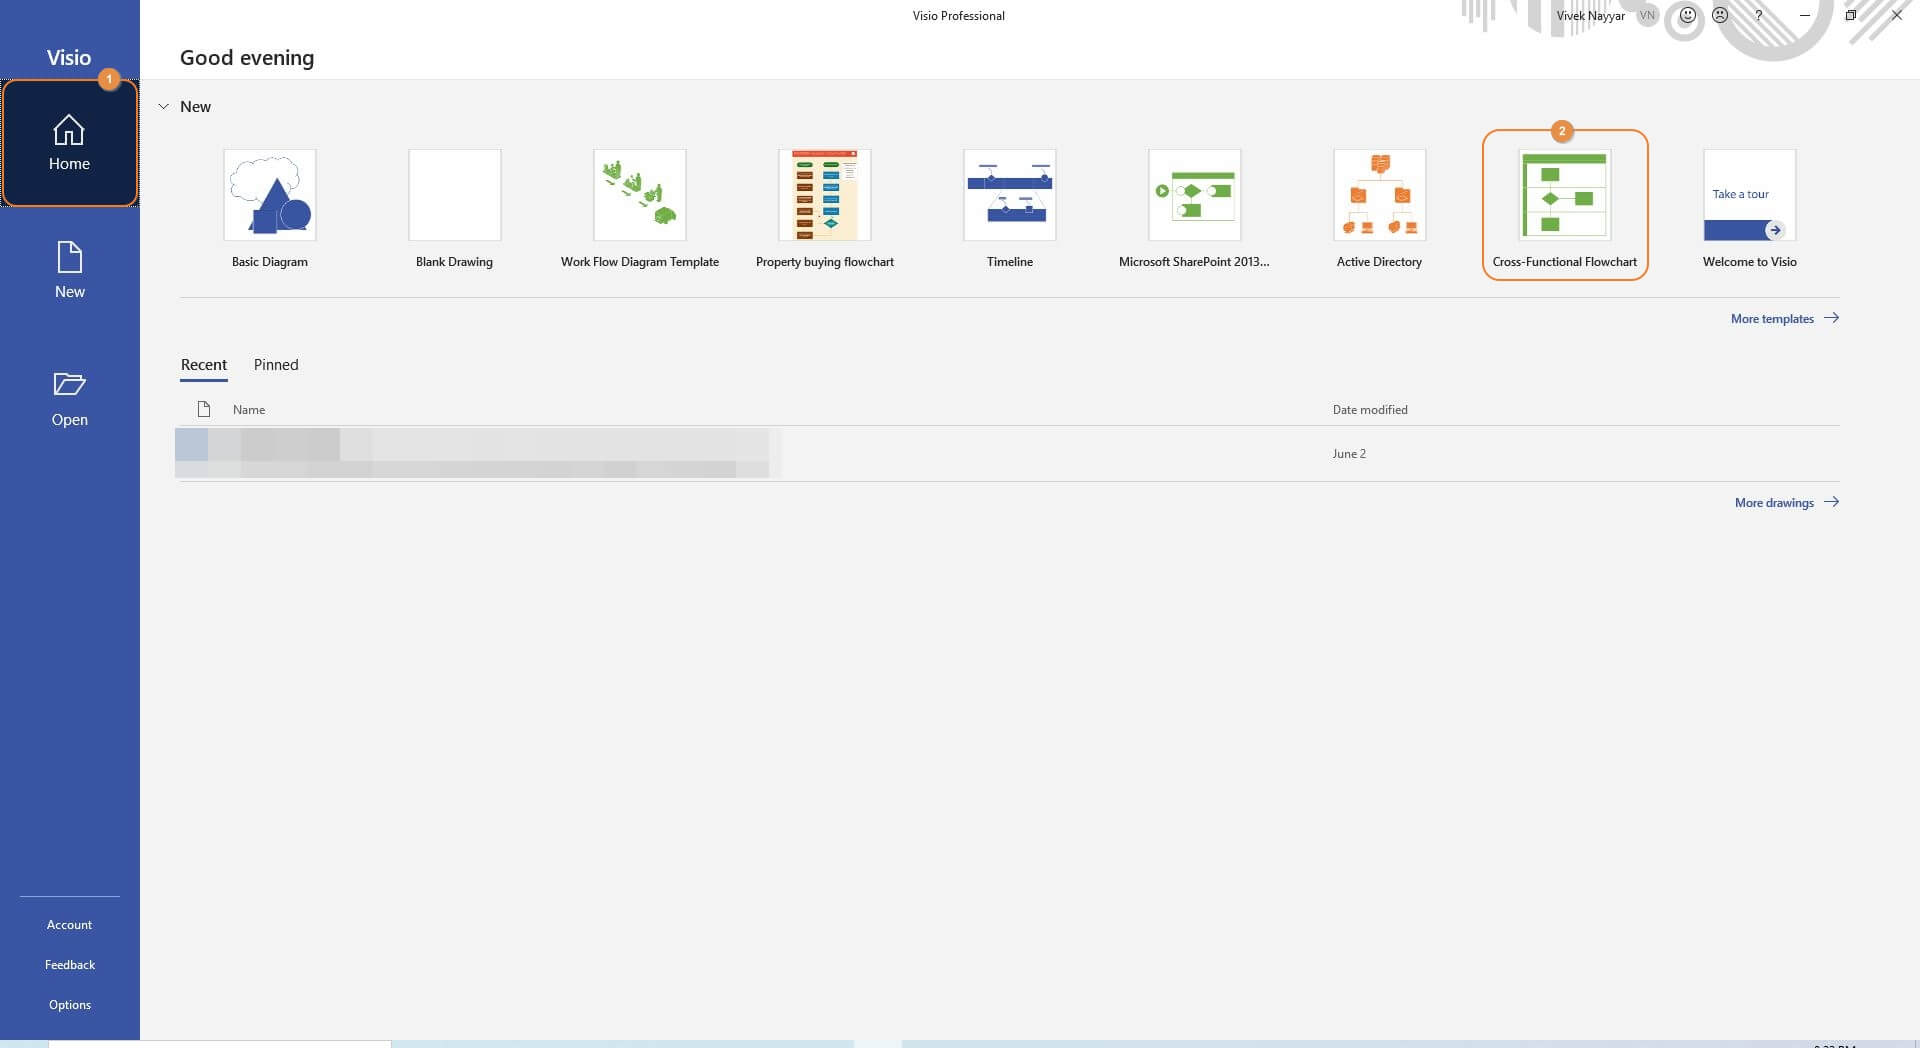
Step 1: Choose Correct Template
Launch Microsoft Visio, ensure that you are on the Home section from the left pane, and click the Cross-Functional Flowchart tile from the right.
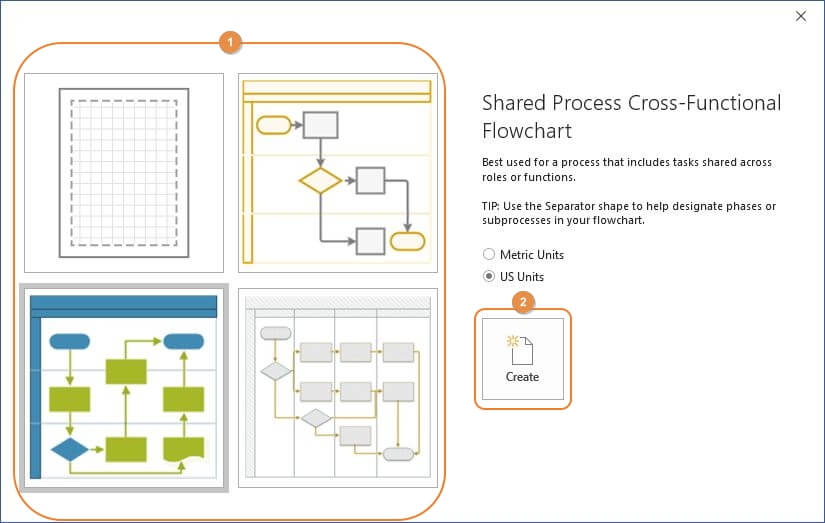
Step 2: Create a Swimlane Diagram
On the next box that appears, click to select your preferred template (or click the blank one to draw a diagram from scratch) from the left section, and click Create from the right to create a new Visio document and insert a Swimlane diagram to it.
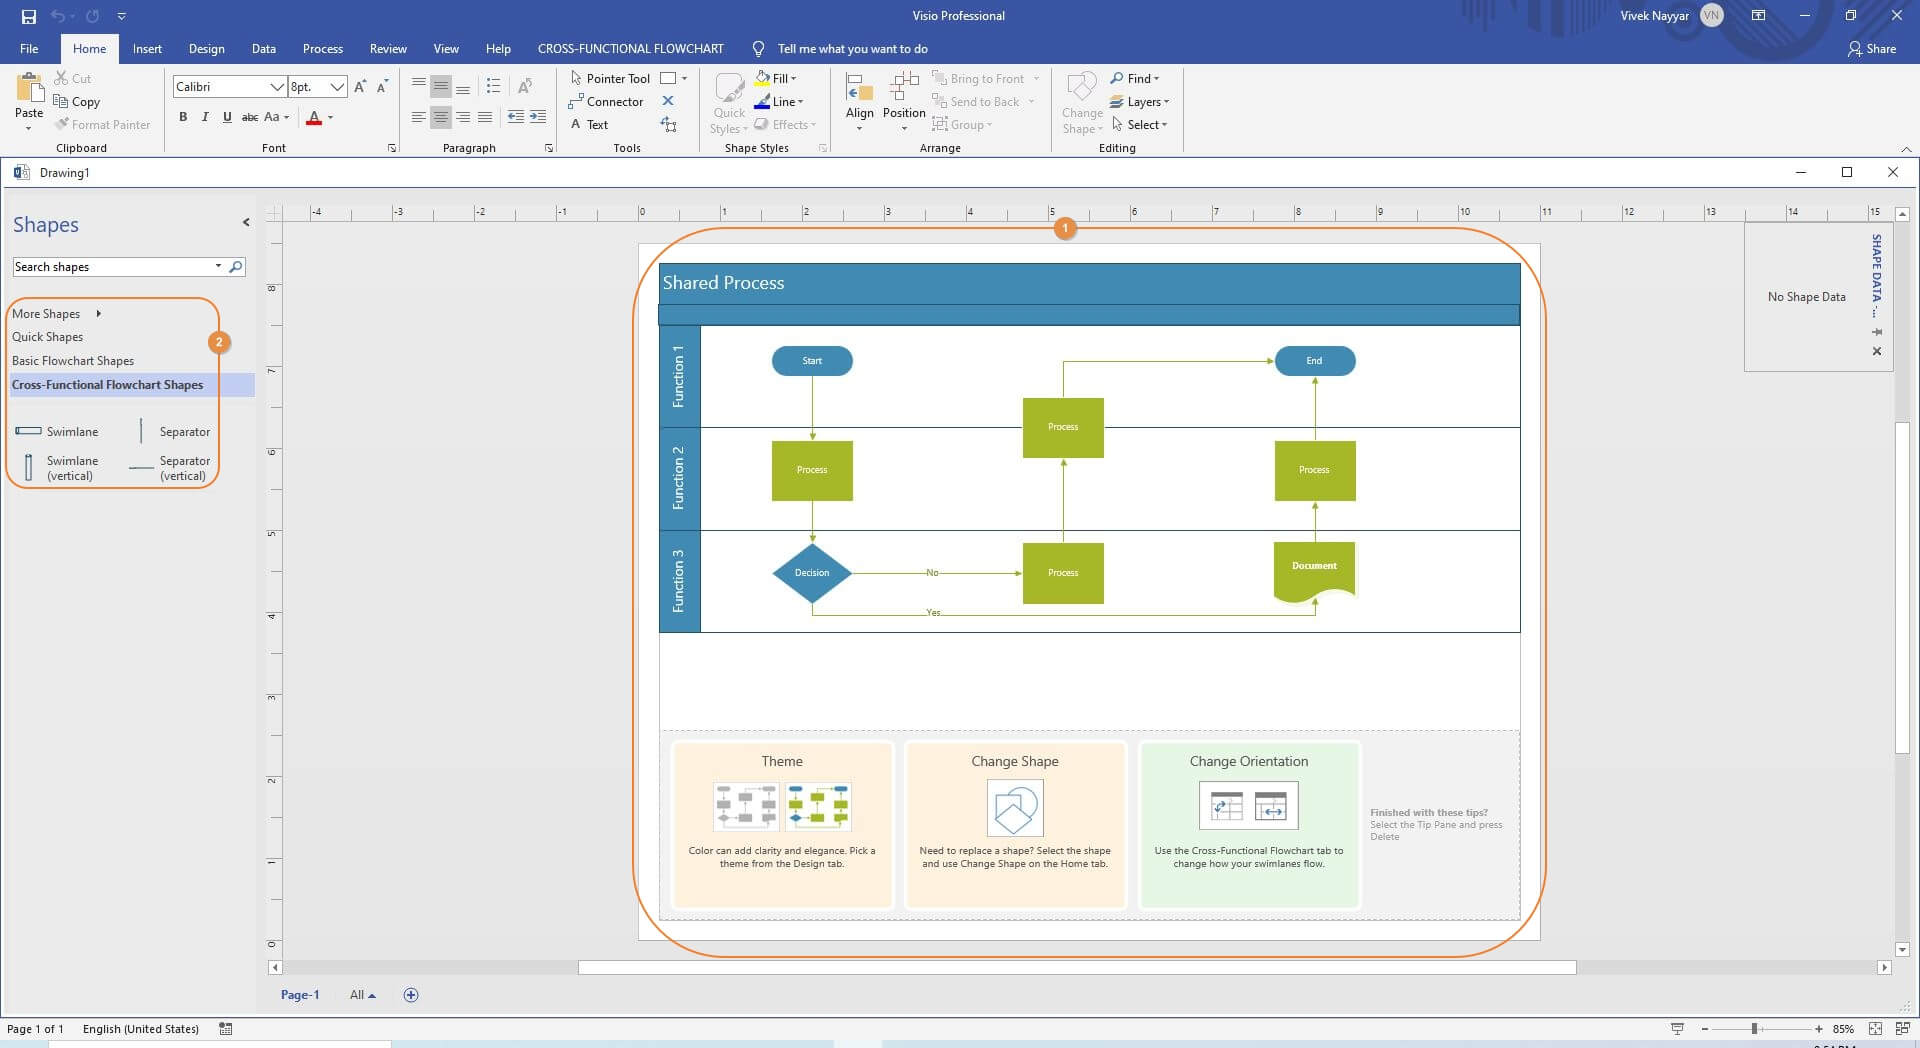
Step 3: Make Changes
Double-click any text or section of the Swimlane diagram that Visio places in the work area, and make the required adjustments as needed. Optionally you can drag other symbols from the libraries in the left pane to the workspace to add more icons (entities) to the illustration.
Step 4: Save the Diagram
Click File from the upper-left corner of the interface, click Save As from the left pane of the menu that appears, and browse/choose a location from the right window to save the chart as needed.
How to Change a Swimlane Diagram in Visio
In MS Visio, Swimlane diagrams can be easily modified, and even their orientation can be changed with merely a few mouse clicks. You can learn the process of adding or removing swim lanes in a diagram, or changing its layout altogether by following the steps given below:
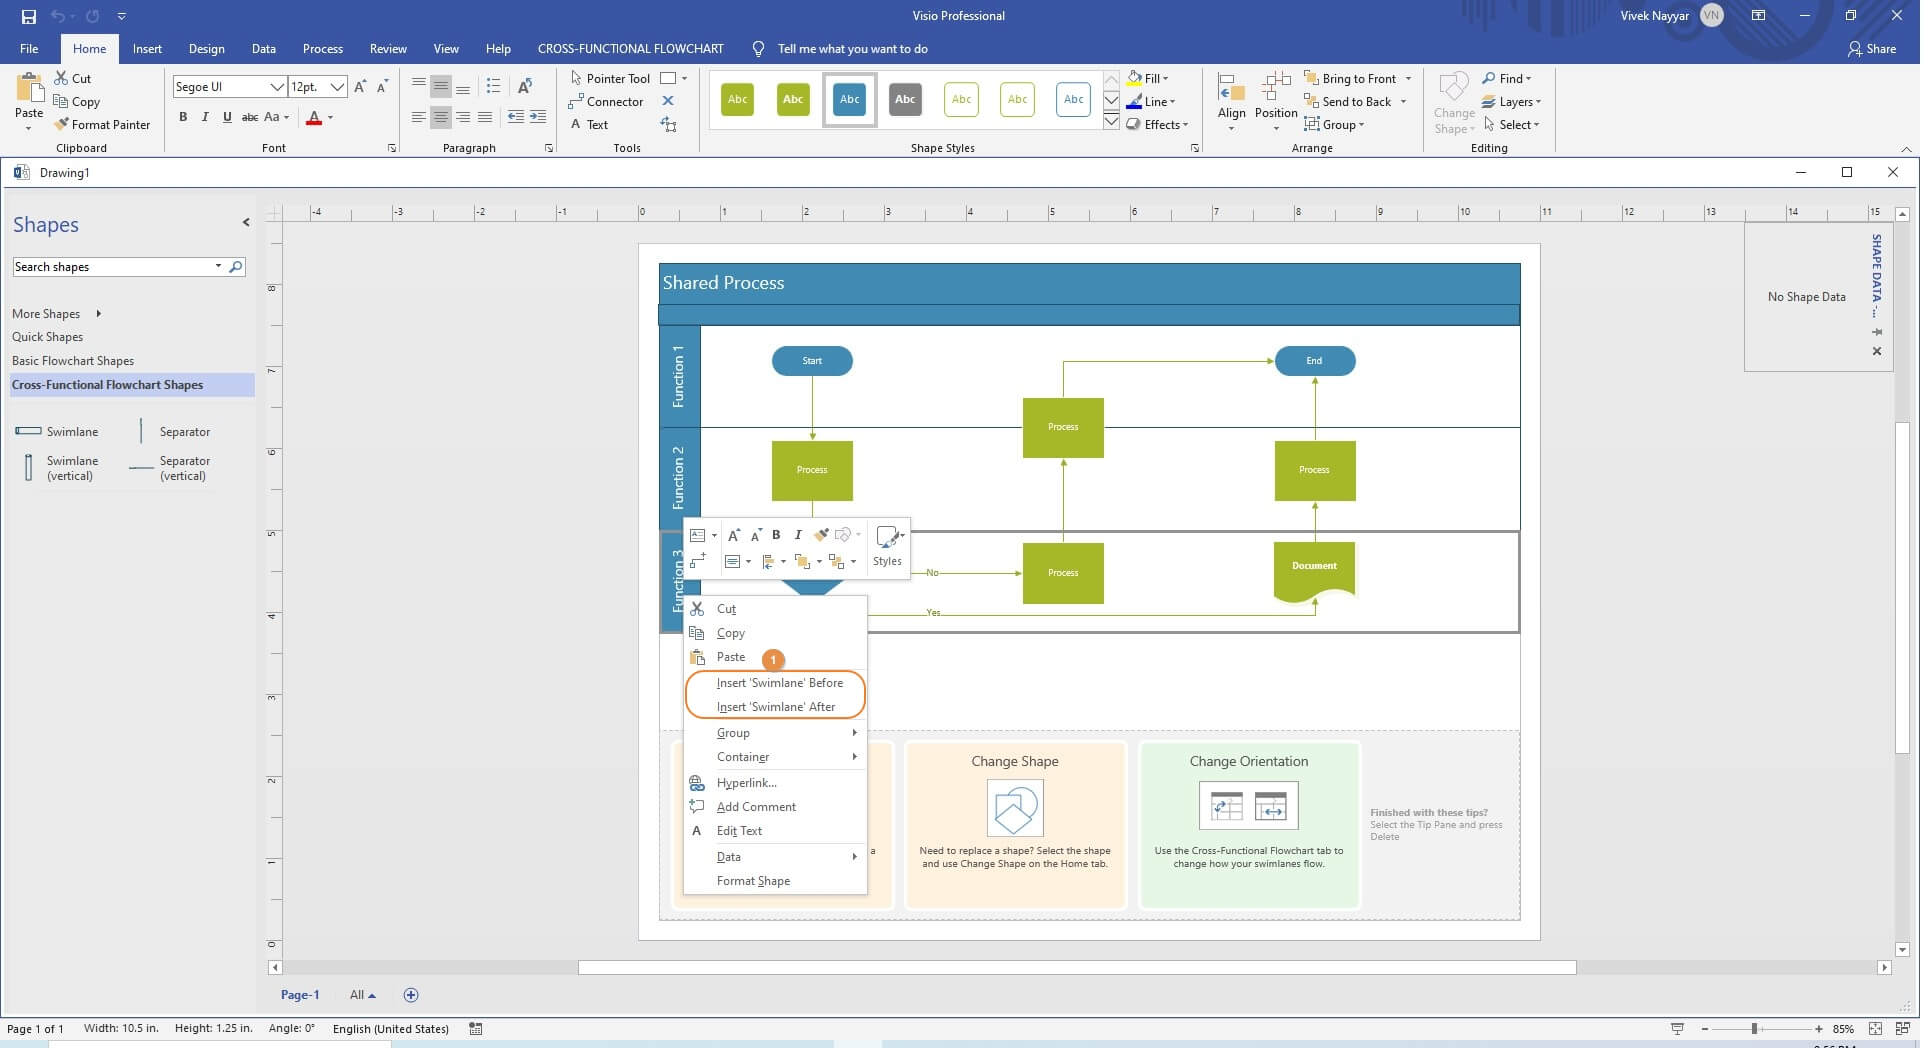
Step 1: Add Swimlane to a Diagram
Open the editable version of the Swimlane diagram in Visio, select and right-click any lane, and click Insert Swimlane Before or Insert Swimlane After from the context menu to add a new swim lane before or after the selected one respectively. Once added, you can double-click its label, and change the caption as required.
Step 2: Delete Swimlane from a Diagram
If the diagram is already open, click and select the swim lane that you want to delete, and hit Delete button on your keyboard.
Note: If the swim lanes were labelled chronologically, you may need to change the captions of all the remaining lanes to make the diagram error-free.
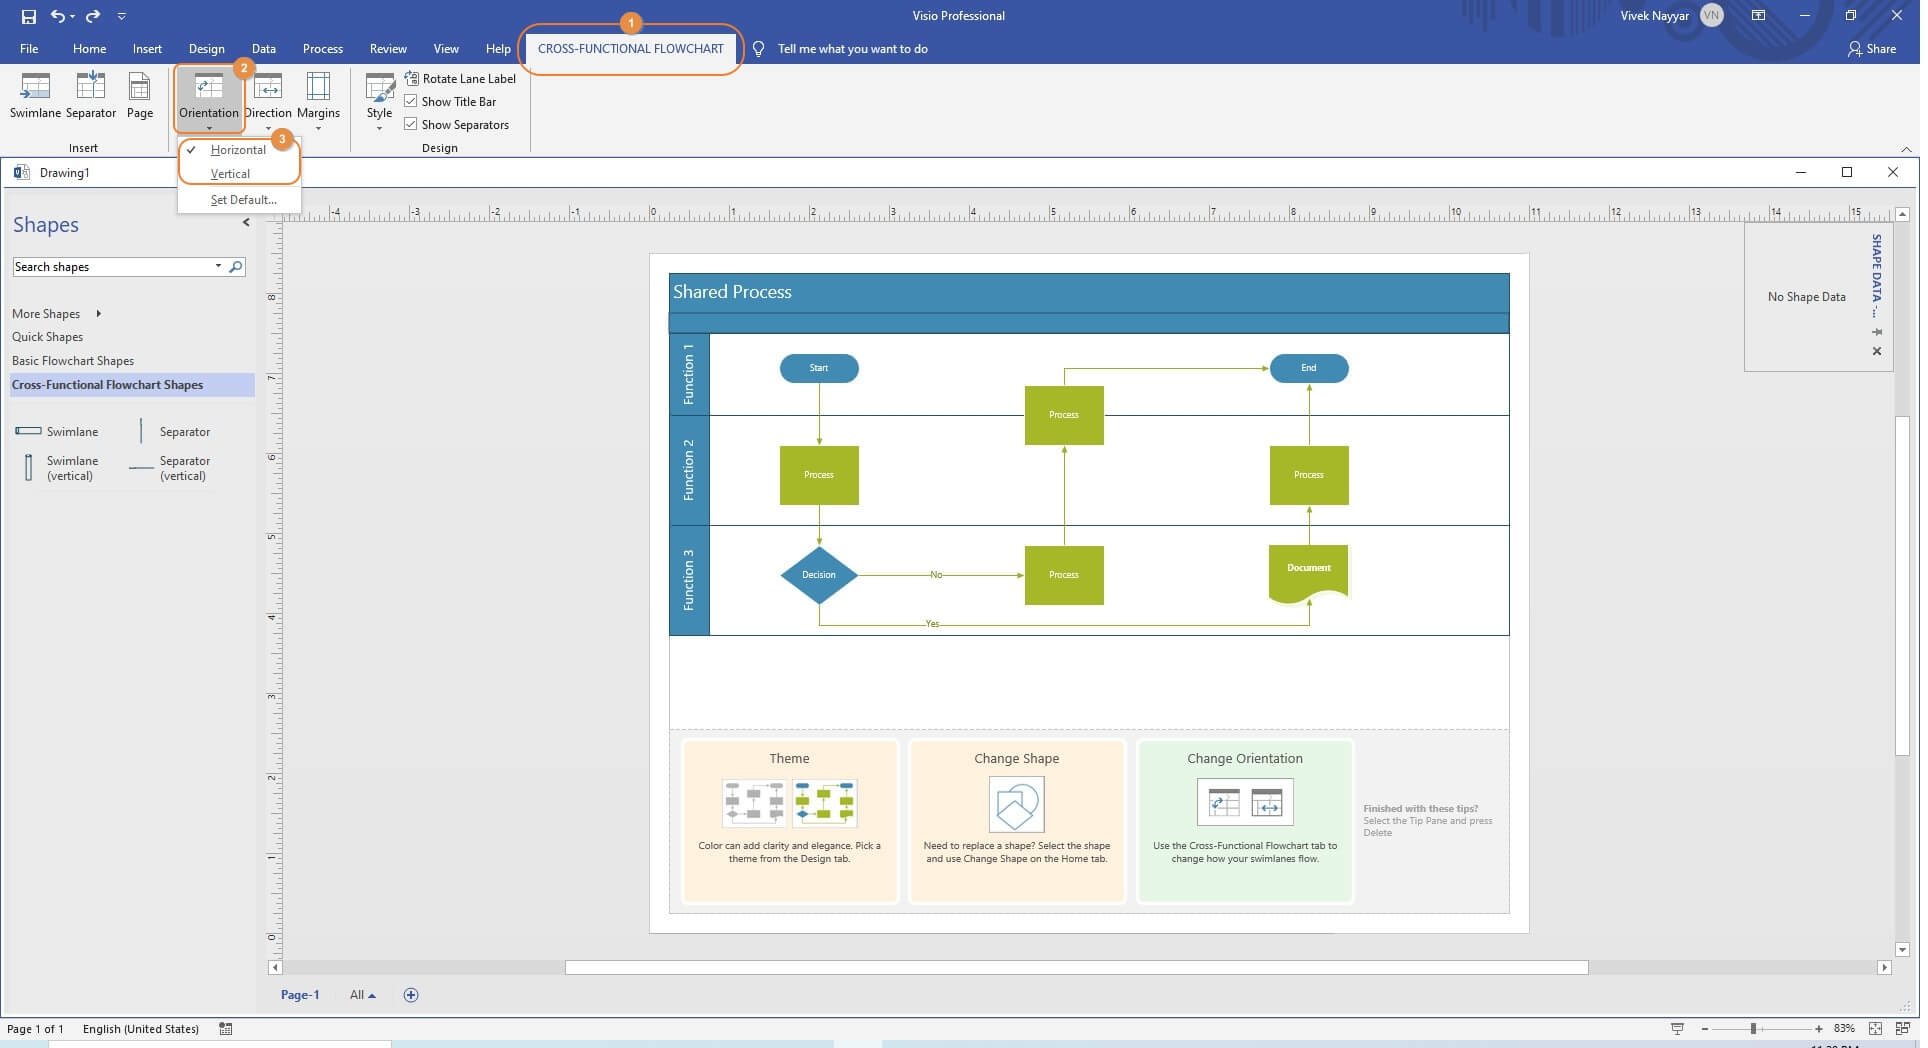
Step 3: Change Orientation of the Diagram
After opening the diagram file, go to CROSS-FUNCTIONAL FLOWCHART from the top, click Orientation from the Arrange category on the ribbon, and choose your preferred layout for the diagram.
How to Create a Swimlane Diagram in EdrawMax
In addition to Microsoft Visio, Swimlane diagrams can also be created in another easy-to-use web app called EdrawMax Online. The tool has several templates for almost all kinds of charts and diagrams that help you start with the creation process almost instantaneously, i.e. without going through those lengthy and tedious initial steps of adding basic shapes and connector lines.
You can learn how to create and change a swim lane diagram in EdrawMax Online by following the instructions given below:
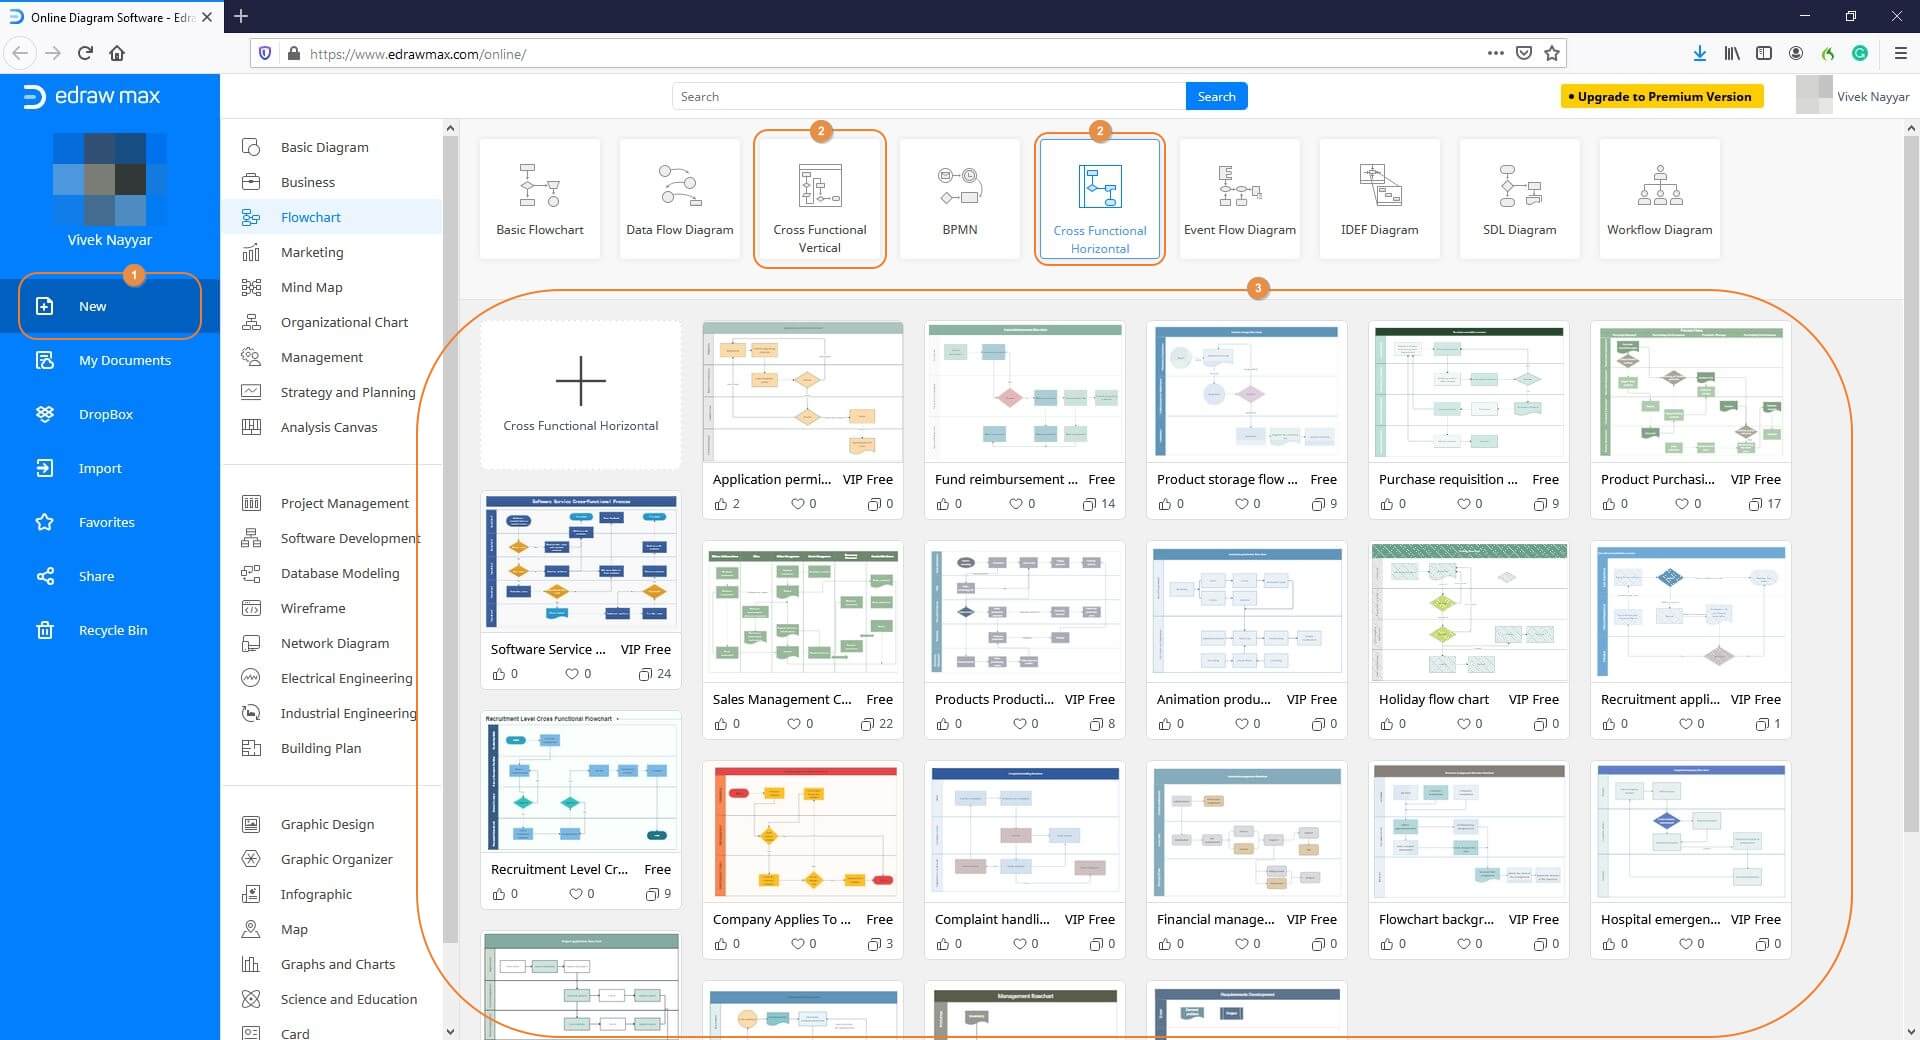
Step 1: Pick a Template
Launch your favorite Internet browser, go to https://www.edrawmax.com/online/, sign in to your account if not already done thus far, make sure that New is selected from the left-most pane, select Flowchart from the list in the center, click the Cross Functional Vertical or Cross Functional Horizontal tile from the upper area of the right window, and choose your preferred Swimlane diagram template from the lower section to create a new document and add the chart to it.
Step 2: Add a Swimlane
Select and right-click a swim lane in the diagram, and click Insert Lane Before or Insert Lane After from the context menu to add a new swim lane before or after the selected one respectively.

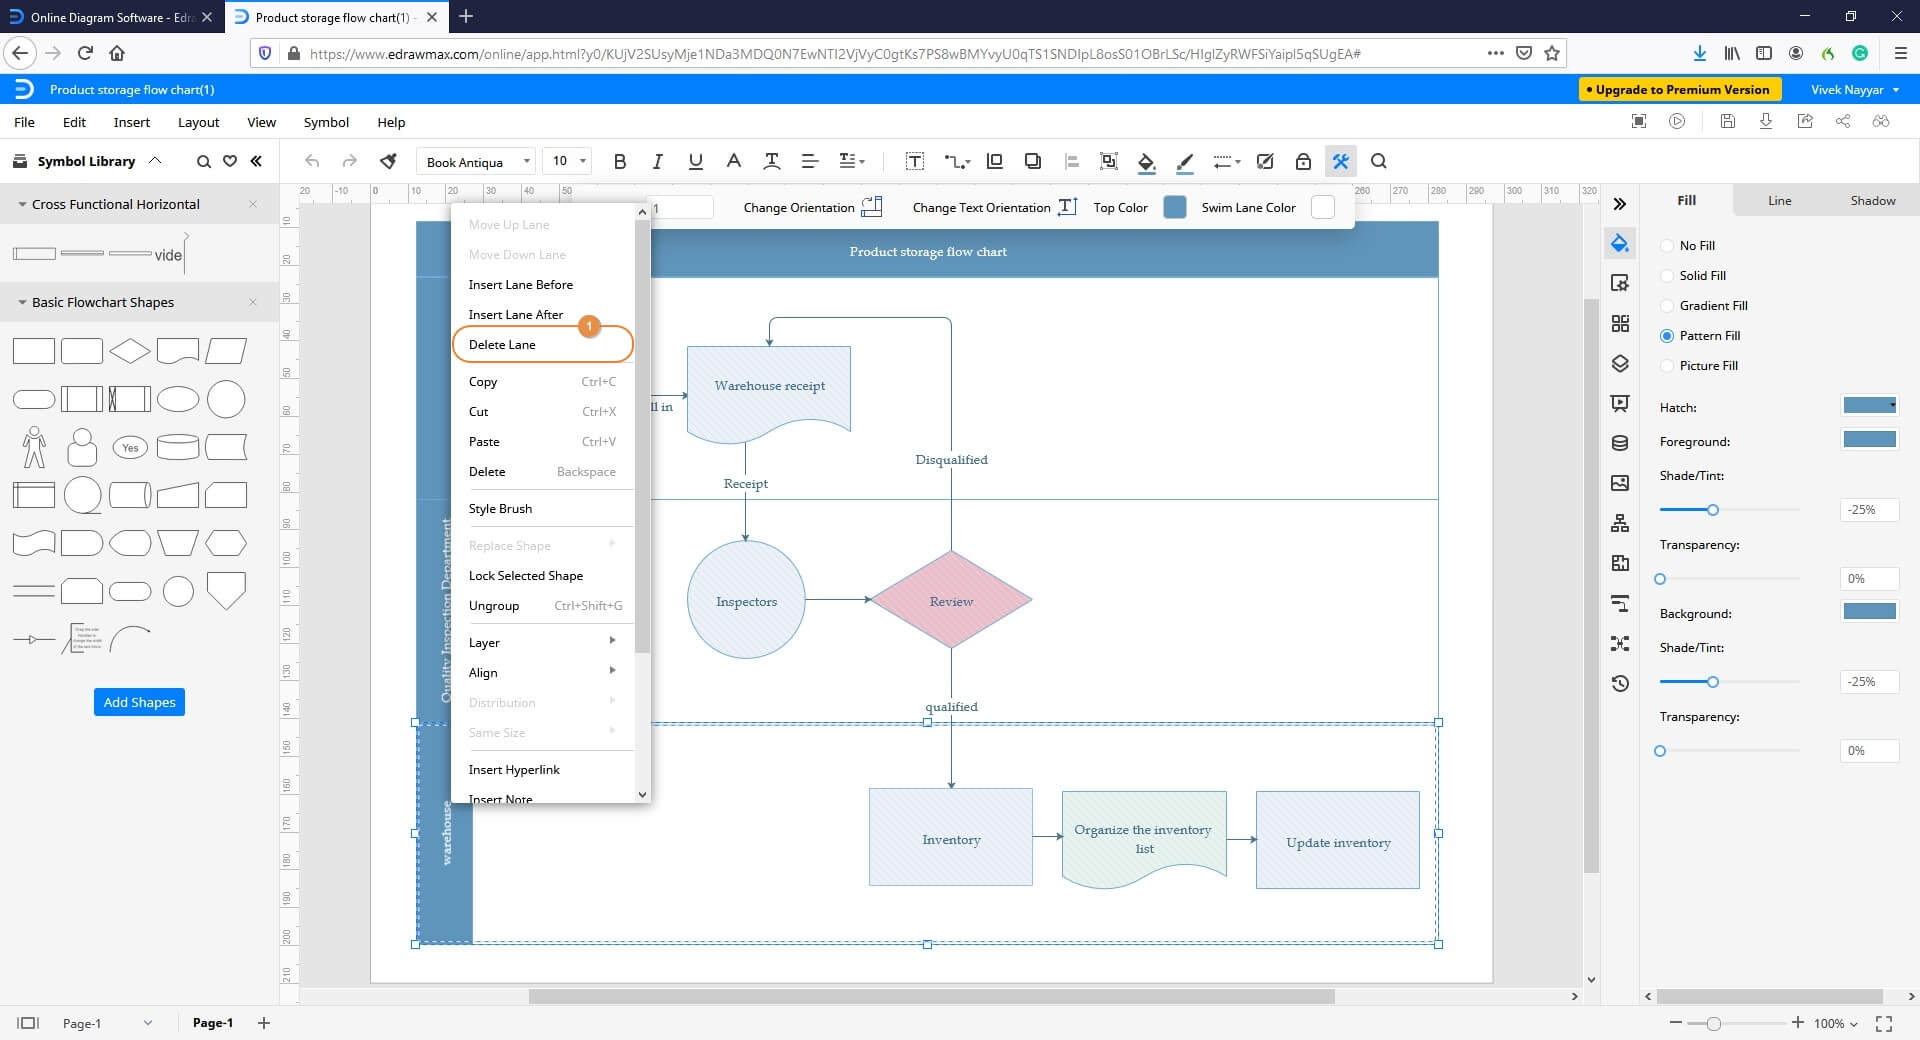
Step 3: Delete a Swimlane
Select and right-click the unwanted swim lane, and click Delete Lane from the context menu.
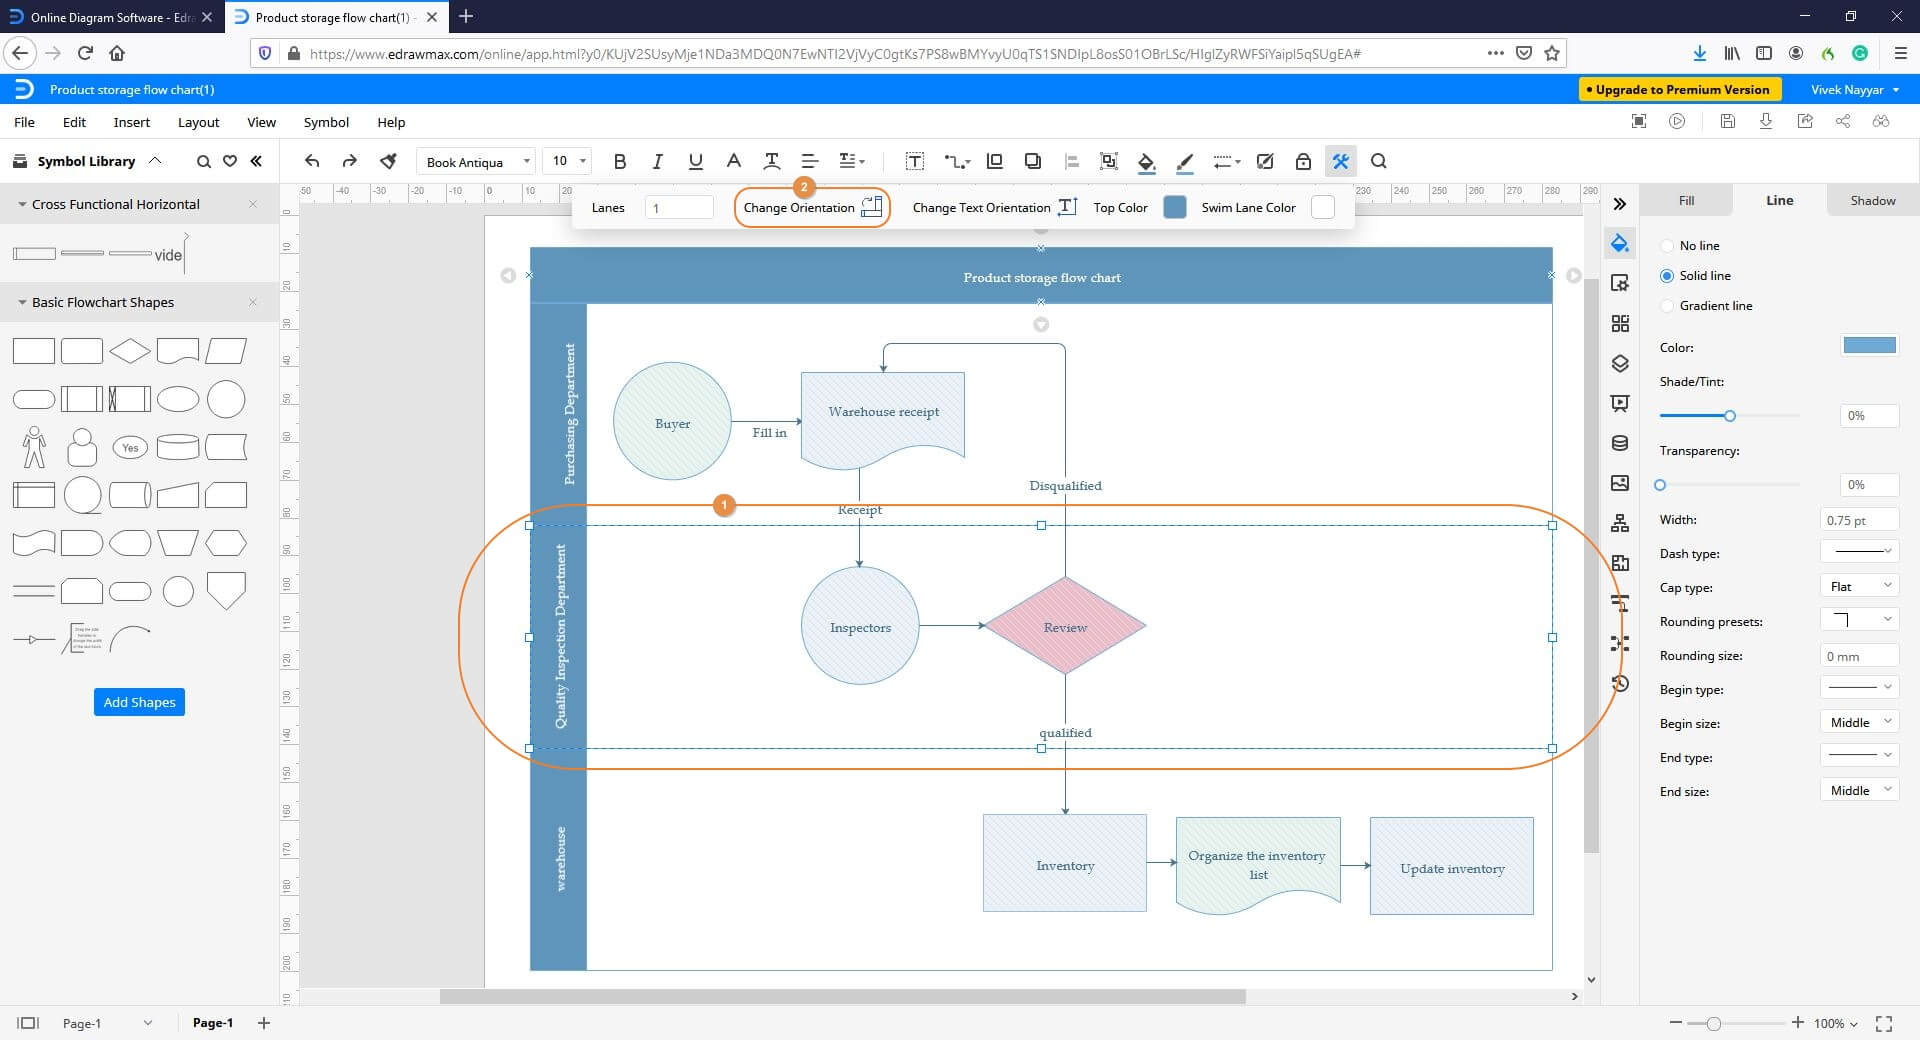
Step 4: Rotate a Swimlane
Select the swim lane that you want to rotate, and click Change Orientation from the floating bar that appears at the upper area of the window. You must repeat this process to rotate all the swim lanes in the diagram individually.
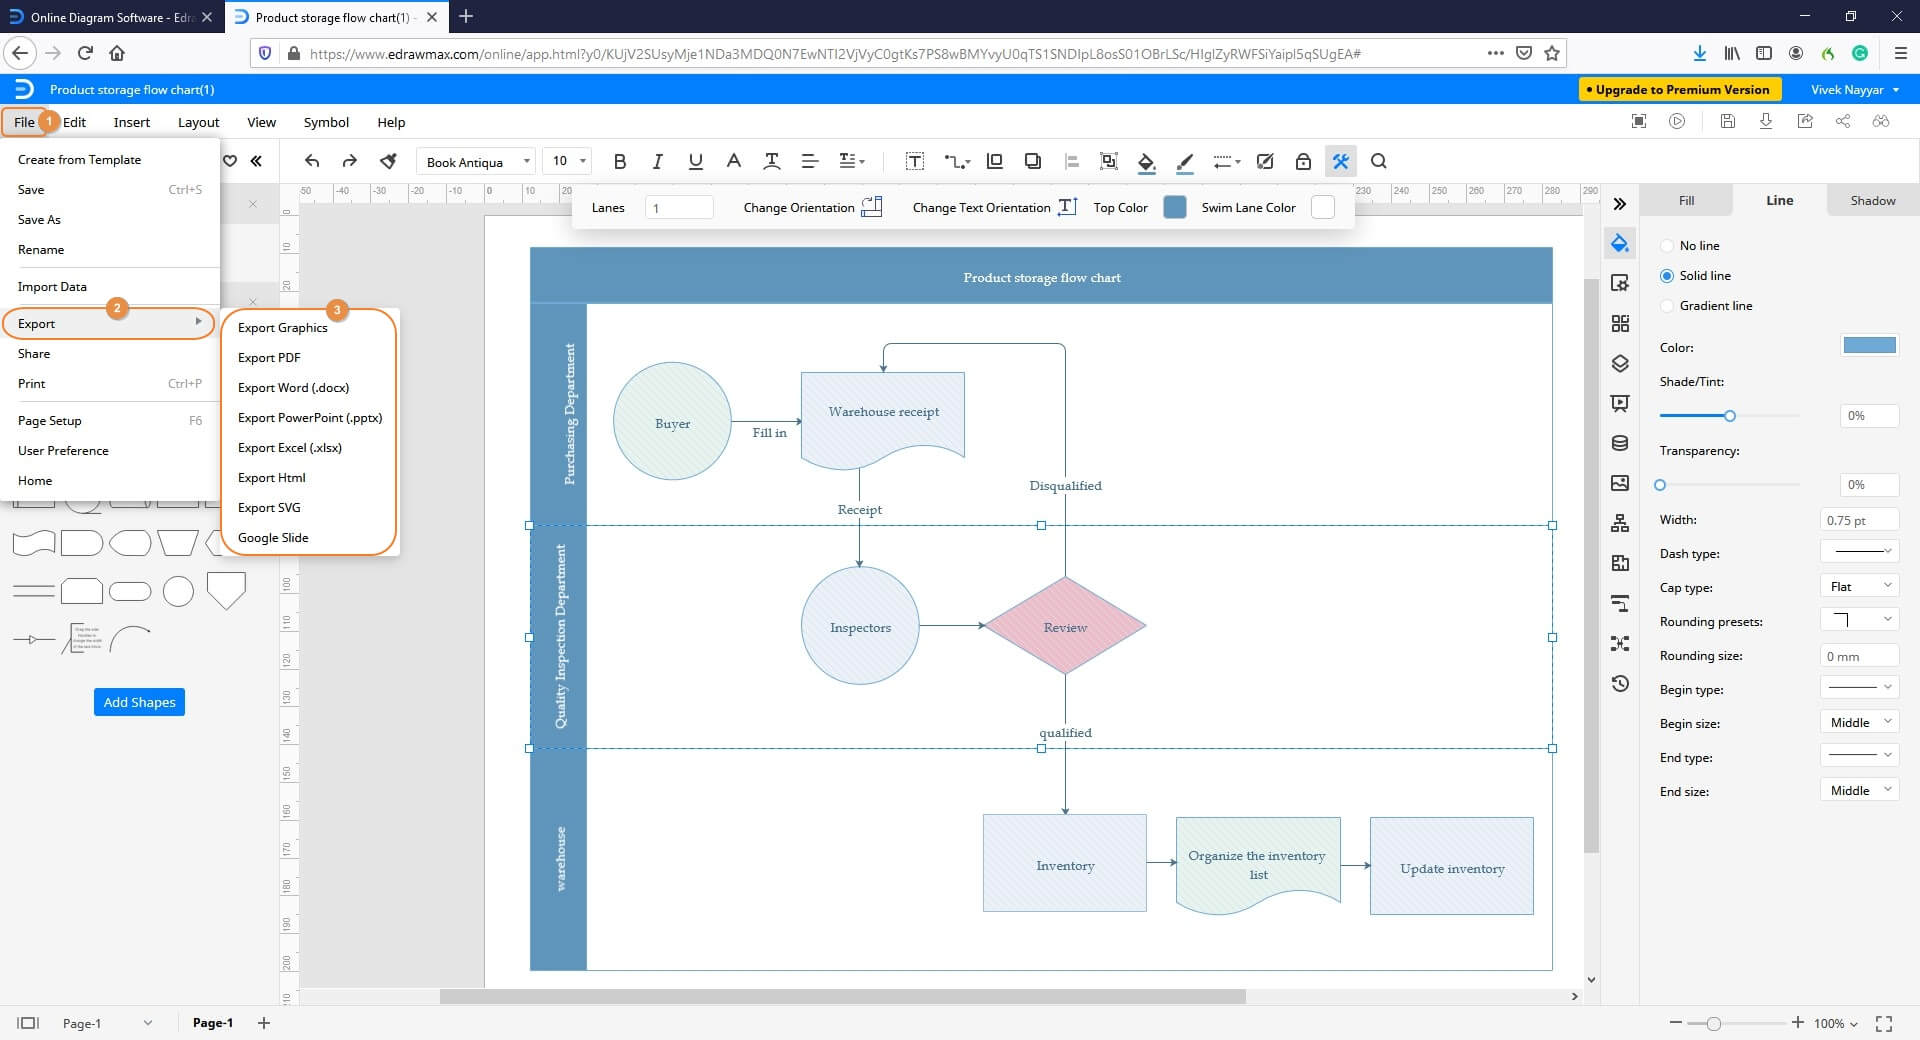
Step 5: Export the Diagram
Click File from the top-right section, go to Export, and choose your preferred option from the submenu to export the Swimlane diagram as required.