How to Make a WBS in MS Project
WBS stands for a work breakdown structure. It is a type of chart which is commonly used in system engineering and project management. WBS diagram is used to systematically breakdown and organizes a team's work into smaller, manageable tasks. In simple words, a WBS chart shows the hierarchical structure of workflow in a given project. There are different tools to create WBS charts, and one of the most useful applications is Microsoft Project. If you want to learn how to create a WBS in MS Project, then you are in the right place.
Today, we will tell you how you can quickly make Microsoft Project WBS from scratch, so let's begin!
How to Make a WBS in MS Project
Step 1 - Launch MS Project and Select Blank Page
Download MS Project software on your desktop. Once the MS Project has opened, click on a blank project worksheet.
Step 2 – Enter Data
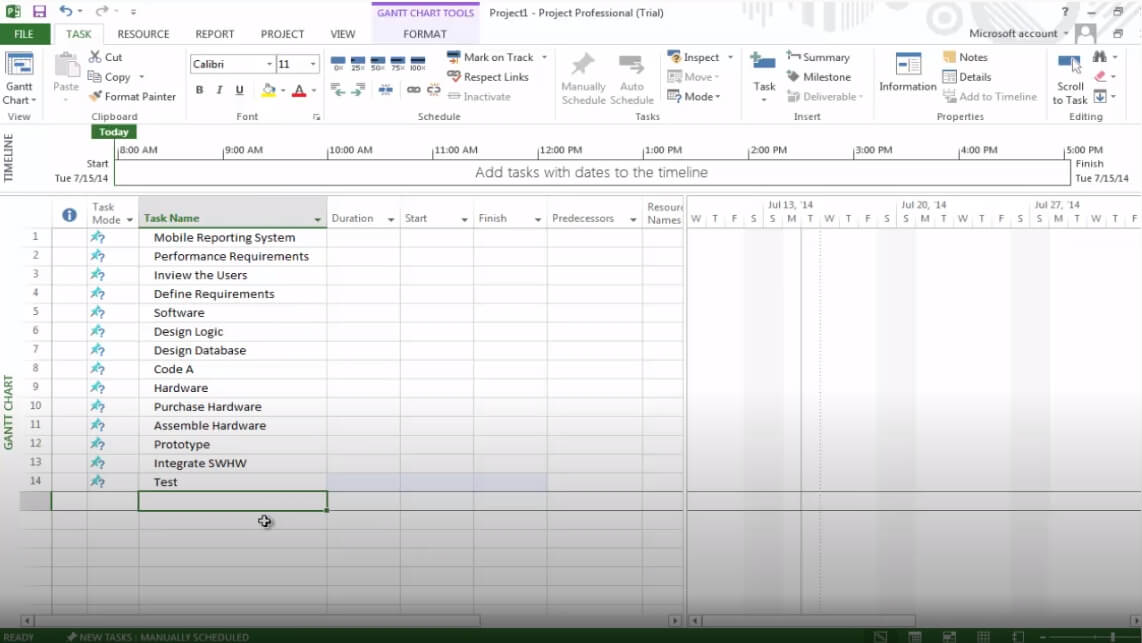
Now, enter the project information on to the blank sheet. For this tutorial, we will be creating a mobile reporting system. Under Task Name, we will enter the project name, i.e., the mobile reporting system. Add other details under duration, start, finish etc. related to your project.
Then we will enter different performance requirements and define the system requirements in order to complete this deliverable.
Once you have finished entering all the deliverables and tasks for the project, it is essential to review your information and make sure you have left nothing out. Under the Task tab, you can use different tools to insert, delete, inactivate, and schedule various tasks.
Step 3 – Add Indentation
Once all the necessary information is on the sheet, create your work grade structure. It is an outline for the project to show the right workflow for your project. Select all the information that you have entered, and under the Task tab in the "Schedule" section, click on the indent button.
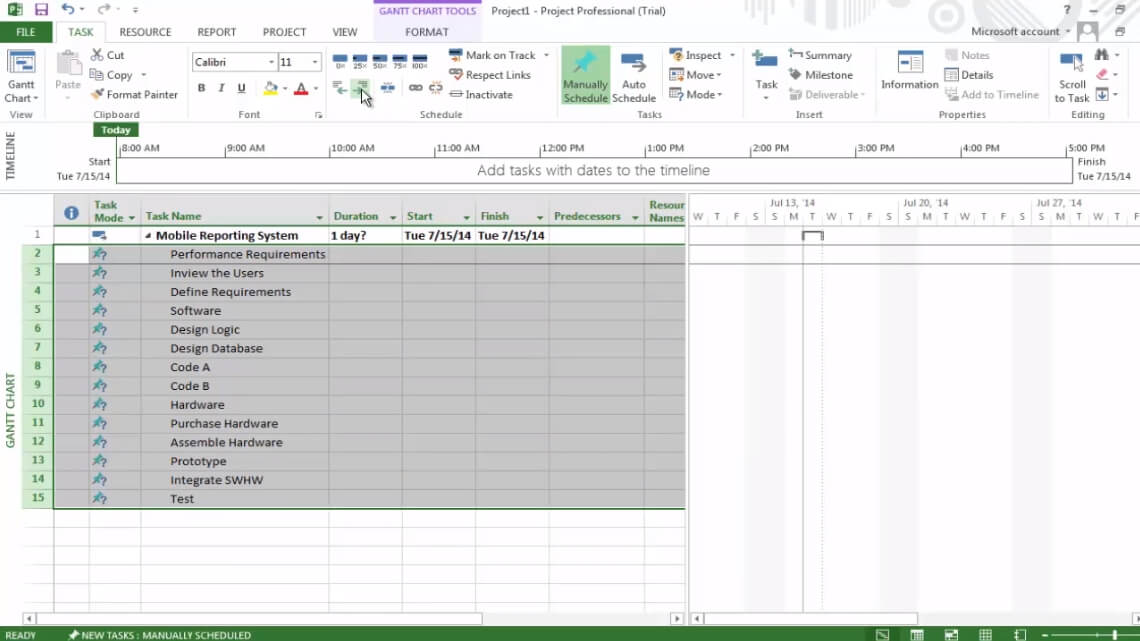
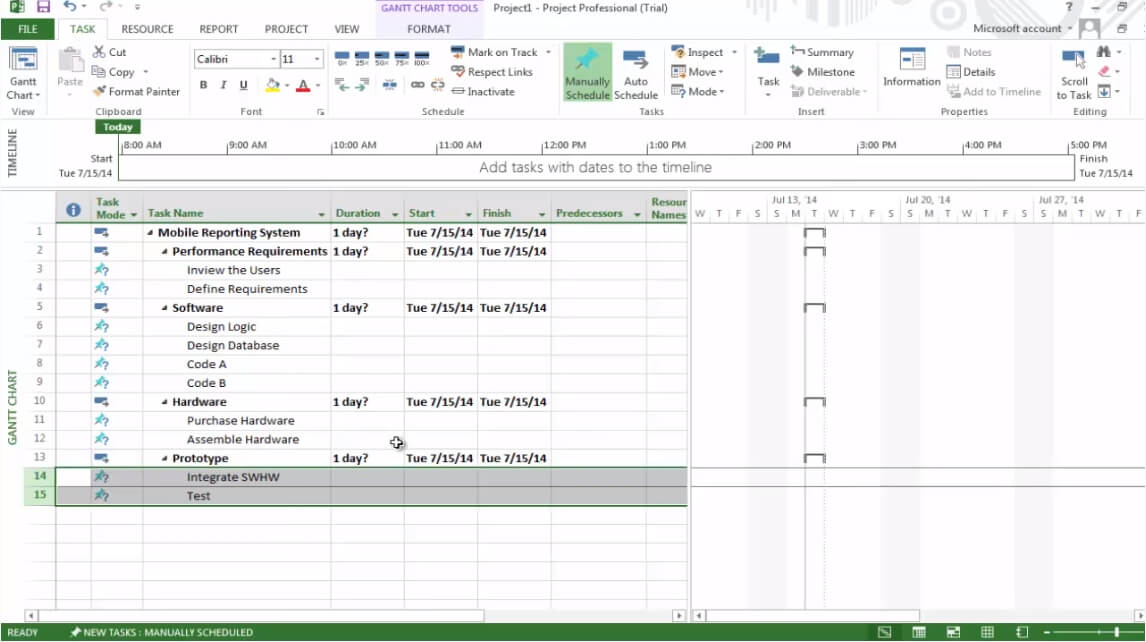
Next, we identify each of the individual major deliverables in the project and indent the associated tasks stated underneath. For this project, the major tasks are performance requirements, software hardware, and prototype.
Step 4 – Save File
Now we have created a basic three-level WBS in Microsoft Project. Click on the File and save your worksheet for future use.
How to Make a WBS in Edraw Max
Edraw Max is an all-purpose diagram tool used by both beginners and professionals to create visual content. It offers multiple tools that help you make flowcharts, workflow diagrams, business starts, floor plans, network diagrams, organizational charts, etc. You can also use Edraw Max Online to create detailed WBS charts from scratch.
- Low Price – Edraw Max offers cheap subscription rates as compared to its competitors.
- Wide Range of Tools – Edraw Max is the all in one diagram software with multiple tools to create all types of charts, graphs, and diagrams.
- Ease of Use – Edraw Max has a simple to use interface, which makes it a very easy and fun tool.
- Accessibility – Edraw Max is easily accessible across different operating systems like Mac OS, Microsoft Windows, and Linux.
- Suitable for Everyone – Edraw Max online is suitable for both industry professionals and beginners.
Now that we know what an amazing tool Edraw Max Online is, let us see how you can use it to create a WBS chart in just a few simple steps.
Step 1 – Open Edraw Max
To open Edraw Max Online, launch your browser and enter the following URL:edrawmax.com/online.
Step 2 – Open Drawing Tab
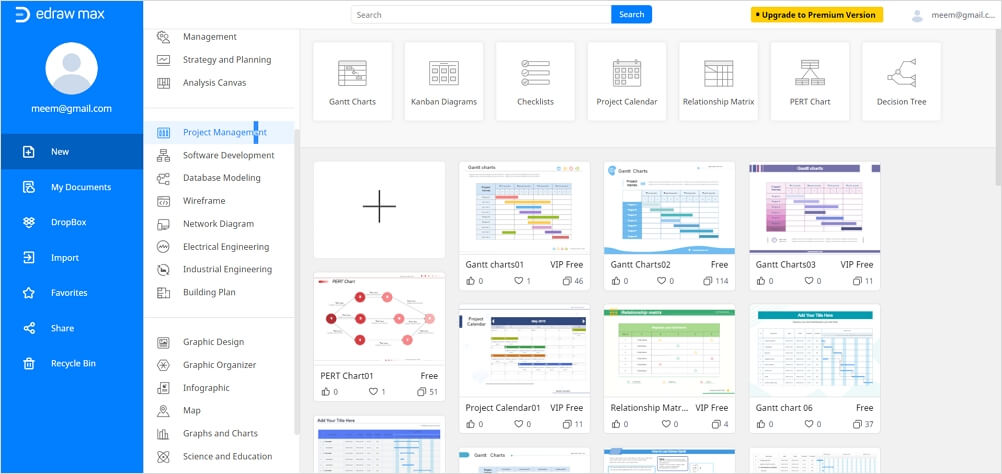
We will have to create one from scratch. Scroll down to project management on the navigation pane on the left side of the screen. Different project management charts will appear on the screen.
Step 3 – Create WBS
Now, just edit and customize the WBS chart according to your requirements.
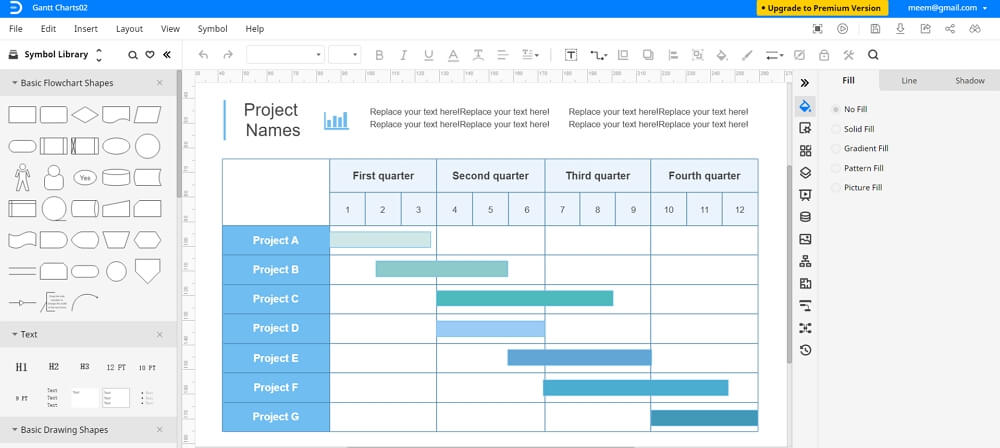
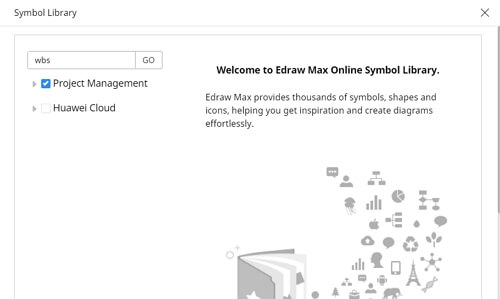
You can also select a blank page to make your own WBS. To start the WBS chart from scratch, start creating your diagram on the blank sheet. To use symbols, drawing, and other visual tools, use the Symbol Library on the left side of the screen. You can search for more by clicking on the icon placed next to the Symbol Library. Now scroll down to Project Management in the pop-up window and click on “OK” to add those symbols in the library.
Step 4 – Edit and Format
Keep editing and formatting your WBS diagram according to your needs. Once you are satisfied with the final results, close the format Tab and Symbol library (on the right and left side of the screen respectively) by clicking on “<<” and “>>” symbols.
How to Save and Export Your WBS
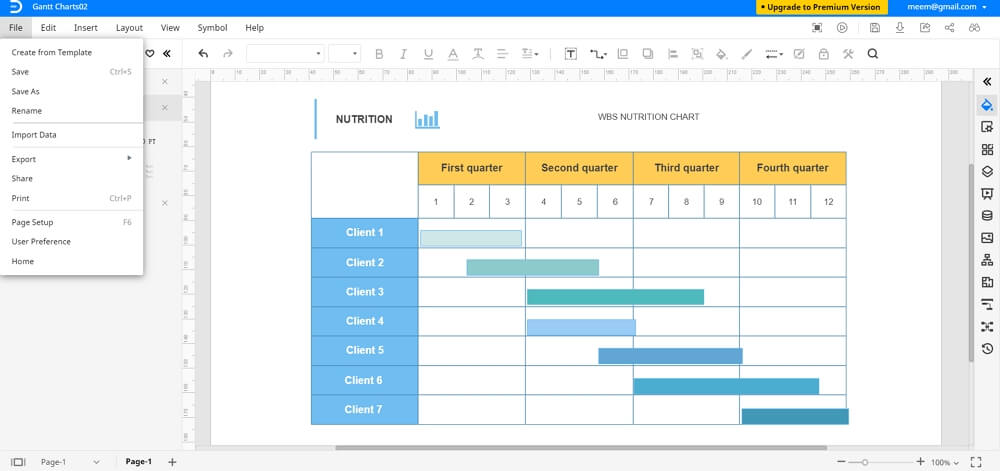
Edraw Max Online lets you export Edraw documents in several commonly-used file types such as Excel, PDF, PowerPoint, Word, or Graphics. To save an Edraw file in another software, click on the File tab and then go to “Export”. Now, select the file type you want to choose.
Edraw Max also allows you to save the file in local storage or cloud storage services like Google Drive and Dropbox. Click on “Save As” under the File Tab to upload files on cloud storage.