How to Make a Venn Diagram in PowerPoint
Want to insert a Venn diagram in your slides? Here, in this article, we will give you a guide on how to make a basic Venn diagram in PowerPoint. The process could be much easier thanks to the SmartArt graphics. However, creating a stunning Venn diagram will be a challenge for it.
How to Make a Venn Diagram in PowerPoint
Step 1: Open SmartArt Graphic Window
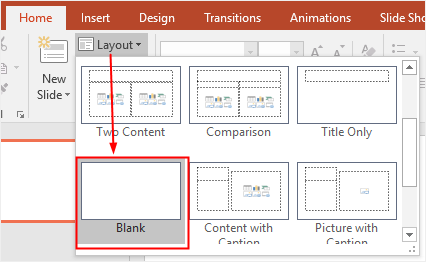
Generally, you can select a blank layout for the slide that you want to insert a Venn diagram, which can help you examine the diagram better. Click Layout on the Home tab, and select Blank.
Go to the Insert tab, click the SmartArt button and then open the SmartArt Graphic window.

Step 2: Insert a Venn Diagram
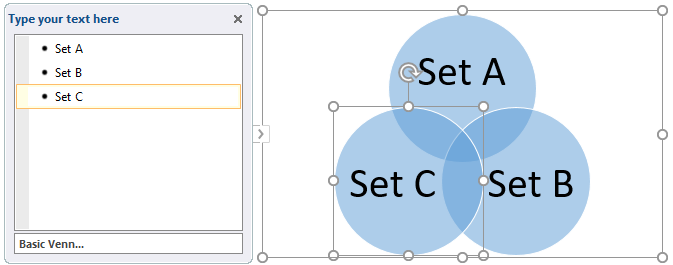
Choose Basic Venn in the Relationship menu and click OK. There a basic Venn diagram shows on the canvas.
Click the arrow icon to open the Text pane or click the text boxes on the circles, then you can paste or type the text or numbers on them and the content will appear on the circles automatically.
To add text or numbers on the overlapping parts of circles, draw text boxes onto those places and type text on them.
Step 3: Add More Circles to Venn Diagram
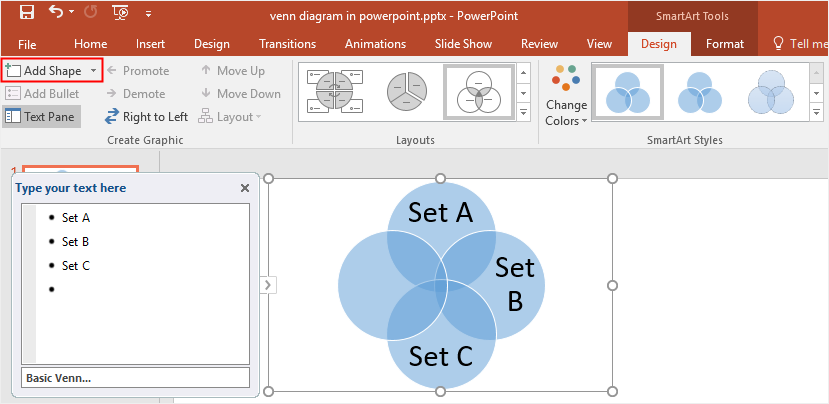
To add more circles to the Venn diagram, click to select the whole diagram, then:
- Go to the Design tab of SmartArt Tools, click Add Shape
- Select Set C or other bullets on the Text pane, click Enter to add a new one and a blank circle will be inserted in the diagram at once.
To delete extra circles, select the circle that you want to delete, and hold down Delete or Backspace key on your keyboard.
Step 4: Style Your Venn Diagram
To change the style or color of the Venn diagram with diversified formatting tools in PowerPoint, you can:
- Go to the SmartArt Tools where you can change layouts, colors and styles of diagrams.
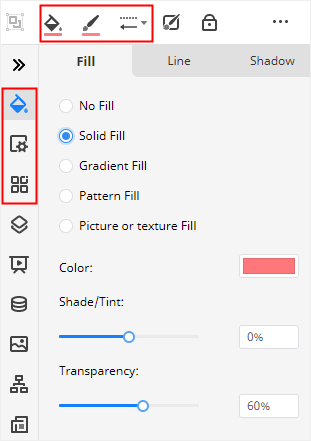
- Right-click on the circle, select Format Shape, and then you can change the fill style, fill color, line style or other options on the right Format Shape
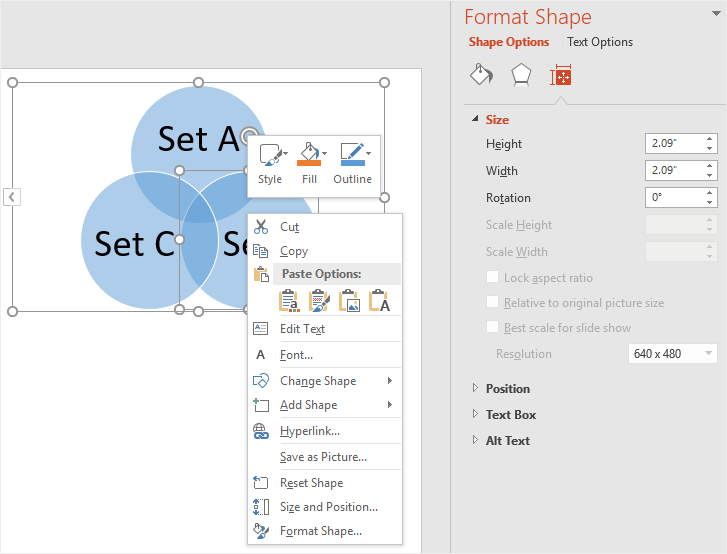
- The contextual menu shows a lot of quick-edit options, like Change Shape, Add Shape, or Reset Shape.
To add circles to the slide manually, you can follow the below instructions:
- Click Shape button under the Insert tab;
- Pick the shape of Oval from the shape gallery;
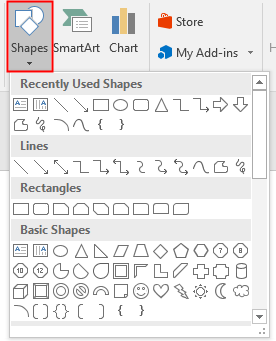
- Draw circles on the slide.
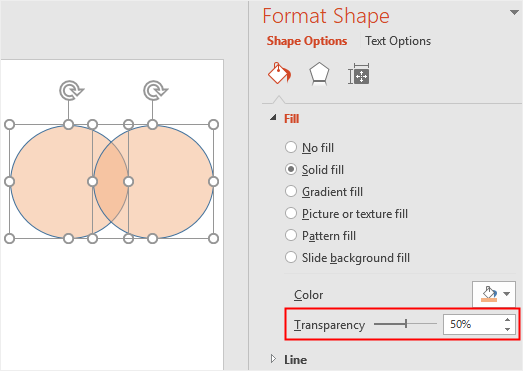
Note that you should increase the fill transparency of each circle in the Format Shape pane so that the overlapping sections of circles will be visible and explicit.
How to Make a Venn Diagram in EdrawMax
Although PowerPoint is very useful in drawing diagrams, EdrawMax can give you much more flexibility to help you create a delicate and professional Venn diagram with little hassle.
Step 1: Find Venn Diagram Templates
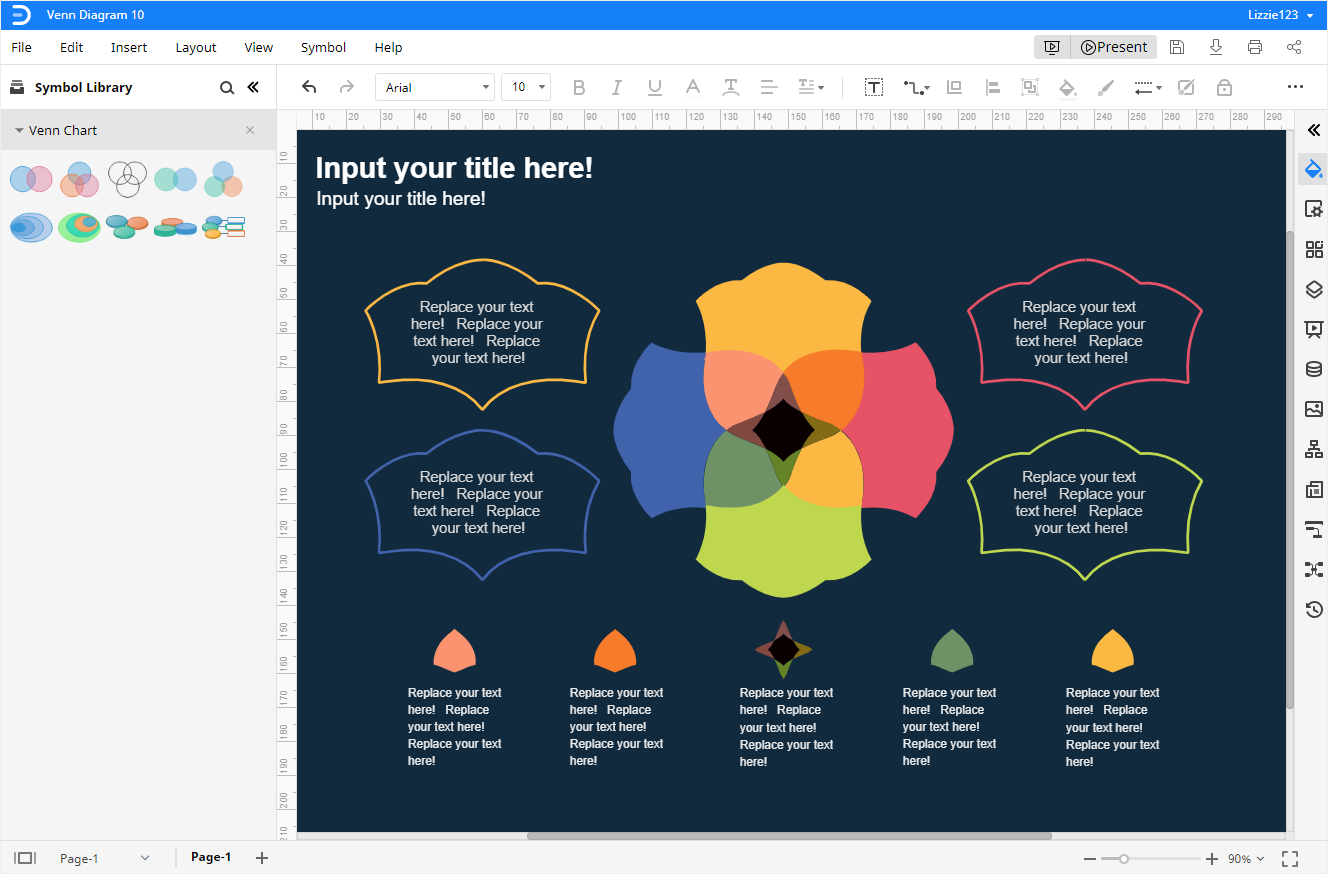
If you want to add a Venn diagram in your presentation, we recommend you to use a pre-made Venn diagram template, because these templates are suitable to display on a presentation. Enter (EdrawMax Online), click Venn Diagram in the Basic Diagram menu, and you’ll see plenty of Venn diagram templates in the template gallery.

Step 2: Open a Venn Template
You can just click on the template icon that you want to use, and it will open on a new webpage. Then you can edit text on the shapes, add new Venn shapes, and replace the shapes or symbols that you don’t like.
Step 3: Add Shapes Manually
If you want to start from scratch, open a blank drawing page, click on the Symbol Library icon ![]() to open Library dialog box, then choose Venn Chart under the Diagram category and click OK. Thus, the shapes and symbols of Venn diagrams will be added to the left Library pane. You can drag and drop any shape and symbol from the Library pane into the canvas in just one click.
to open Library dialog box, then choose Venn Chart under the Diagram category and click OK. Thus, the shapes and symbols of Venn diagrams will be added to the left Library pane. You can drag and drop any shape and symbol from the Library pane into the canvas in just one click.

Step 4: Style Your Venn Diagram
To customize your Venn diagram in EdrawMax, no matter you use a template or add shapes manually, you can:
- Choose desired shape styles and colors on the Fill/Line/Shadow pane and the quick buttons on the toolbar.
- Select different background colors on the Page Setup
- Change theme schemes, theme colors or font styles on the Theme
Step 5: Present Your Venn Diagram
Click the quick Play button on the upper right corner, and EdrawMax will display the current page in the full-screen mode so that you can check how the Venn diagram looks like in the presentation.

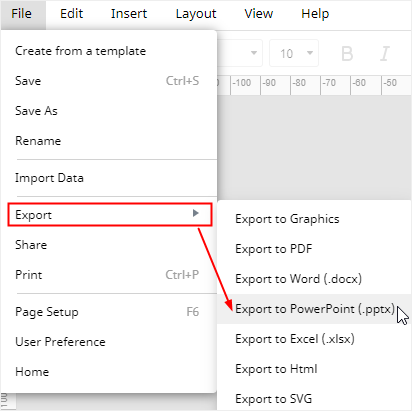
How to Save an Edraw Diagram as a PowerPoint File
If you want to save your Venn diagram made in EdrawMax, click Save As button on the File tab, and select to save the diagram in Edraw personal cloud, Google Drive or Dropbox so that you can access your diagrams in any time and any place.
Moreover, click on Export and you can select to export the Venn diagram as a PowerPoint file. Besides, all MS Office files exported from EdrawMax are editable in those programs, and it will be more convenient and efficient for you to share diagrams with others, especially when he or she hasn’t used EdrawMax before.