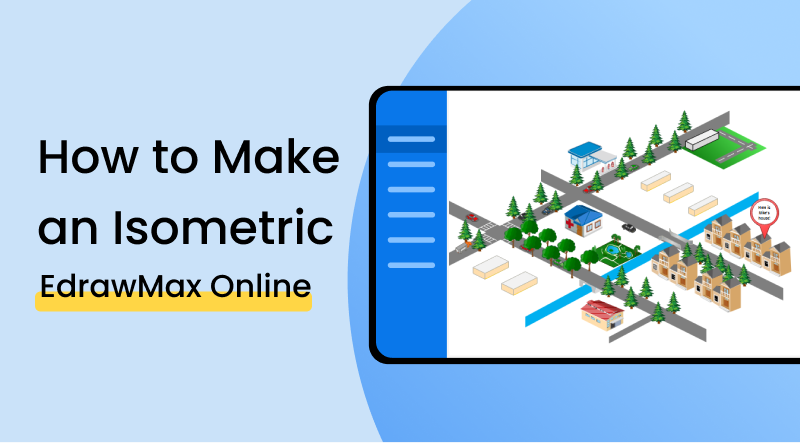
How to Make an Isometric Map
1. Introduction
An isometric drawing is defined as a 3D depiction of a shape, object, symbol, room, or building on a two-dimensional plane. Isometric maps are a collection of such representations, and they are typically used to show the detailed design or layout of a particular building, town, or city. In this guide, we are looking at creating an isometric map using EdrawMax Online.
2. How to Create an Isometric Map
Before we understand 'how' you can draw an isometric diagram, let's take a look at the 'why.' The reason you should opt for an isometric map has been pretty much discussed in the heading above. Using these maps can accurately represent the proportions of the included components and show how everything fits in the whole system. Especially when it comes to drawing city plans and landscapes, it becomes necessary to depict everything properly since the drawing stands as a reference for future implementation.
1. Understand the three rules of isometric drawing
There are three rules that you have to follow when coming up with an isometric drawing. These points are the distinction of isometric diagramming, and if any of them is ignored or left out, the whole thing may not identify as 'isometric' anymore. Here are the rules: a) Vertical edges are always drawn as vertical lines, b) Parallel edges are shown as parallel lines c) Horizontal lines are always drawn at a 30-degree angle. Due to these properties, it is also seen that isometric drawings are undistorted and very pristinely shaped.
2. Enlist the elements and components of your layout
Before creating the actual drawing, you should list all the included elements and components that you have to represent in the map. This will be helpful as a reference when the map is being made, and it will also be beneficial when you want to tally everything at the end.
3. Choose an application and start drawing
Once you have done the groundwork, it is now time for you to start working on the diagram itself. In this post, we will be looking at how you can do that using EdrawMax. Read on for a step-by-step guide.
If the video doesn't play, please visit it at YouTube.
3. How to Create an Isometric Map with Edrawmax Online
The first thing you have to do to use EdrawMax Online creates an account. All you have to do is head over to the website and search for the 'Sign Up' button. After entering your details, you will be directed to the homepage. When you sign up, you are automatically registered as a free user. The free plan allows you to enjoy the basic amenities.
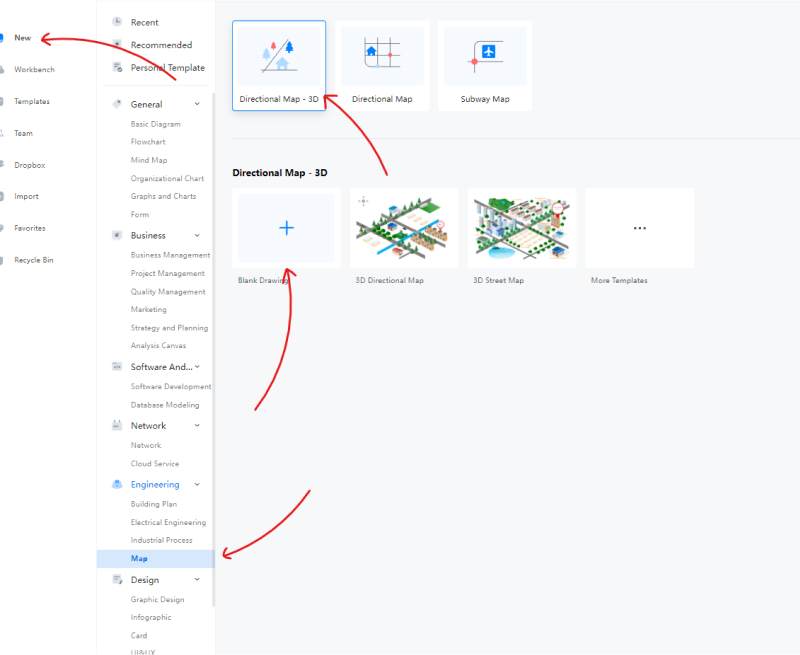
Once you are at the homepage, you will find the 'New' option on the menu on the left side of the screen. Click on it, and a window will open up. Scroll down to the 'Engineering category and select 'Map.' Another window will open up where you will find three options at the top viz. 'Directional Map 3D', 'Directional Map' and 'Subway Map.' Select the 'Directional Map 3D' option and click on the 'Blank Drawing' to open the canvas. Here, check this screenshot:
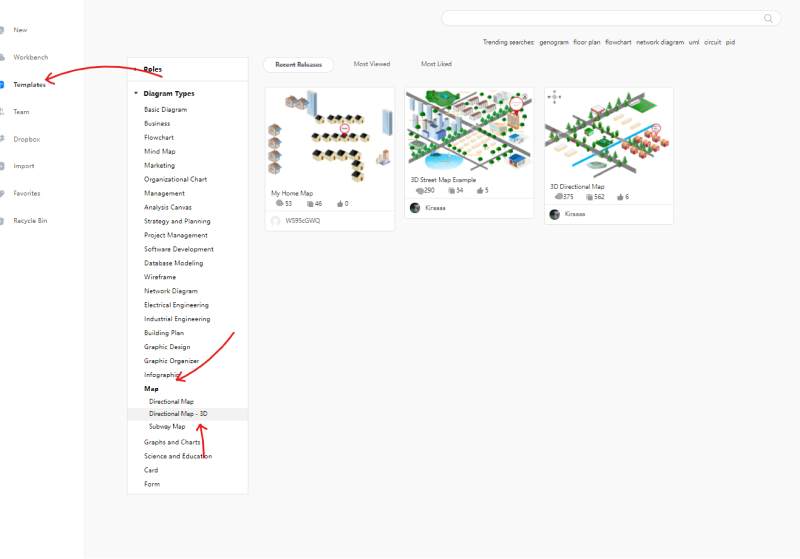
Alternatively, if you want to use a template to save time on the basic layout, you can head over to the 'Templates' option and take a look at the template gallery. The option is available on the homepage. Currently, there are just a few templates available at the time of writing, but still, they can help save time. Once you have selected your desired template, you can edit the details and shapes according to your aspired model.
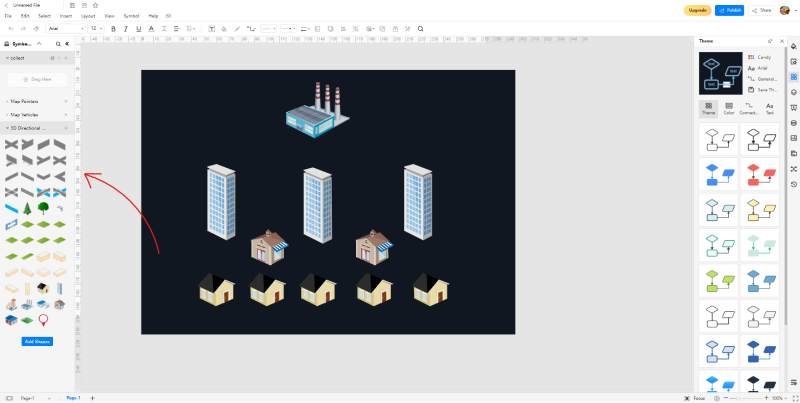
To add the shapes to the canvas, all you have to do is click the symbol in the icon library (this is found on the left of the screen) and drag it over to your desired position. Once you have placed the object, you can move it around all you want afterward.
This is another great perk that you can use to give your work a touch of your own. While this is mainly helpful in visuals such as concept and network diagrams, it can also be artistically implemented in isometric maps. With themes, you can change the style of all the included boxes and lines to a certain hue and color. You can mess around with this feature and make your work pleasant and attractive.
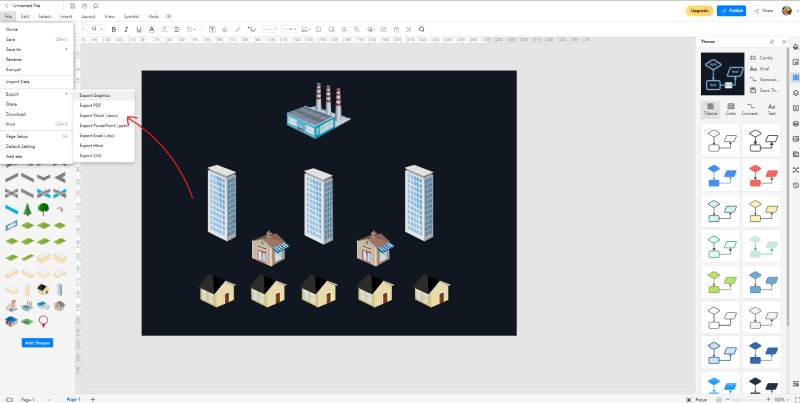
Once your work is finished, head to 'File' option on the top left and export your diagram to a format of your choice. There are many file types that you can choose from such as .docx, .pptx, .xlxx, PDF, HTML, SVG, and Graphics.
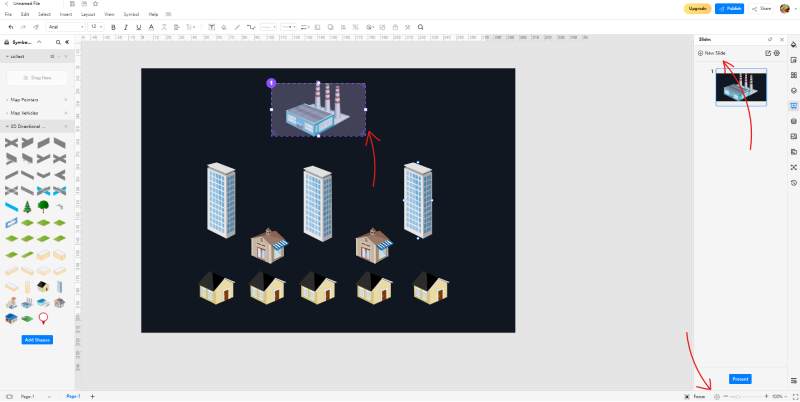
When it comes to presenting, there are two options that you can use with EdrawMax. You can choose the 'Slideshow' feature from the bottom right and start a full-screen display of your drawing. If you have multiple pages, you can show them one by one. Alternatively, you can make an MS PowerPoint-ish presentation using the 'Slide' option found on the bar on the right side of the screen. The slick feature of this function is that you can choose what portions of your drawing to include in your slides. If you want to show just a particular part of the plan, you can bring the purple box over it, and it will be added to the slide.
4. Expert Tips for Making Isometric Drawing
Always follow the three rules of isometric diagramming
Everyone starts as a beginner. If you are not skilled in creating an isometric map, don't hesitate to use a template. You can move the shapes around and change the stuff within it however you like. Apart from making things easy for you, you will also learn and educate yourself on how a professional-looking map has to look like.
Be consistent
Whenever you are making an isometric representation, don't mess around with the symbols and shapes. That means if you used a particular model to depict a house or a factory, don't use another one to show the same thing. It could confuse your reader and make your work look like a rookie job.
5. Key Takeaways
With EdrawMax Online, you access various useful features and tools that make diagramming straightforward. It is easy and intuitive, and with this guide, you'll be able to know how to make an isometric map in no time.The easy-to-use interface and the available templates make the whole job a piece of cake. A person with no experience can come up with professional-looking maps instantly. In the template community, you can find pre-made maps examples that can give you an idea of what your work should look like.