How to Make a Poster On Word
1. How to Make a Poster On Word
A poster consists of attractive graphics and textual content, and they are used for promotional activities or declarations. The poster aims to snatch the attention of the general audience. Anyone can make a well-designed and informative poster on Word.
It is effortless to create a nicely designed poster on Word, and you can follow the below step to create one on your own:
Step 1: Open MS Word.
To make a poster in Word, you need to open MS Word on your computer. Then you can either create a blank document or select an already existing document to start drawing your poster.
Step 2: Select the SmartArt Graphics
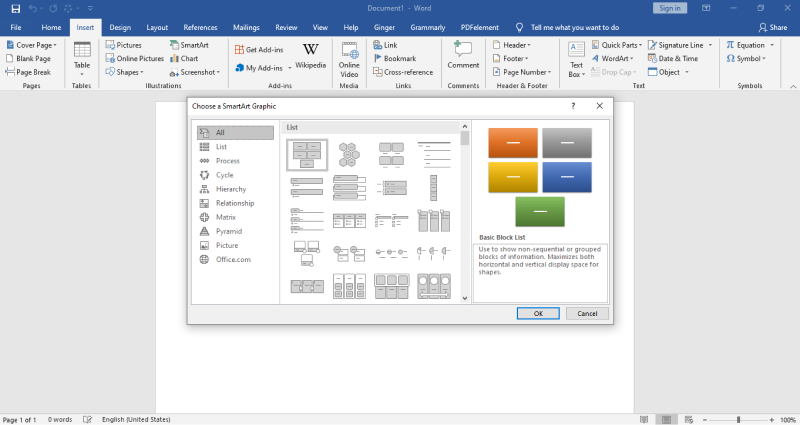
The next step of making a poster on Word is to add graphics, and for that, you need to click on the Insert tab. You can select suitable SmartArt Graphics of your choice from the Illustration section. Next, you can click on SmartArt Graphics to open the "Choose a SmartArt Graphics" dialogue box. There are various clips, arts, and other graphic options with multiple categories. You may like to check them before selecting your graphics.
Step 3: Customize The Design
Once you have selected the SmartArt Graphic of your choice for the poster, it will open in the editor. Now, you can write texts in the given text pane and add the required details. You can pick colors, styles, and fonts from the font section of the editor and make your adjustments.

Step 4: Add Pictures to Poster
If you want to add pictures instead of graphic arts, you can go to Insert Tab and click on 'Picture.' A dialogue box will open, allowing you to choose a picture from the location you have saved it. After selecting, click on the insert button present at the bottom of the dialogue box. Finally, you have to Save your poster for future use.
Posters are essential as promotional tools, and they can also serve as declarations. There are multiple styles of graphic arts present in MS Word that you can use. You can add texts and images to it as well. However, the process of creating the poster in Word can be lengthy. You must use the EdrawMax online tool. It can help you create a nice one of your choice.

1.1 Advantages of Making Poster on Word
Posters are a great tool to convey a company's message or share the details of an upcoming event. Several tools let you create posters, like Microsoft Word. There are some advantages of making a poster on Word, like:
- Microsoft Word has an import feature that lets you import your high-definition images to create the poster.
- Word lets you add different fonts while creating a poster.
- Files exported from Word are easily accessible on different machines.
1.2 Disadvantages of Making Poster on Word
Even though there are several advantages of using Word to make a poster for your company or personal needs, some major disadvantages put this tool in the back seat. Some of the disadvantages of making a poster on Word are:
- Word is a word-processing tool. This software is not designed to create posters or other graphics.
- When it comes to free available templates, you will not find too many options with Word.
- Robustness is one of the major disadvantages of using Word to make a poster. If you are not using the same version of Word, then you might lose the formatting or even the fonts.
1.3 Tips for Making Poster on Word
Poster making is one of the key responsibilities of any graphic designer. You should keep note of a couple of things before you start making posters on Word.
- Learn the MS Word commands before you start making the poster.
- Try to use the in-built fonts and background when creating a poster in Word. This way, you will not lose the formatting or the fonts if the design is accessed differently.
- Try to work on the minimalistic designs to ensure that the resultant poster is not cluttered.
2. How to Make a Poster Online Easier
There is a tool EdrawMax Online that shorten your time to create a poster online. Also, it contains substantial poster chart templates in product and template community that you can use immediately and create chart without efforts.


On EdrawMax Online, you can find thousands of readily available templates and design components to create all kinds of diagrams. The best part is that EdrawMax Online can also be accessed online, letting you work seamlessly on any platform. With simple drag and drop options, you can also create visually appealing poster via EdrawMax Online in the following way:
Step 1: Sign In EdrawMax Online
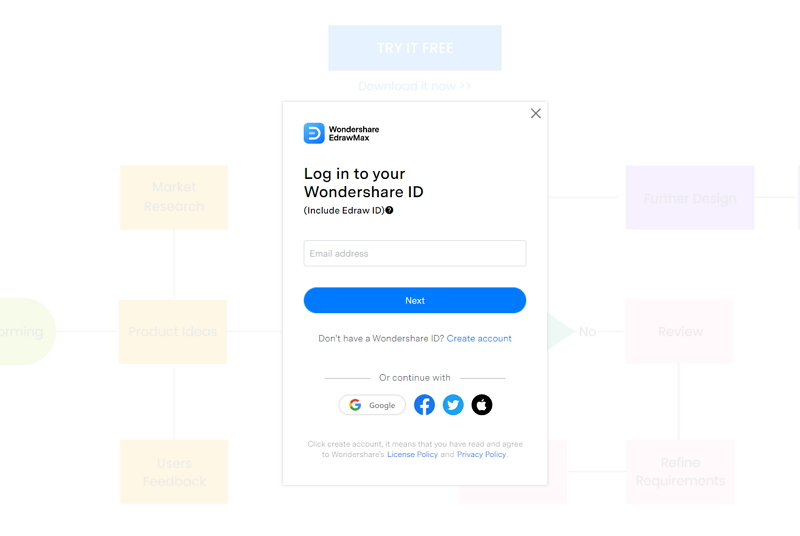
First of all, you need to log in to your EdrawMax Online account. If you haven't used EdrawMax Online before, you can sign up for a free account with your email address. Then you can use EdrawMax Online for free.
Step 2: Select the Poster Tab
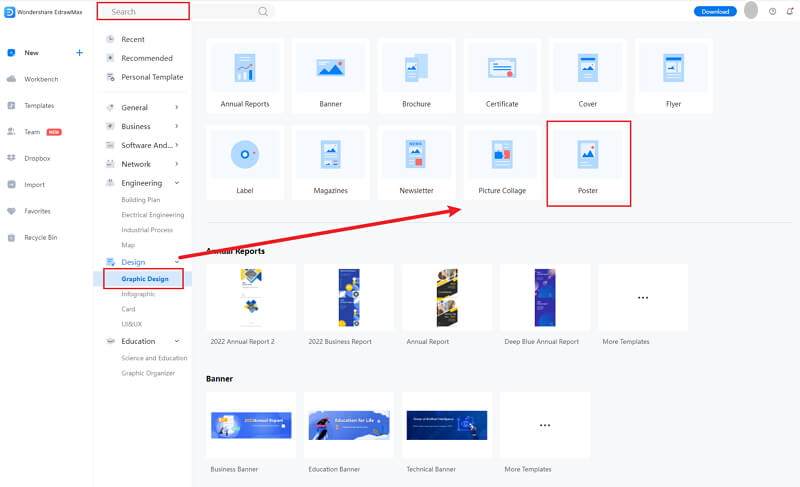
Click on the Design tab, you'll see the menu will open in the upper side window. There are many options in the Recommended menu, as you can see in the below image. Click the Poster sign to open the editor window.
Step 3: Select the Poster Symbols
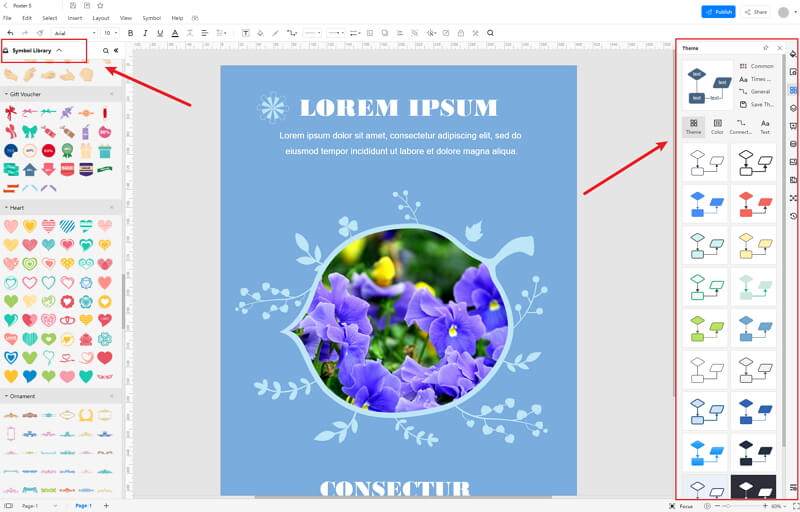
After you select a template, it will redirect to a new window of EdrawMax editor. You can customize the template and replace the text and images of your choice. When you click the large + sign, the editor window will open. You need to find poster symbols from the Symbol Library.
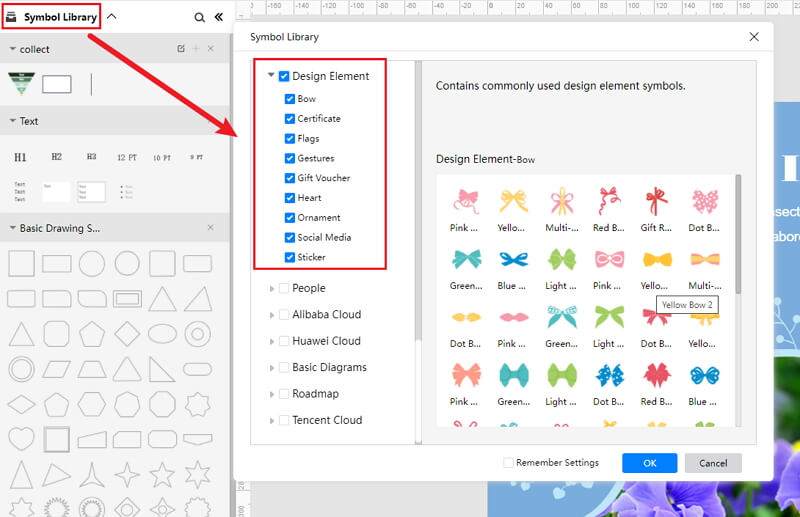
Click the Symbol Library option on the top left side of the editor window. Next, a dialogue box will open. From the dialogue box, a pop-up menu for poster symbol categories will appear. Then, mark the poster tab from the dropdown menu. Then, click the OK button to import the poster symbols in the editor window.
Or you can search the poster from the Symbol Library. Then, select this option, it will appear on the left side toolbar.
Step 4: Add More Details to Complete Poster
Once the symbols are imported to the editor window, you can drag and drop the poster or design symbols in the editor to create your poster chart using them. To edit the symbol, click in the boxes and enter your content. Likewise, you can make the boxes more attractive by using the Fill, Line, and Shadow options.
There are many editing options available in EdrawMax Online to make sure your poster chart is customized according to your needs. You can change the transparency, change, type of fill, as well as add and remove layers, insert photos, and more.
Moreover, you can also change the properties of the line and shadow to make it according to your preference. With EdrawMax Online, the editing tools available are endless to ensure that the file you want is what you had in mind!
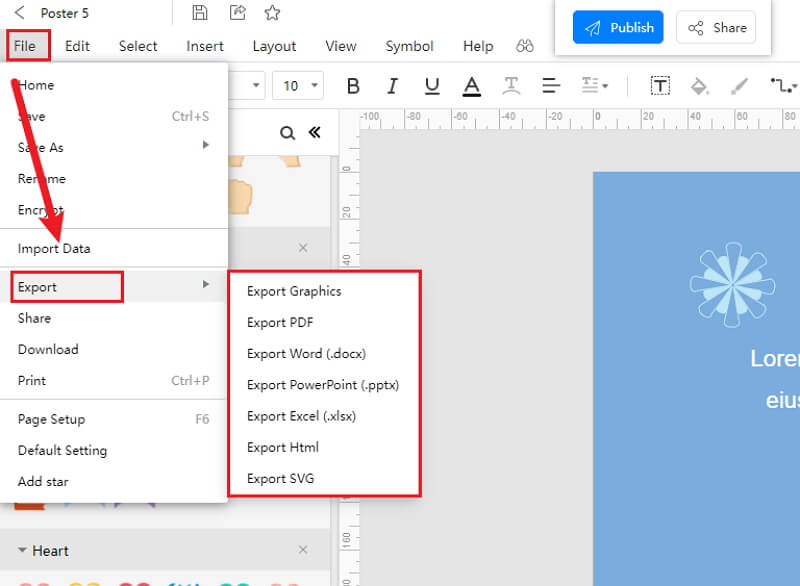
Step 5: Export Your Poster
Click on File in the top left corner, from the drop-down menu select Export. From the Export menu, select Export to Word (.docx), and your Edraw poster chart will be saved as a Word file to your computer. You can also export your files to cloud services like Dropbox on EdrawMax Online.
If you are still wondering how to make a poster in EdrawMax Online, just check this poster guide, and accrod to the steps to create yours with ease.
2.1 The Advantages of Making Poster in EdrawMax Online
Compared with Word, there are many advantages that making a poster in EdrawMax Online:
- EdrawMax Online supports to make a poster online, and will be automatically saved, which means you could make charts in any where at any time.
- EdrawMax Online has a powerful Template Community, that you can find inspirations from thousands of templates made by Edraw users.
- EdrawMax Online supports to export and import multiple file formats, which ensures that you can make continue your work from other platform to EdrawMax Online, or you can export your poster from EdrawMax Online, and attached to other files.
- Or even you can showoff your poster with others by using Presentation Mode.
2.2 The Disadvantages of Making Poster in EdrawMax Online
Even though there are some advantages of using EdrawMax Online as the tool to create your poster, certain limitations affect the overall quality of the project. For instance:
- EdrawMax Online contains limited poster related symbols. However, it is good for you to make your own poster symbols, you can create symbols from EdrawMax, or you can import the symbols you like and save into your symbol libraries.
2.3 Tips for Making Poster in EdrawMax Online
Creating poster in EdrawMax Online could be easier thing than making in Word, since there are resources and powerful export function.
- Choose a built-in template from Template Community to start quickly.
- Use powerful toolbars on the right and left sides of canvas to make your poster more stunning.
- Export your poster in mulitple formats to meet your needs, or share to your social media, email, and print it out.
3. Word Poster Templates
The followings are the posters in Word templates, you can refer to them, or even use them immediately with ease. Or you can find more poster templates and examples for reference.
Poster Template Word
It's a poster for sky photography. It's a simple template for showcasing the user's photographic work and talents. A heading and three images are included in the template. The user has the ability to make minor adjustments. It's incredibly simple to use. Photographers and regular users can use the basic poster to present their work in an appealing manner.
As you can see in the poster design here, the primary components are images and texts. So, while customizing the poster design, you can also change the images or update the text according to your personal or professional needs. You can either take inspiration from the poster below or get access to hundreds of free poster templates to create something for your own.

Source:EdrawMax Online
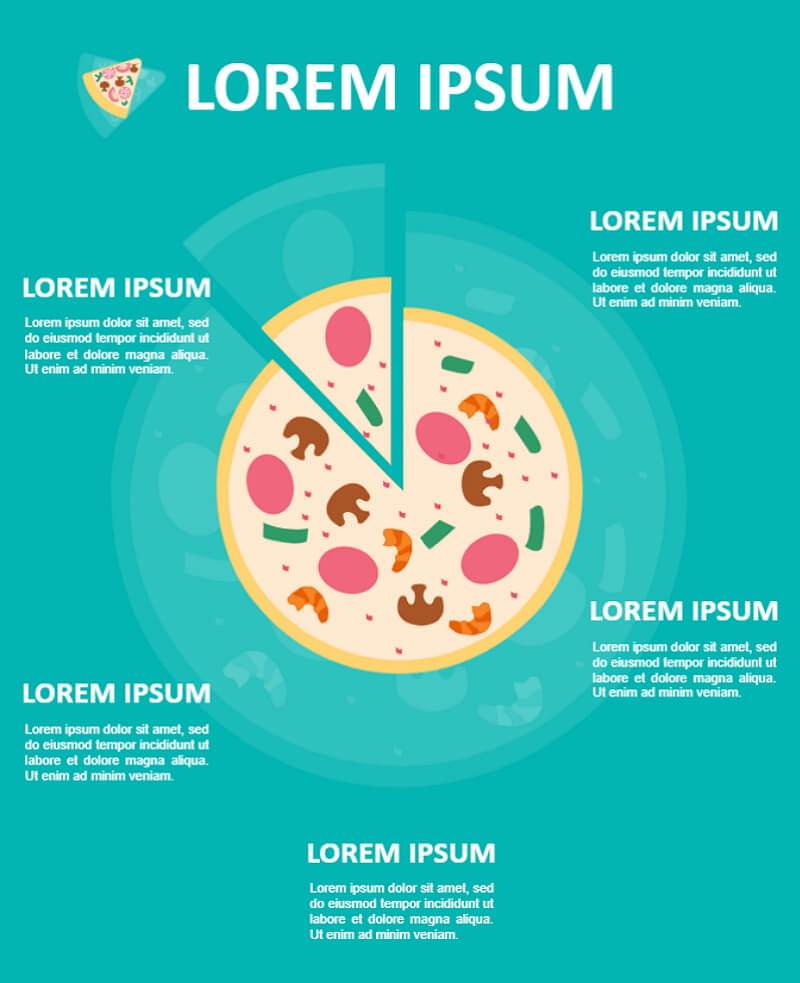
Campaign Poster Template
Campaign poster is a dynamic and appealing poster template that puts pizza photos front and center. On one side, there are many text placeholders that can be used to describe the information.
For instance, we used a violet color when we talked about taking breaks -- such colors play a very important role in our psychology and help us achieve our goals. Such infographic posters are a great way of sharing your thoughts with others.
Source:EdrawMax Online
Motivational Poster Template
It's a motivational poster template. The concept is straightforward and revolves around travel and sightseeing. It can be used to promote tourism as well as travel and adventure-related events. The heading, image, and text are the three essential components.
It should be noted here in the graphs that the primary function of a poster is to capture your audience's attention. As you can see, over 40 percent of people respond better to visual information than text.

Source: EdrawMax Online
4. Free Online Poster Maker
EdrawMax Online is a free online poster maker. This all-in-one tool offers everything from importing images right from your Google Drive or Desktop to remote collaborating with your team members. The primary requisite of creating a poster is a tool's ability to give complete freedom to the designer. With EdrawMax's in-built features like symbols, templates, and other diagram elements, you can incorporate hundreds of different designs in your poster.
- There are thousands of design elements in EdrawMax Online that can help you create 280+ different types of diagrams.
- You can also browse its extensive range of templates in Template Communityand can readily customize them as per your requirements.
- EdrawMax Online is a free cross-platform tool that you can access on any browser and use without any prior designing experience.
- There are dedicated features to customize your diagrams and export them in numerous formats like PNG, PDF, TIFF, SVG, and more.
EdrawMax Online is a vector-enabled tool that ensures that your design does not hamper when you start customizing the minute details. Furthermore, you can even export your poster designs into multiple formats, including PNG, JPEG, and more.
5. Key Takeaways
MS Word is considered one of the best writing tools in the market, but when it comes to making a poster, Word lacks several areas. Even though files from Words are easily accessible, the software does not provide the required tools to make a poster.
Unlike Word, EdrawMax Online is loaded with free poster templates, diagramming tools, and the ability to access files both offline and online. EdrawMax Online not only lets you customize the posters the way you want, but it also lets you create different types of diagrams, like a flowchart, org chart, fishbone diagram, and more, which you can add to your poster design.