How to Create a Spider Diagram
1. Introduction
A spider diagram can be defined as a graphical representation in which different bits and pieces of information are laid around a central idea or concept. These diagrams are good for brainstorming as they allow the reader to see what sort of data and research has been collected and conducted on the topic. If you are trying to create a spider diagram, read on because we will be looking at a step-by-step guide on understanding and using the software.
2. How to Create a Spider Diagram?
A spider diagram is usually required for brainstorming and discussions. At the center of the drawing, a circular shape is drawn, and the name of the subject or topic is written in it. Then, multiple boxes and bubbles are made around it and connected to it using a line. This basically indicates that the text within the surrounding sections is related to the idea in question. For example, if a city is taken as the subject, then the surrounding boxes will show the population, area size, amount of rainfall, number of homes, and level of unemployment, and so on. To make spider diagrams, you have to follow a couple of steps which include:
1. Choose your diagramming tools
First off, you need to select the tools for making the map. Since a spider diagram is not that hard to make, you can easily make one on paper. However, for decorating it and adding some artistic effects, a dedicated application would be more appropriate. It's up to you to make a choice. In this post, however, we are going to be looking at how to create one using EdrawMax. The software can be accessed online, and it's free to start, so open it up and follow along with the tutorial.
2. Circle your main idea and put it in the center
Spider diagrams are categorized by their specific web-like shape – which also explains the nomenclature. You have to stick to that particular layout; otherwise, the diagram may not appear to be very….spidery. Put the idea or subject name in a circle and position it at the dead center of your canvas.
3. Draw the lines and surrounding fields
After the circle is placed, draw lines starting from its perimeter away from it. At the end of every line, place a box and fill it with the relevant info. The surrounding fields can be rectangular, oval, square or any other shape provided it's not a circle because that may cause some confusion.
If the video doesn't play, please visit it at YouTube.
3. How to Create a Spider Diagram with EdrawMax Online?
The first thing you will have to do is make an account on EdrawMax Online. At the top right, you are going to see a login button. Click on that, and you will be directed to the sign-in screen. Select the 'Create Account' option under the fields.
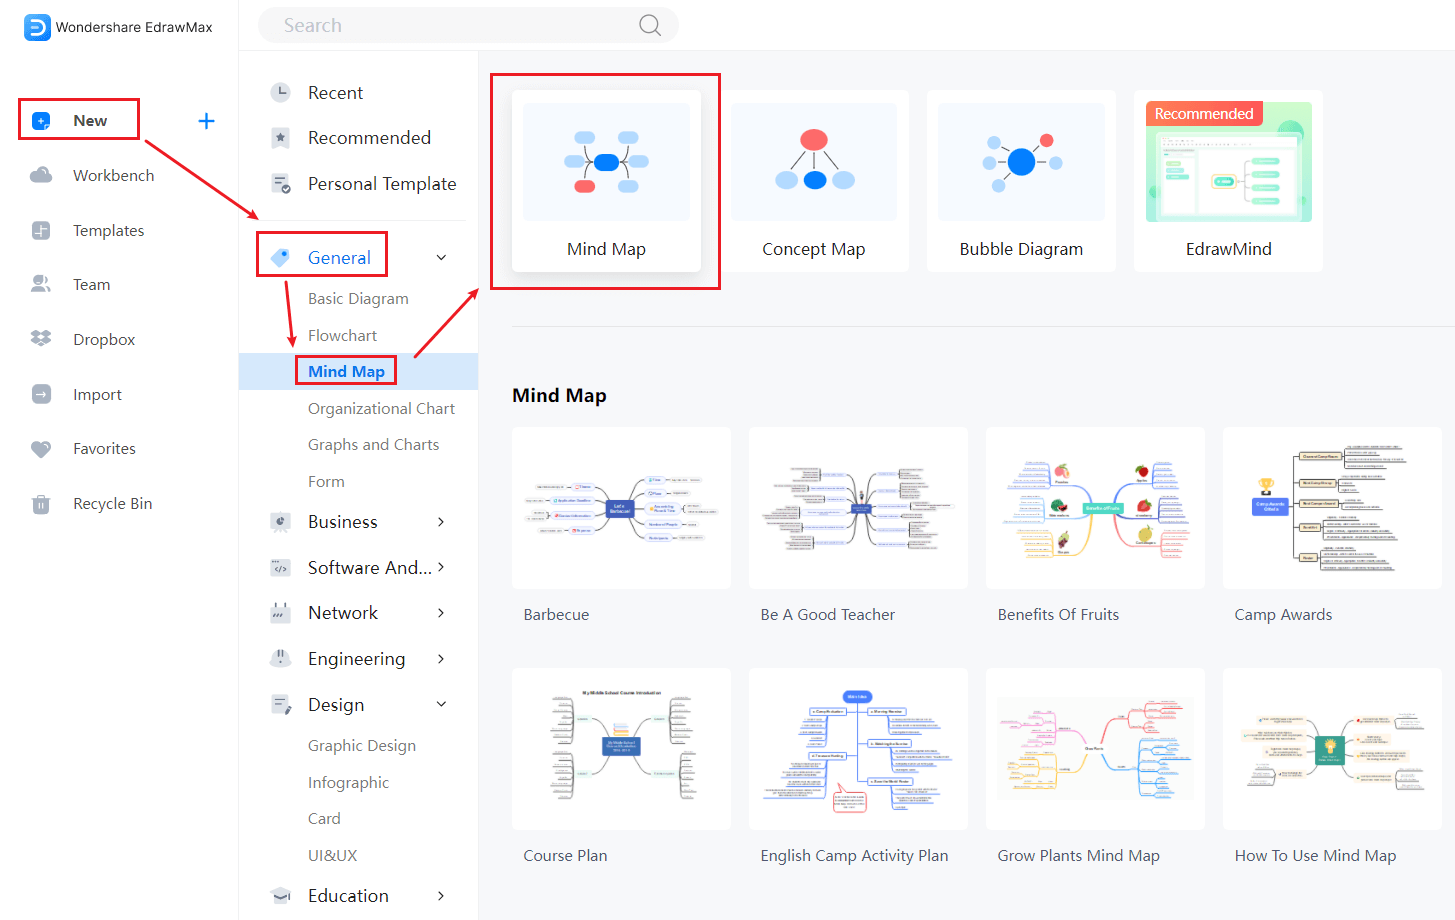
To open up the drawing board for the spider diagram category, go to the homepage and click on ‘New.’ Under ‘General,’ select ‘Mind Map.’ The window will open up with three boxes showing different categories. Click on ‘Mind Map’ and then open the blank drawing by selecting the option below. This, by the way, is something you should know when using the application. Spider diagrams are made from the ‘Mind Map’ category. They don’t have a separate one of their own.
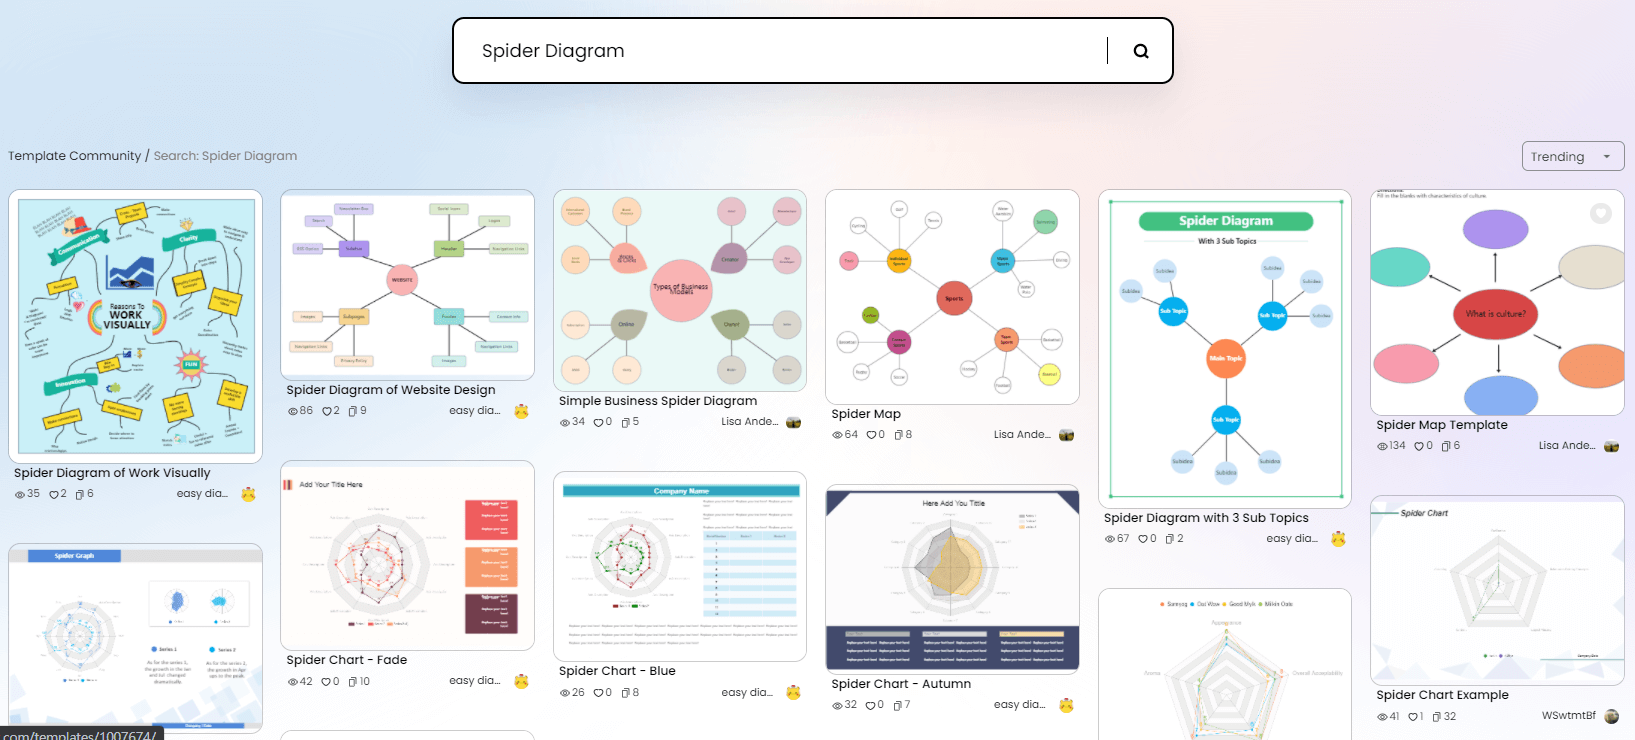
If you want, you can pick a template instead of creating the drawing from scratch. Using a template is a good learning experience for newbies, as they can see how the map has to be laid out. You can also save time if you opt to use a premade drawing. All you have to do is edit the particulars and details according to your given data. Find more templates in Templates Community.
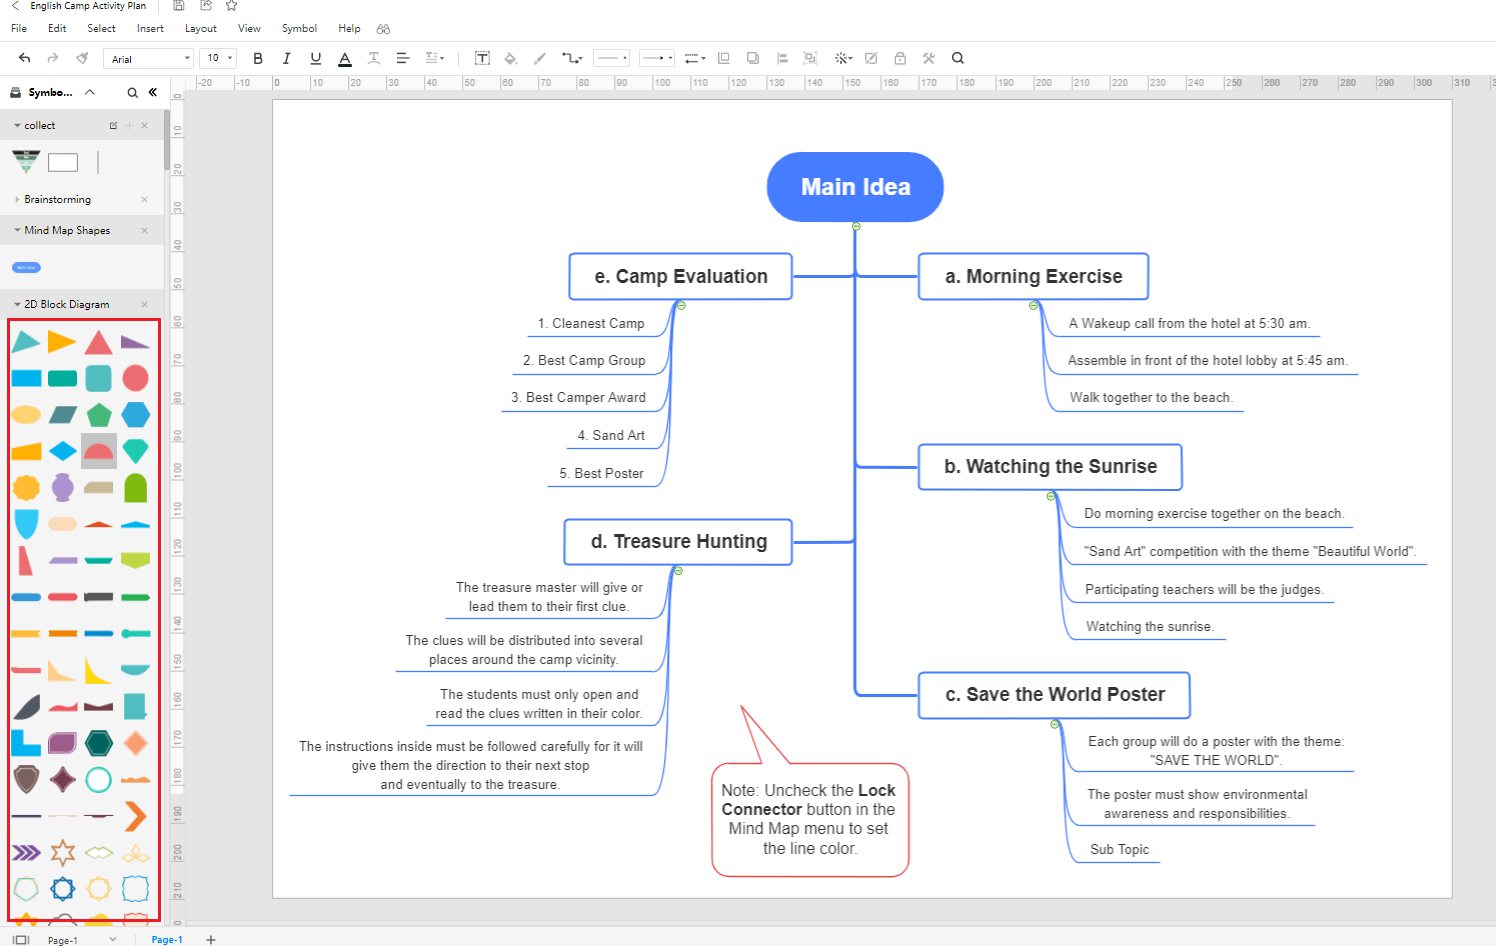
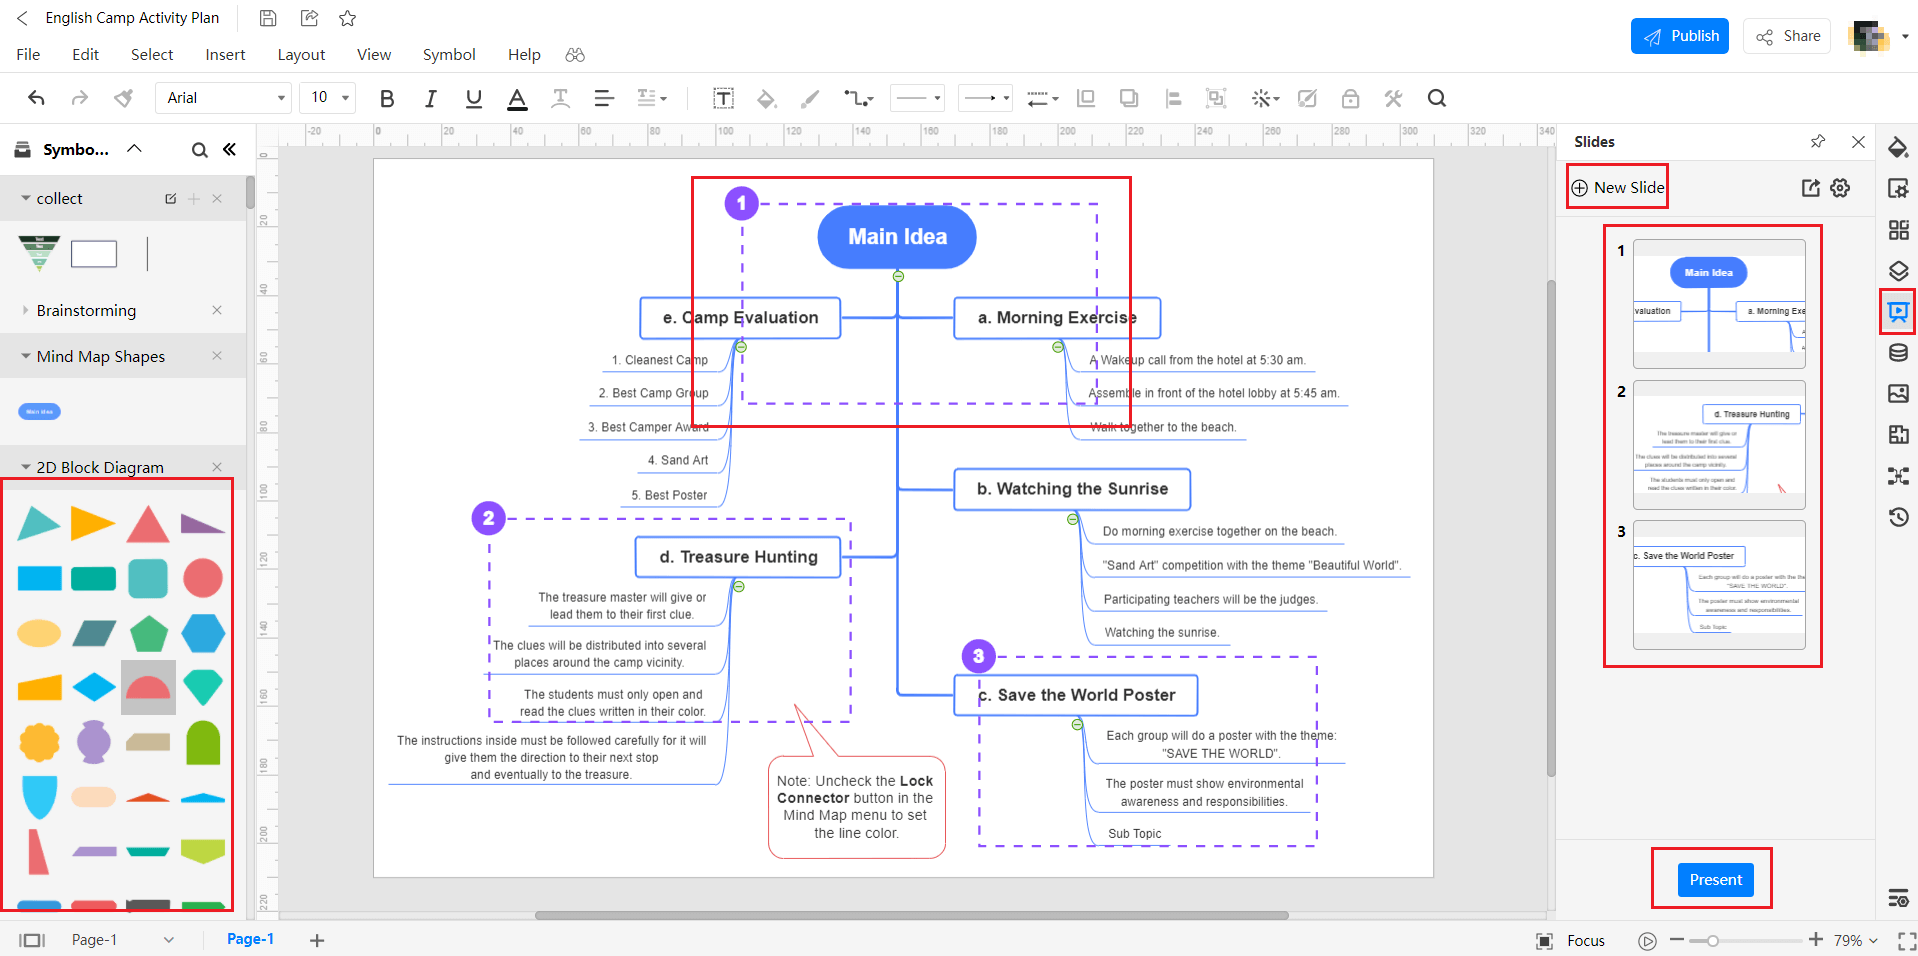
When you are at the drawing board, you can quickly add and move icons to your drawing. The library on the left can be used to access various shapes and symbols. If you want to use some graphics and clip art from other categories, you can use the ‘Add Shapes’ feature. To bring the shapes to your diagram, simply click on them and drag ‘em over to their place on the canvas.
The ‘Theme’ menu can be accessed from the right menu bar. With this feature, you can change the appearance of the connectors, the font styles, and the color palette used in your spider diagram. You can alter them separately or use existing combinations for a collective modification.
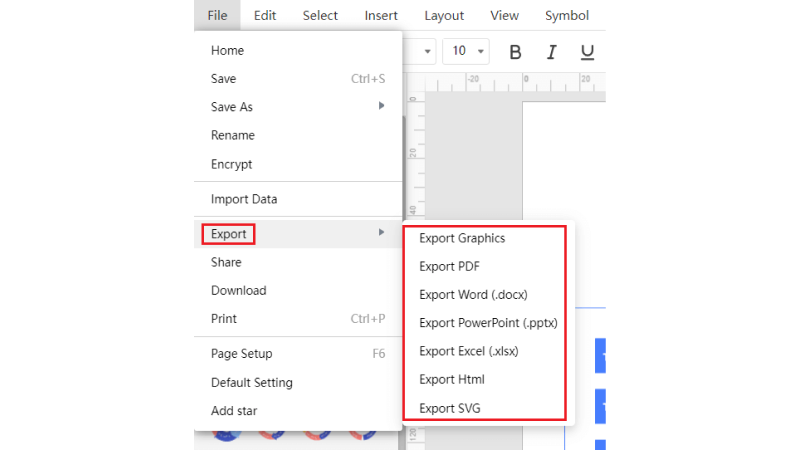
To save your work to the EdrawMax Cloud, click on the 'File' button on the top left of the screen. Select 'Save,' and your work will be stored on the application. You can use the ‘CTRL + S’ shortcut to do this step quickly. Alternatively, you can go down to the ‘Export’ option on the ‘File’ menu. This feature lets you save your drawing as an offline document. You can choose the format from popular file types like PDF and SVG.
There are two main presentation options that you can use with EdrawMax Online. You can either start a slide show (by clicking on the play symbol at the bottom right) or create customized slides from your drawing. Click on the ‘Slide’ menu from the right menu bar and select ‘New Slide.’ Adjust the purple box to determine what portion of your canvas should be included in the slide and what is left out.
4. Expert Tips for Making Spider Diagram
Tip 1: Keep your diagram symmetrical
If you are making a spider diagram, try and keep the surrounding boxes in a symmetrical arrangement. For example, for placing a total of six fields around the central idea, put three to one side and three to the other.
Tip 2: Use colors only where necessary
Spider diagrams are different from mind maps due to the fact they don’t always contain polychromatic elements or shades. So, if you are making a spider diagram, use colors in places where they stand to represent a value or attribute.
Tip 3: Keep the labels large and readable
When you are dealing with a diagram that has a lot of surrounding fields and text boxes, don't try and reduce their size to fit them all in together. In doing so, you will mess up the font size, and the reader will have trouble making them out. Try increasing their distance with the center so that there is more room in between them.
5. Key Takeaways
If you don’t know how to draw a spider diagram, hope this post can help you learn some base concepts about these graphics. Find more spider map templates.EdrawMax Online provides its users with a range of different tools and services that make diagramming a total breeze. The customization features can help you make your drawing unique and one-of-a-kind, while the available templates can relieve you of the burden of coming up with the base structure yourself. You can choose one from the template community and make your work smooth and simple.