How to Make a Flowchart on Mac
A flowchart is a visual way of presenting data in the form of a structured diagram. This type of diagram shows the flow of a process, relationships, ranks, and hierarchy. Therefore, flowcharts are commonly used in various fields like education, businesses, engineering, process industry, etc. The purpose of a flowchart is to plan and manage a step-by-step approach. A functional flowchart shows different steps in a simple yet detailed fashion to improve communication and understanding. To efficiently create flowcharts on macOS, you should continue reading this article.
To help you learn how to make a flowchart on mac, we have put together a simple tutorial.
How to Make a Flowchart in Pages
To learn how to make a flowchart in pages on Mac, follow these step by step instructions:
Step 1: Open Pages
Launch the Pages app on Mac and click on "Blank" in the template window to select a blank sheet. You should also click either "Blank" or "Blank Landscape" to choose the orientation of your page. Another way to open a blank page is by clicking on the File menu, and then selecting "New."
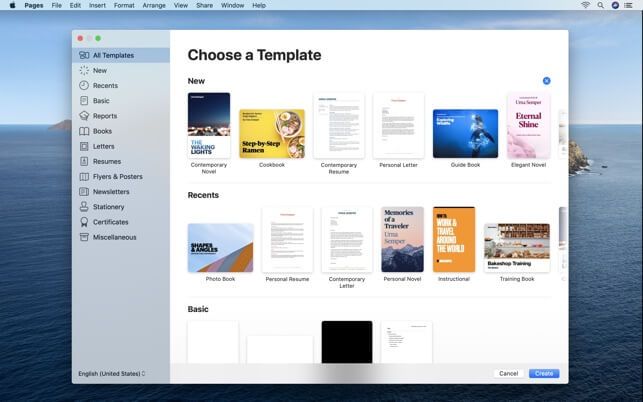
Image Source: https://is1-ssl.mzstatic.com/
Step 2: Arrange Shapes
Click on the "Shapes" icon to select shapes like circle, rectangle, or square. Drag the selected shape to a preferred spot on the page. Then, click on the "Inspector" button and go to the "Graphics Inspector" tab. It will allow you to style your shape by adjusting the color, border, effects, etc.
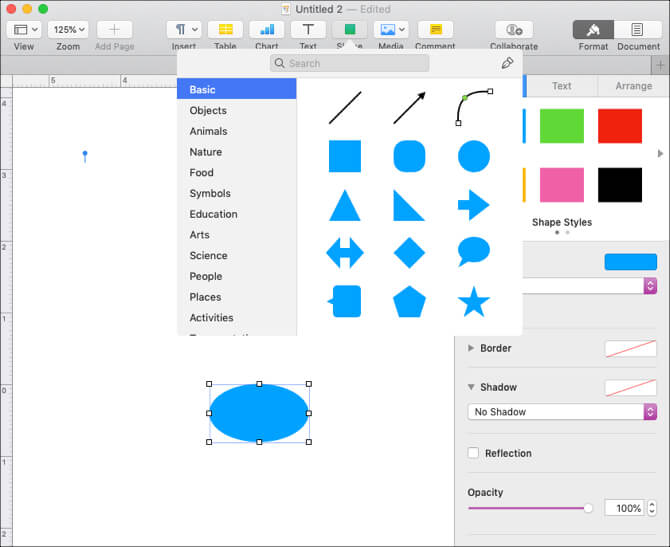
Image Source: https://static.makeuseof.com
Step 3: Add Text
Double-click each shape to enter the text in your flowchart. Alternatively, you can also click the "Text Box" icon and drag it to your shape to enter the information. Select the text and go to the "Text Inspector" tab under Inspector. Here you can style your text by adjusting its color, spacing, font, and alignment.
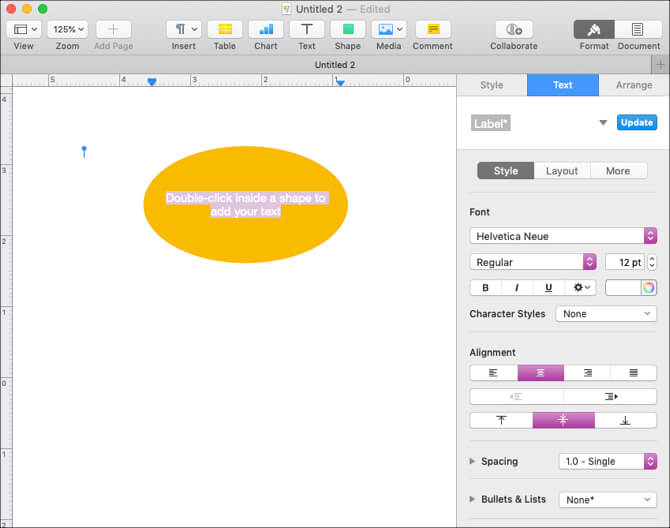
Image Source: https://static.makeuseof.com
Step 4: Add Connections
To express the flow of direction in your flowchart, hold down the "Shift" key and click the shapes you want to connect. Go to the "Insert" menu, and click on "Connection Line" to add lines between the shapes. Continue making line connections where required.
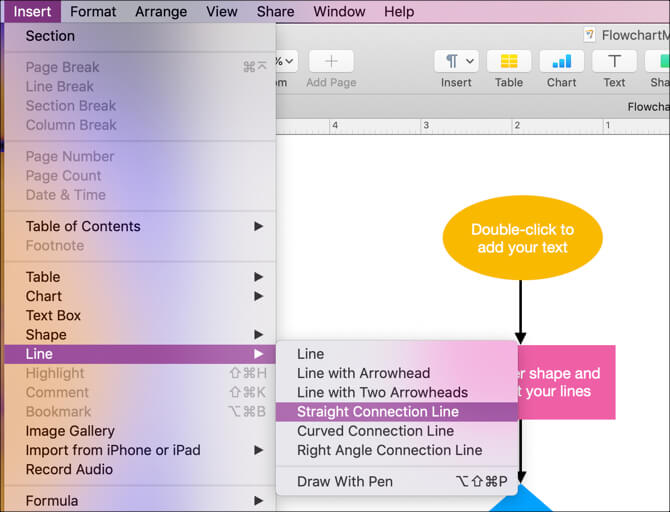
Image Source: https://static.makeuseof.com
Step 5: Save and Close
Once your flowchart is complete, go to File and click on “Save” to store your flowchart.
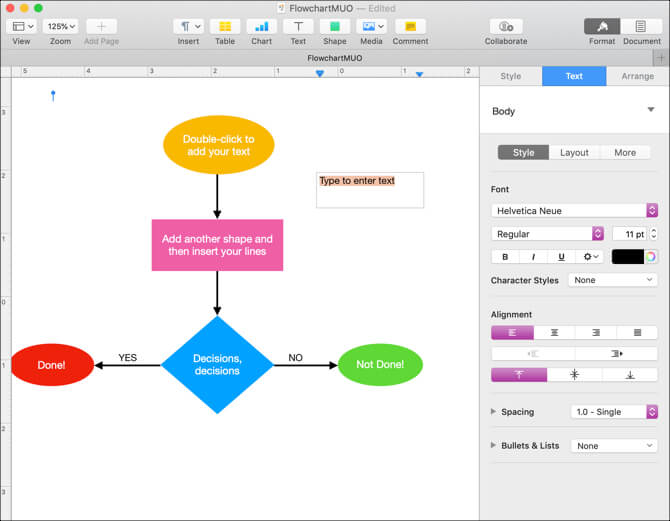
Image Source: https://static.makeuseof.com
How to Make a Flowchart on Mac Efficiently
Using Pages on Mac is easier said than done. It is why we recommend using Edraw Max Online, which is a versatile drawing tool used to create different types of diagrams. Edraw Max allows you to make storyboards, posters, technical diagrams, graphs, and much more. With its cloud sharing feature, advanced formatting, and collaborative interface, Edraw Max can help you create stunning flowcharts from scratch. So, save extra effort, reach higher productivity, and create legible flowcharts with Edraw Max.
Here are a few simple steps to teach you how to make a flowchart on a mac using Edraw Max Online:
Step 1: Open Edraw Max
Open Edraw Max Online by clicking this link: https://www.edrawmax.com/online/.
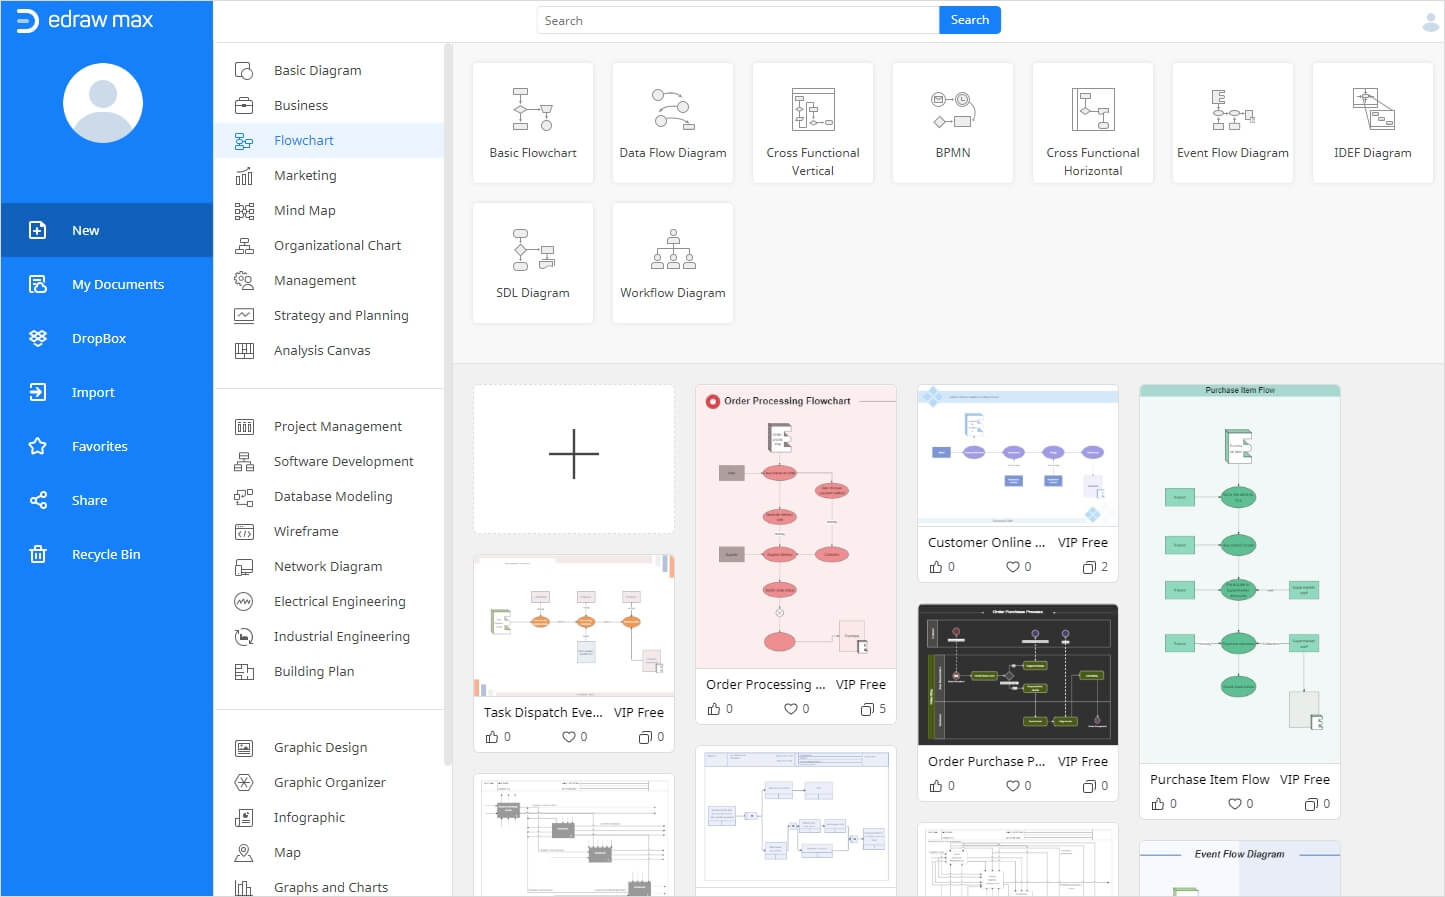
Step 2: Select Blank Template
Go to “Flowchart” in the category list where you will find different types of flowchart templates. For this tutorial, we will use a blank page to create a flowchart.
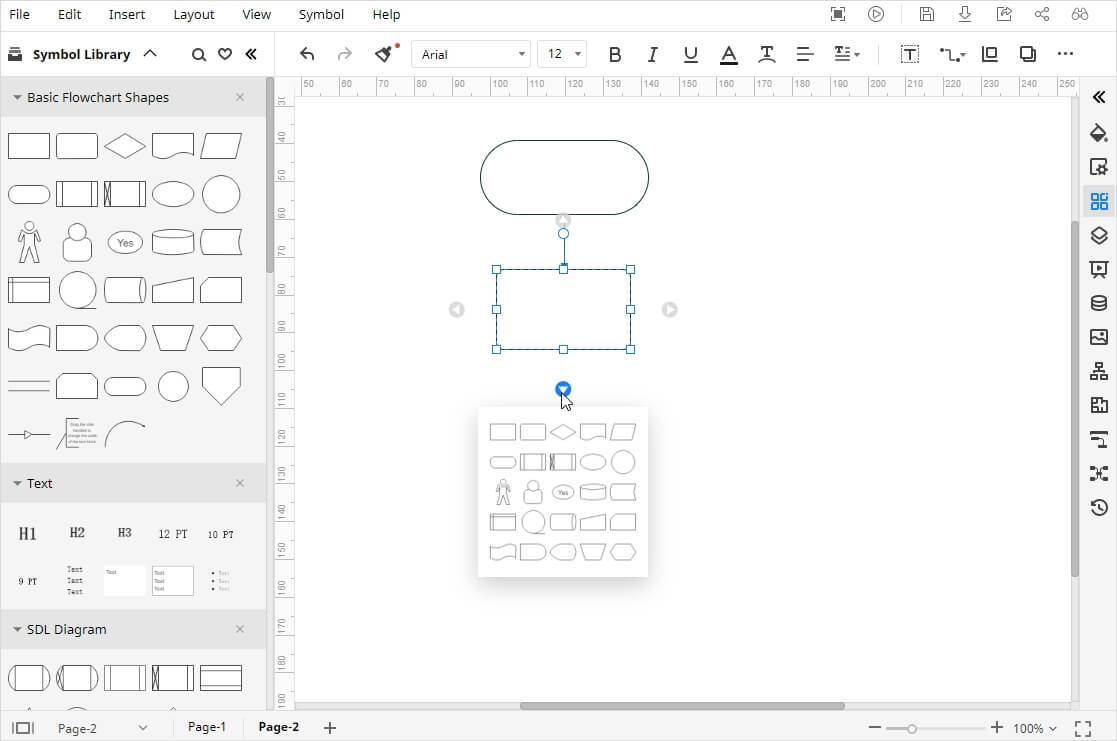
Step 3: Build Flowchart Structure
Once your drawing tab has opened, you will see the symbol library on the left side of the canvas and formatting tools on the right. Select a flowchart shape from the symbol library and drag it to place it on the canvas. Keep arranging the shapes in proper order.
Step 4: Enter Text and Connectors
Enter text in each of the shapes to add data to your flowchart and then go to the “connector” option in the menu ribbon and click on the “straight connector” to add lines between the shapes.
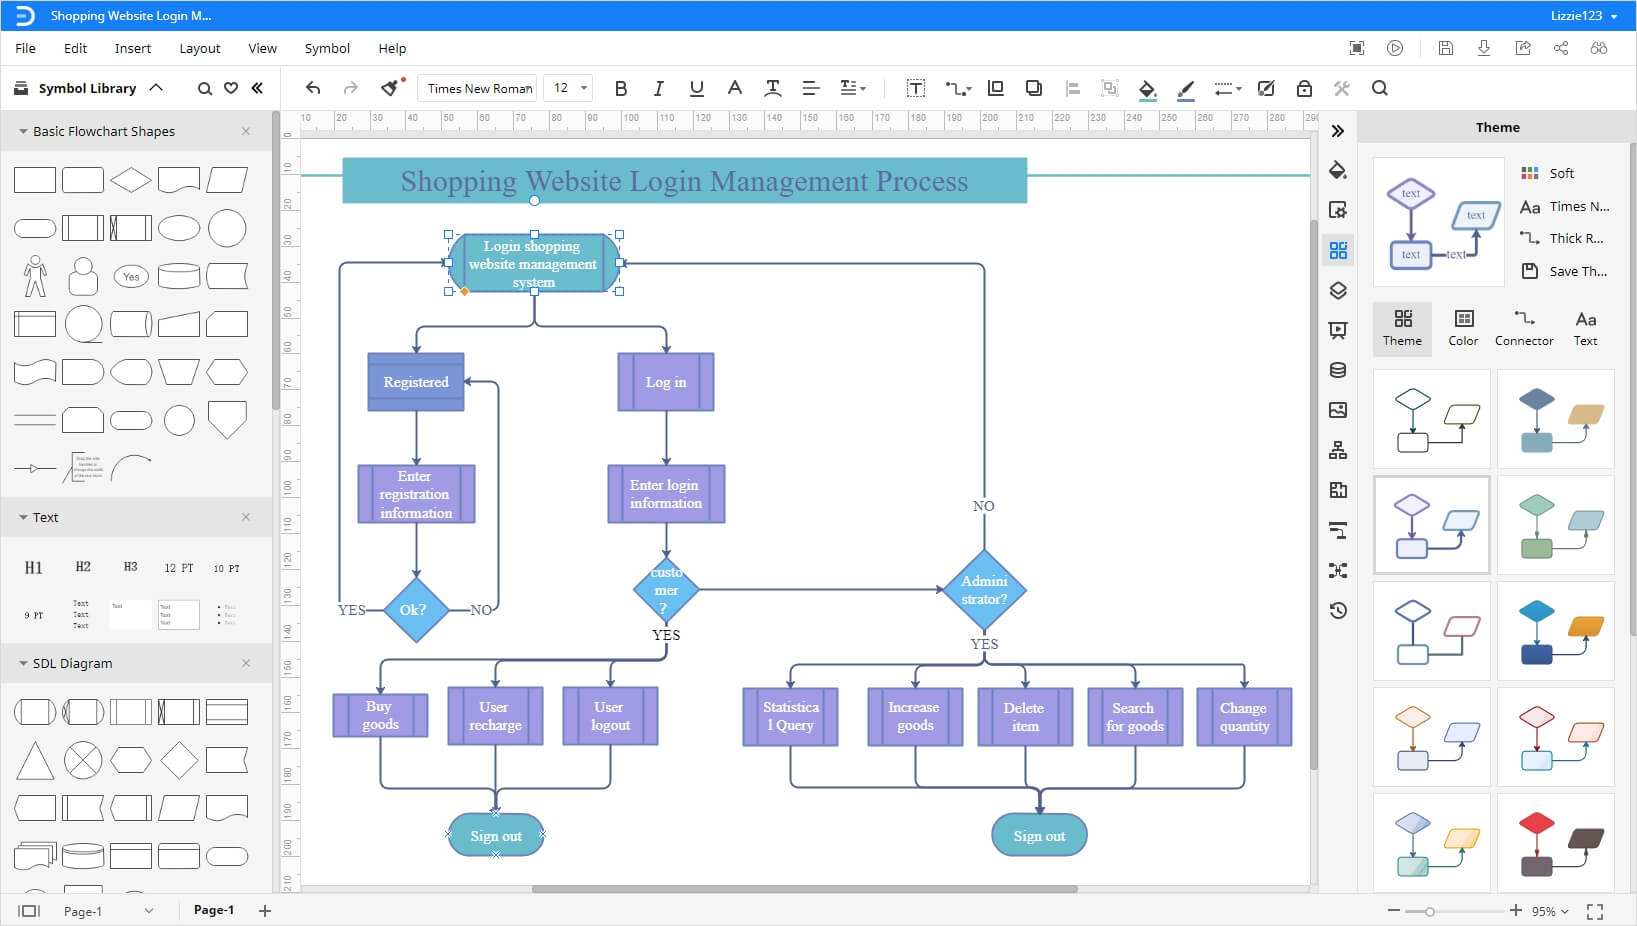
Step 5: Customize Your Flowchart
Once you have created the basic layout of your flowchart you can make it attractive by changing color, adding images, and using symbols. To format, use the tab on the right side of the screen which will give different options to change the background color, adjust themes and styles, etc.
How to Save and Export Your Flowchart
Once you have created your flowchart, you can save or export it in different file formats. Go to the File tab and click on the “Save” option. A pop-up window will appear where you can name the file, select file location, and click on “Save” to store the document. Edraw Max also allows collaborative cloud sharing options like Google Drive and Dropbox. Besides, you are able to export your drawings as commonly-used file types, as shown in the below picture.