How to Make a Genogram on Mac
A genogram is a visual display of different family relationships in a person's medical history. It is an advanced version of the family tree and allows users to visualize the hereditary theory and psychological patterns that punctuate relationships. Genograms are used to uncover integration patterns of marriage choices, behavioral conflicts, and family alliances. Genograms are commonly used by psychologists, family therapists, doctors, and clinical social workers. Genograms are made up of different symbols put together to create a detailed gene chart. To create a genogram, we recommend using an app or online software. If you want to create a diagram on Mac, then continue reading this article.
Today we will tell you how to make a genogram on Mac using Microsoft Word.
How to Make a Genogram on Mac
To create a genogram on Mac, you can use any professional software or app that you like, but what if you don't know any of them? There you can use Microsoft Word and try to draw a simple one.
Step 1: Open MS Word
First of all, go to MS word, launch the app on your desktop and open a blank document.
Step 2: Create Genogram
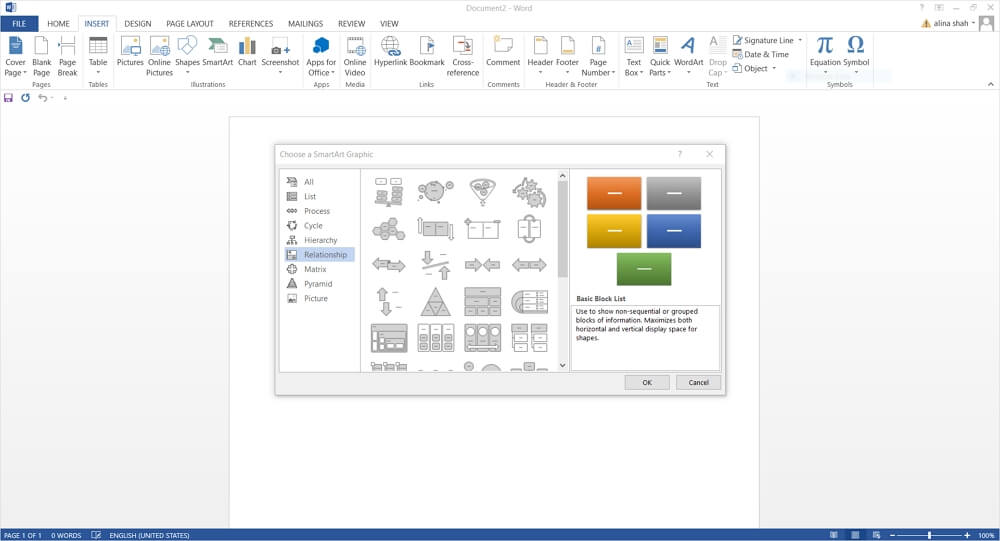
Go to the Insert menu in the toolbar and click on the “Smartart” option to open the smart art gallery. Here you will see different options like list, cycle, relationship, hierarchy, matrix, and pyramid. Go to the desired list and check out its different readymade art graphics. Select the desired type and click on ok. The chart will be placed on your page.
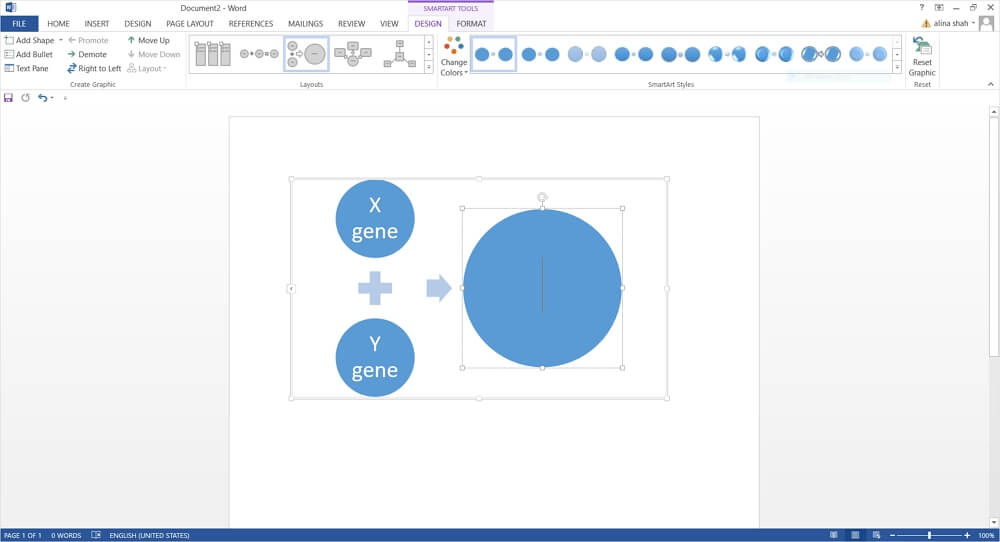
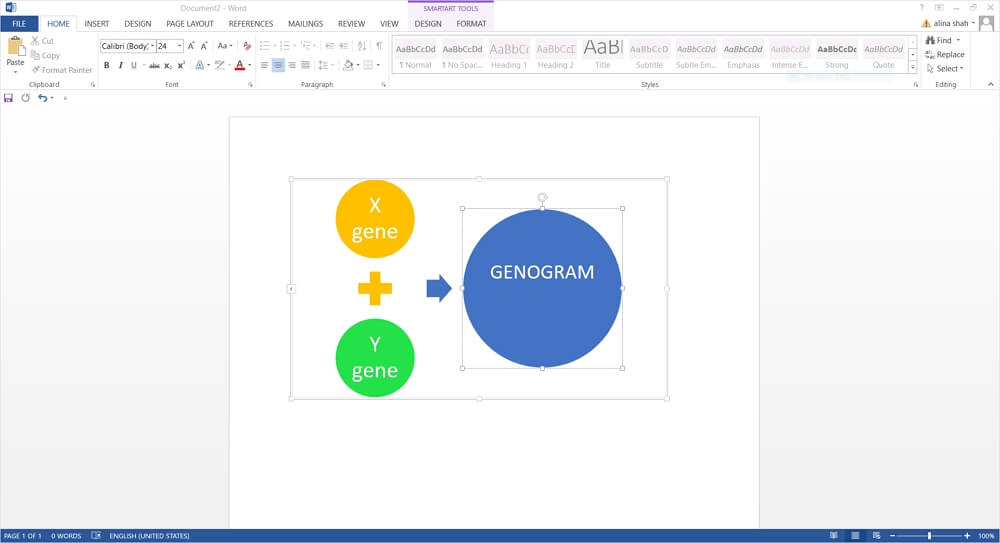
Step 3: Add Text
Now, add text and other graphic symbols as per your requirement. You can also add more shapes if required. Add vertical and horizontal lines from shapes in the insert tab to complete your genogram.
Step 4: Save File
Once your genogram is complete, you can store it in your Mac by going to the File tab and clicking on save as.
How to Make a Genogram More Efficiently
Genogram on Mac can also be created more efficiently by using an advanced drawing tool called Edraw Max online. It is a free website that allows you to create all types of diagrams and charts, including a genogram. Edraw Max online provides many cool features such as unlimited free templates cloud storage service cross-platform support and a wide range of tools.
If you want to know how to make genogram on Mac using Edraw Max online, then follow these steps mentioned below:
Step 1: Open Edraw Max
Launch browser on Mac and open Edraw max online by entering this URL: https://www.edrawmax.com/online/.
Step 2: Create Genogram
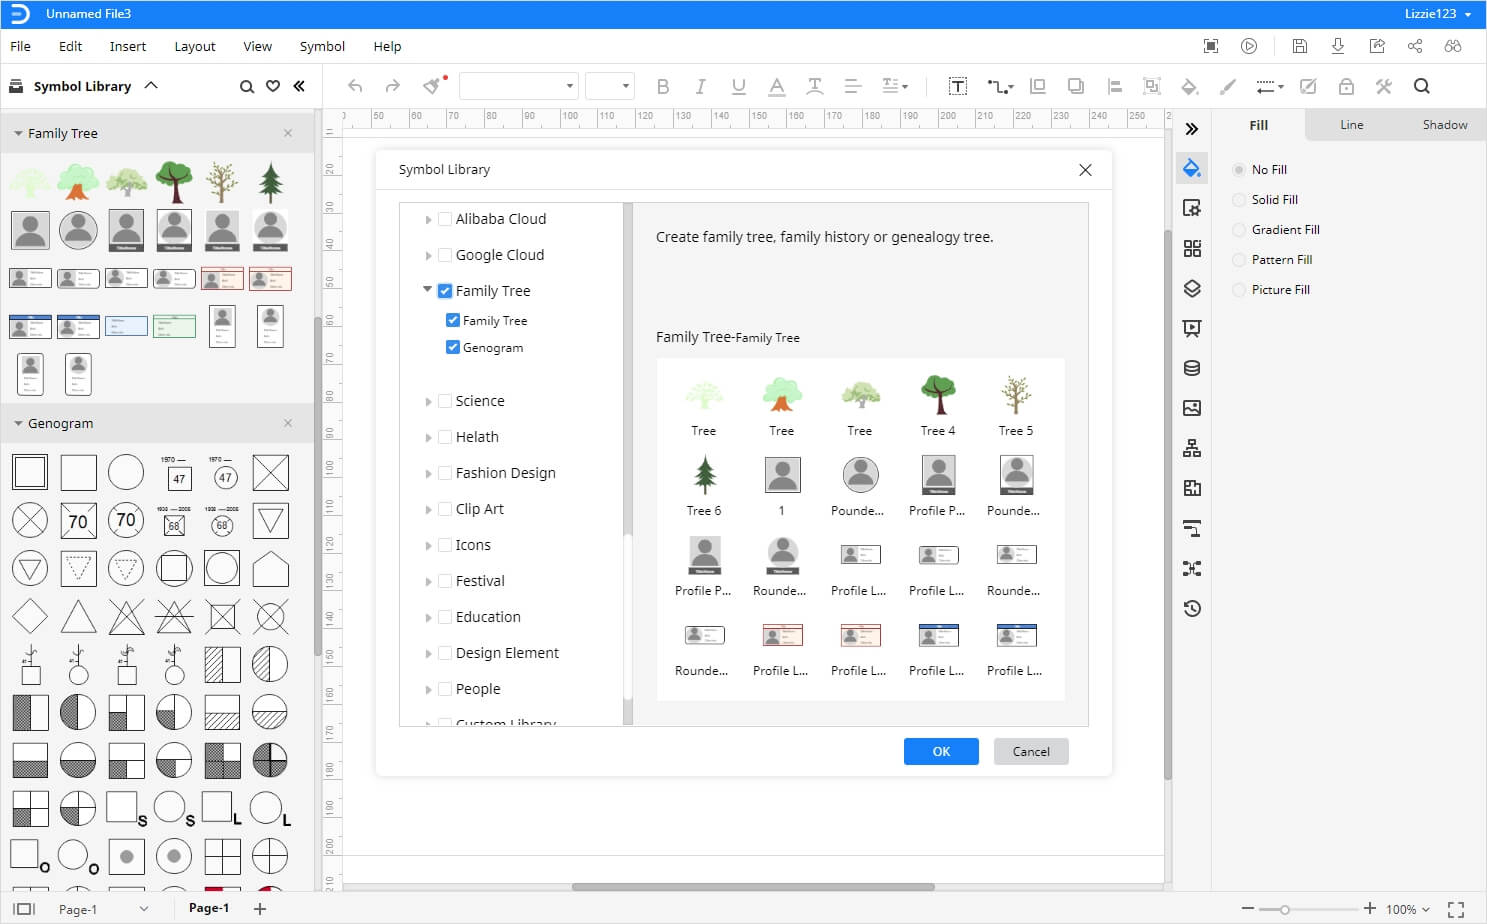
To make a genogram on Mac from scratch, go to the symbol library and click on the icon placed next to the "Symbol Library." A popup window of the symbol library will launch on your screen. Now scroll down to the family tree and select "genogram" to enter symbols in the library.
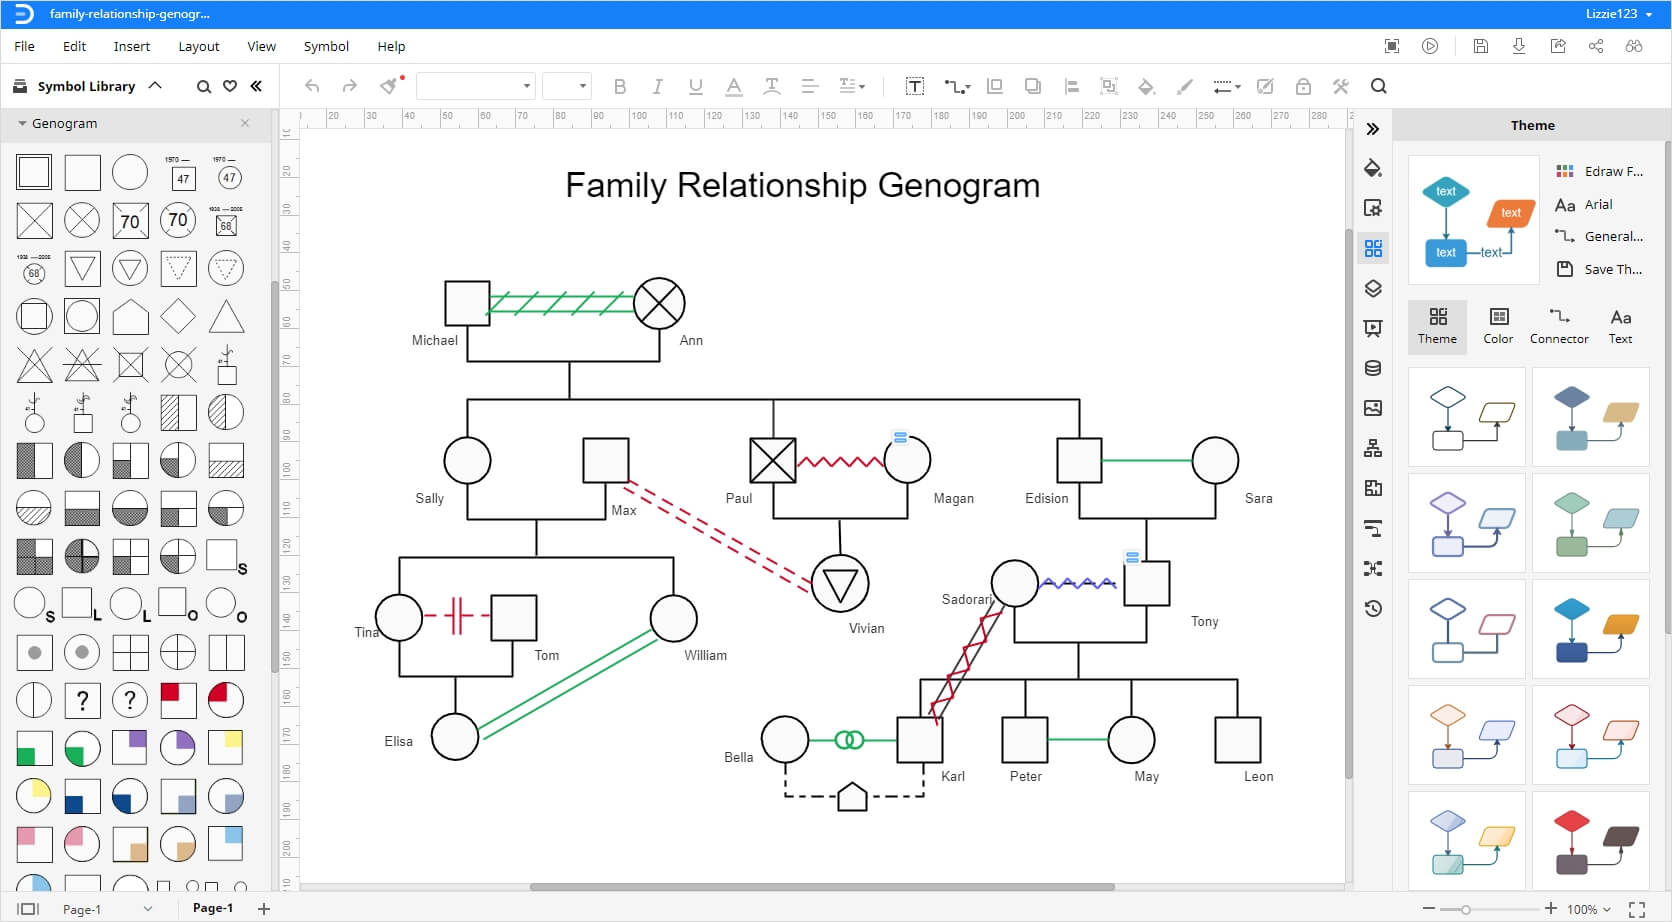
Now using the symbols, you can create a genogram. Select the symbol and drag it to the sheet to place it. Keep arranging the symbols as you like and enter connectors from the "connectors" option on the menu ribbon.
Steps 3: Customize Your Genogram
Add text to your genogram and edit it. Once you have created the layout of your genogram, you can enhance it by adding color, style, and other unique details from the format Tab on the right side of the screen.
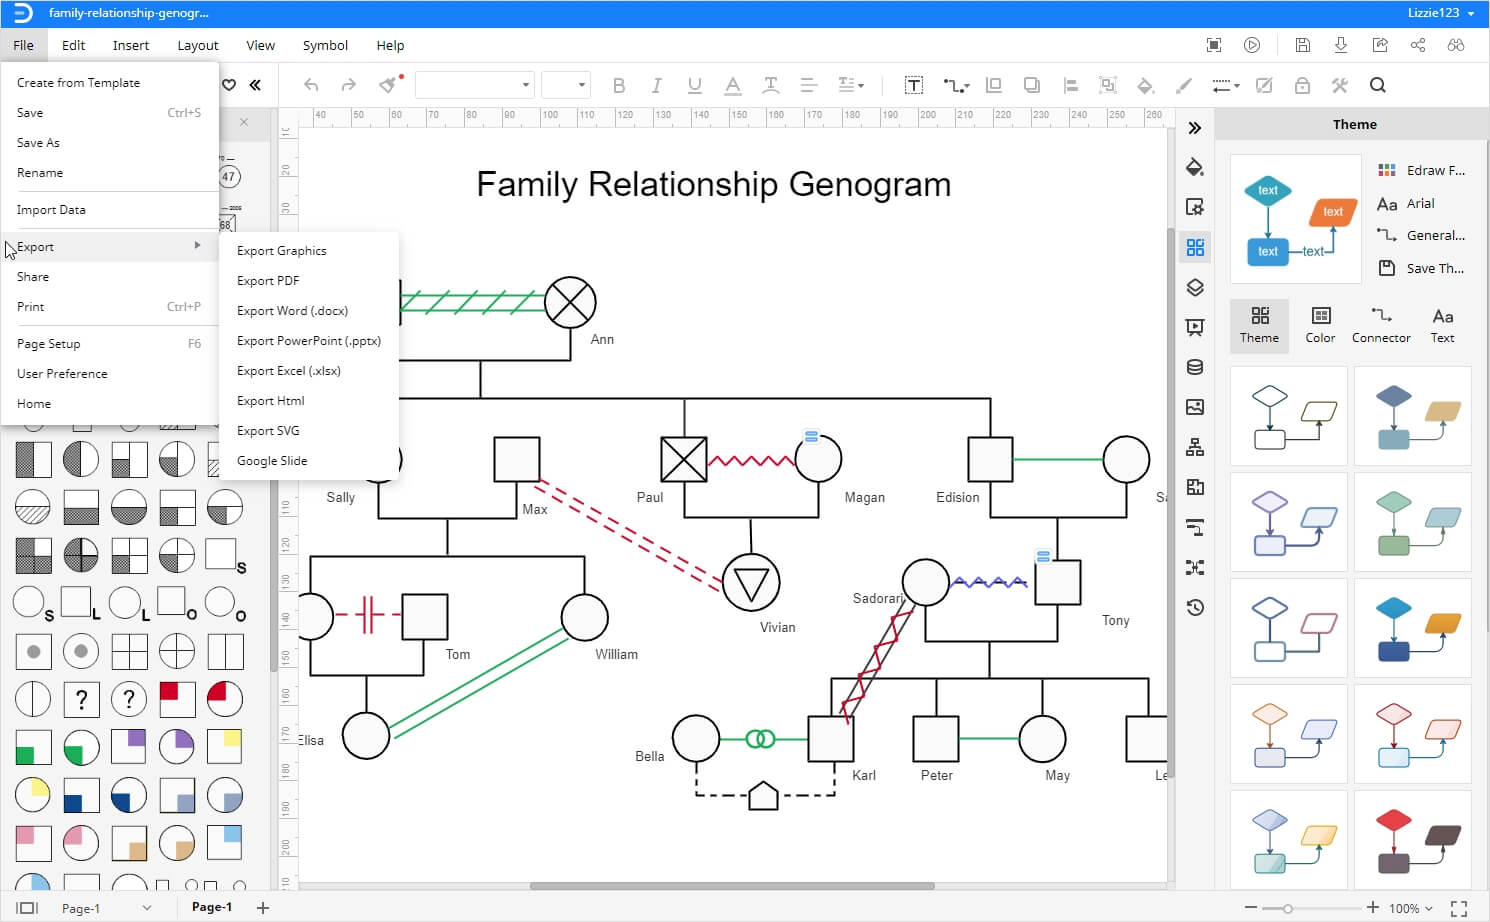
How to Save and Export Your Genogram
Edraw Max Online offers an excellent save and export feature under the file tab. If you want to save your genogram on Mac, then click on the save option, and after entering the right path, you can save your file on your desktop permanently.
An alternative option is to save your genogram on cloud storage services like Google Drive and Dropbox. For this, you need to click on the save as option given under the File tab.