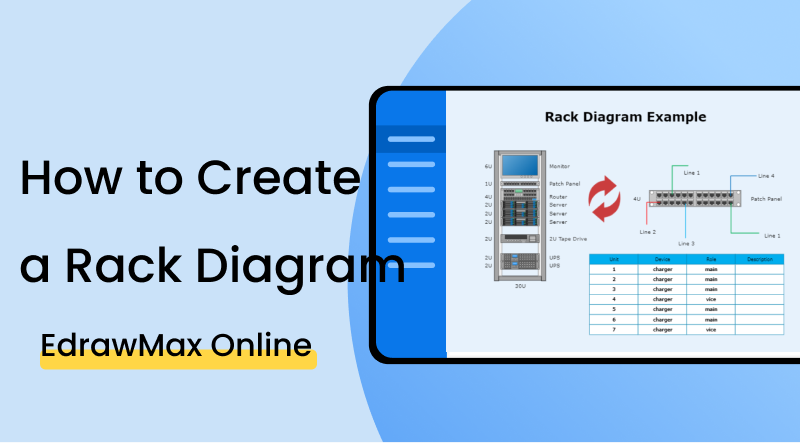
How To Create a Rack Diagram
1. Introduction
Before you create a rack diagram, you need to know what it is and its importance. A rack diagram graphically represents server racks. We use server racks to house and handle sensitive IT equipment. Server racks house various IT hardware and systems without taking much space. A racking diagram helps you make a pre-plan to optimize the setup of server racks easily. You can choose the size of racks based on the equipment. A racking diagram is also called a rack elevation.
2. How to Create Rack Diagrams
A rack diagram gives you an outline of server racks. When installing equipment in the server racks, it is not unusual for hardware to fit perfectly in the racks due to size or wire adjustments. You can solve this problem by creating a racking diagram and analyzing both racks and hardware. You can create it on network diagraming software. Rack diagrams get harder to create for a system with many components. Follow these steps to create a professional rack diagram.
Step 1. Identify all components
Before you start making your diagram, the first thing to do is identify all physical components you will place in the racks. When you identify components, you have to identify their kind, shapes, the number of racks you will use, and placement from top to bottom. Doing this instead of randomly organizing components helps you clear out inefficiencies. It will help you out a lot, and when you are making the diagram, you will not get stuck after every step.
Step 2. Network Design
A rack diagram deals with IT systems and servers commonly used by data centers. When you are making your diagram, make sure to check the network design to organize the racks better. You don't have to make it part of the diagram. Create a network topology first to account for all items. The whole purpose is to make the network function properly with your rack setup.
Step 3. Organize physical items
We use racking diagrams to determine where we will place physical hardware and components in the server racks. After identifying the items, you will use, define the network design, and start placing the items on server racks in the diagram. When using diagramming software, all you have to do is drag and place the icons on the racks.
Step 4. Labeling
After you organize all items, the last thing to add to the diagram is labels. We do this to make sure that the diagram is easy to understand for anyone who sees it, and when we are implementing it on a physical server rack, we don't have to face many complications. Using icons makes it easy to identify components and label every item, and it helps you quickly streamline the system.
Step 5. Final Review
After there is nothing left to add to the diagram and you have already labelled everything, it is time for you to do a final review. Don't forget or ignore this step because there might be some little mistakes in the diagram. You can review it by cross-checking the components and network design.
If the video doesn't play, please visit it at YouTube.
3. How to Create Rack Diagram with EdrawMax Online
You can only create a rack diagram with a network diagramming software that gives you many icons and templates, such as EdrawMax Online. It comes with a comprehensive collection of symbols and diagram types. You can even design the network topology and place it together with the racking diagram. Follow these steps to create a rack elevation with EdrawMax Online.
The first thing you will have to do is make an account on EdrawMax Online. At the top right, you are going to see a login button. Click on that, and you will be directed to the sign-in screen. Select the 'Create Account' option under the fields.
After you sign in, go to Network
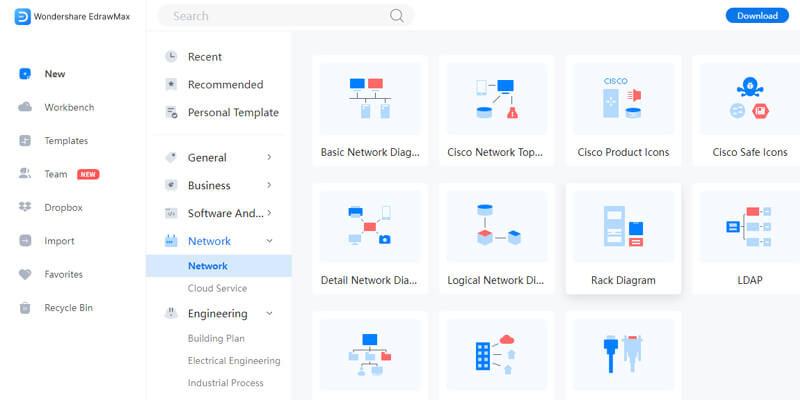
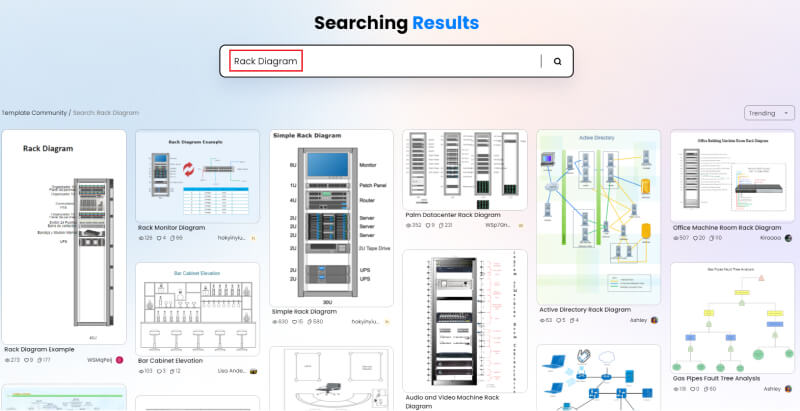
Find rack diagram templates in the EdrawMax Online template library. All you have to do is either go to templates or click the search bar. Type the name of the diagram and get a comprehensive list of templates professionally made for you. You can easily make changes to these templates according to your requirements. Find more templates in Templates Community.
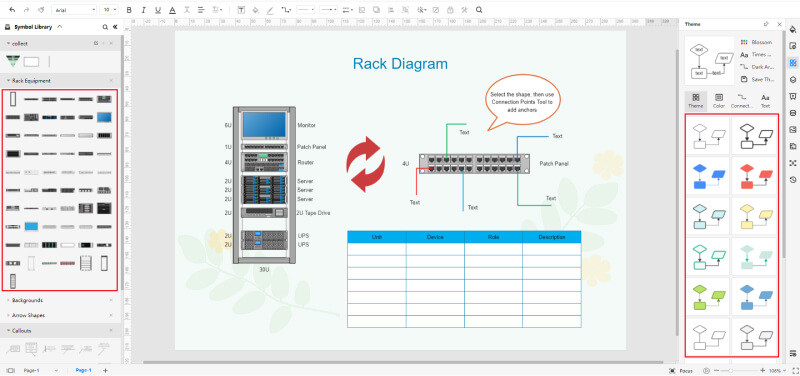
You can customize your rack diagram by using icons from the library. You have to click and drag the icon you need and add them to your diagram. You can also make changes in templates by adding labels and changing font and styles, and text colour. You can add various shapes, and there is a toolbar at the top of the canvas with various customization options.
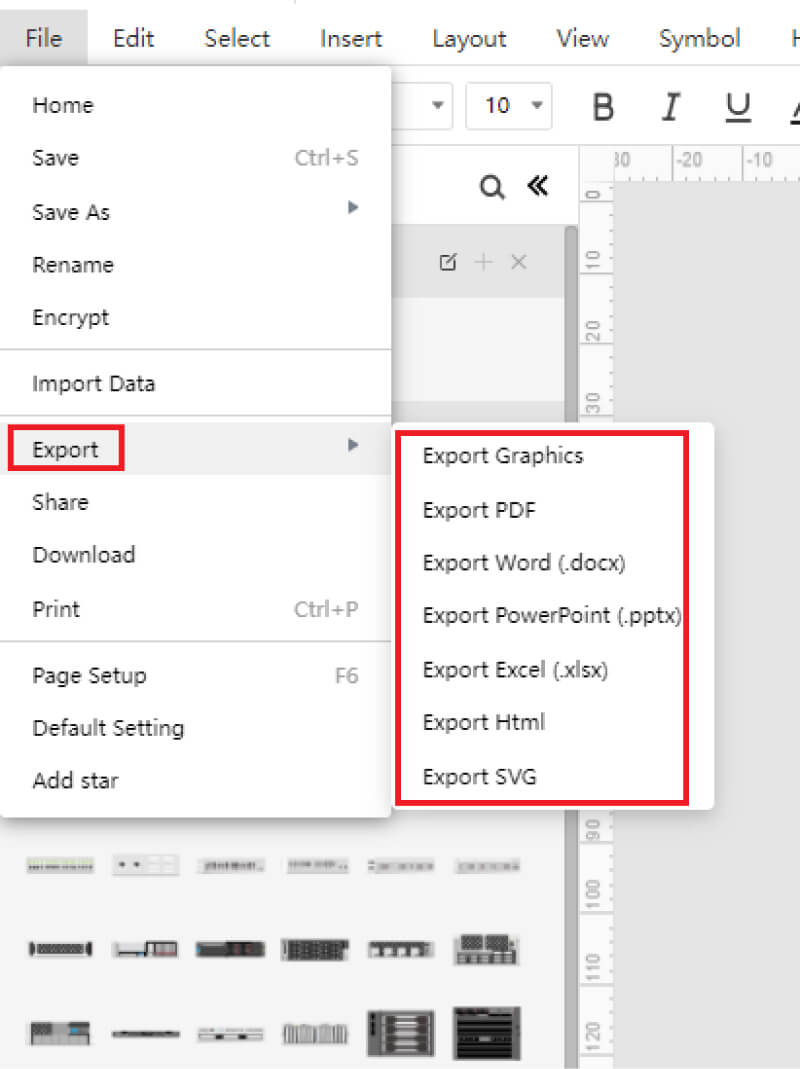
You can save your drawing in all popular formats using EdrawMax Online. All you have to do is go to files and click the save or export options. Please select the format you require, such as docs for a text file or jpeg to export it as an image.
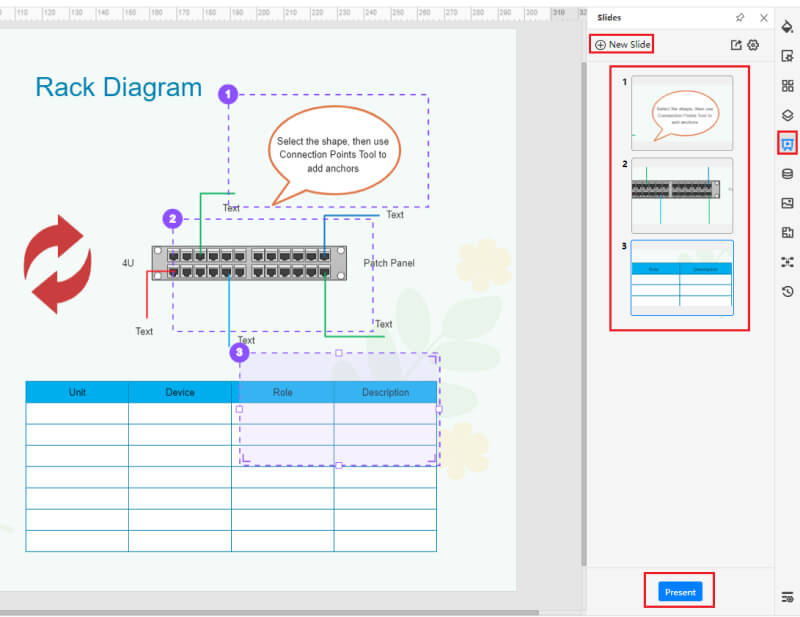
You can create presentations on EdrawMax Online for your project. You can add slides to explain your diagram. You can style every slide differently to make it more creative.
4. Expert Tips for Creating Rack Diagram
Tip 1: Define the network
Organizing a rack diagram depends on the type of network. Make sure to define the network design before you make a diagram. Even without doing it, you can make a rack diagram, but it will not work with much efficiency when applying it to a physical server rack. It also helps when configuring a rack elevation for some other system, such as home theatre.
Tip 2: Keep some space for future components
Creating a rack diagram is all about optimizing the placement of equipment on server racks. But keep in mind that you might have to add or change the components of a server in the future. In such cases, if your rack cannot accommodate new items, then you might have to organize a new one. Avoid this by making a flexible racking diagram.
Tip 3: Review
Make sure to review your rack diagram, but you can still left-out small mistakes. That is why ask your trusted colleagues to help review it with you. They might be able to catch some errors that you can't. After confirming the diagram with them, you can finally use it to organize physical rack systems.
5. Key Takeaways
A rack diagram is the documentation of the overall equipment in a server rack. Creating a rack diagram makes it easy to set up any racking system by optimizing the placement of items in racks. You can easily create a racking diagram by following basic steps such as identifying equipment and considering the network design
With EdrawMax Online, you can easily create a rack diagram. It gives you a library of templates and icons that you can use in your diagram. It also gives you a lot of customization options and helps you make presentations. You can also save your diagram in various formats. Find more network diagram templates.