How to Make a Timeline in Google Docs
A timeline is an effective way to help you illustrate the project process and plan to your team members or partners. Using Google Docs to make a timeline can let your team access to it easily.
This article will show you how to create a basic timeline in Google Docs since this application couldn’t support to make complex timelines, especially when you have no delicate templates.
How to Make a Timeline in Google Docs
Step 1 Change Page Orientation
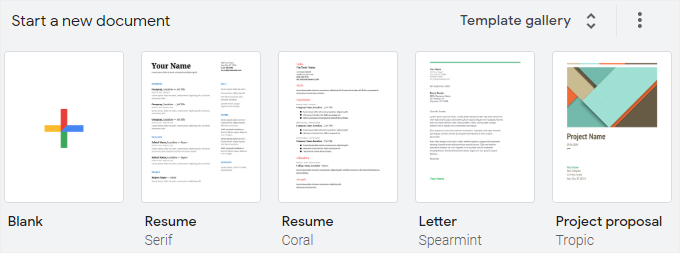
Open a new Google Docs document by clicking on the Blank type in the Template gallery.
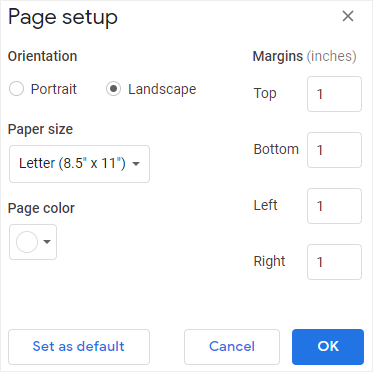
Go to File tab, click on Page Setup option in the drop-down menu to open Page Setup dialog box and select Landscape under the Orientation option to change the orientation of the page.
Step 2 Draw a Line with Arrows
Go to the Insert tab, hover over the Drawing option and click on New to open the Drawing window. Then click on the line icon, open the drop-down menu and select Arrow.
Click and drag the cursor on the drawing interface until the length of the line is what you want. You can make the line larger by using the Line Weight tool.
Step 3 Add Shapes and Edit Text
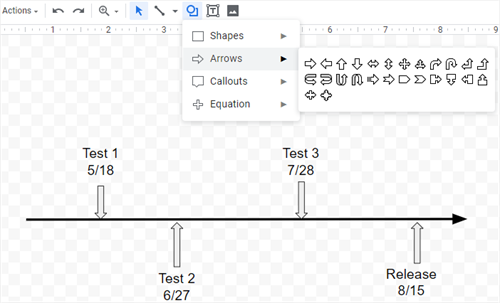
To build a timeline with this arrow line, you need to add other lines and shapes to set up the main structure of your timeline.
Click the icon of Text box and insert enough text boxes on the drawing page. These text boxes represent the events and you can type dates on the boxes, too. You can put the text boxes above or under the line.

After that, you can type or paste the text onto the text boxes. Otherwise, these text boxes will become transparent on the drawing page.
To add the connectors between the main line and text boxes, you can choose to use Line tool or insert arrow shapes. In this example, I will use arrow shapes to connect the line and text boxes.
Step 4 Customize the Timeline
To customize the timeline to what I like, here, I need to change the colors of the arrows.
Select the one of the arrows, the formatting tools will show up on the toolbar automatically. Click on the icon of Fill color to open the color menu and pick the desired color to fit your needs.
How to Make a Timeline in EdrawMax
Step 1: Select a Timeline Template
Enable EdrawMax, select Timeline under the category of “Business”, then you will see many delicate and wonderful timeline templates. You can choose one of these templates to make your own timeline.
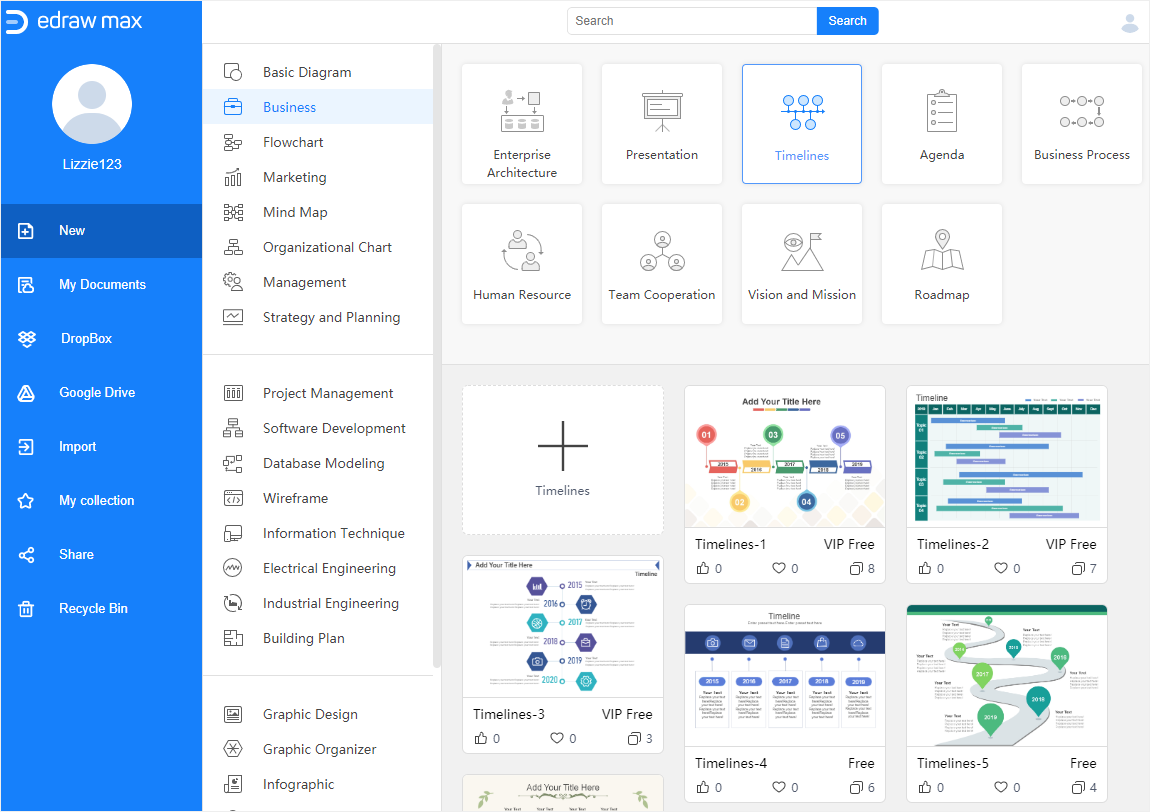
If you want to see more free timeline templates, you can visit Edraw Template and find your favorite template.
Step 2: Make Your Own Timeline
Double-click on the thumbnail of the timeline template in the Home page of EdrawMax, then you can enter into the main interface and start to make your own timeline on the basis of the selected template.
Here is the template that I selected.
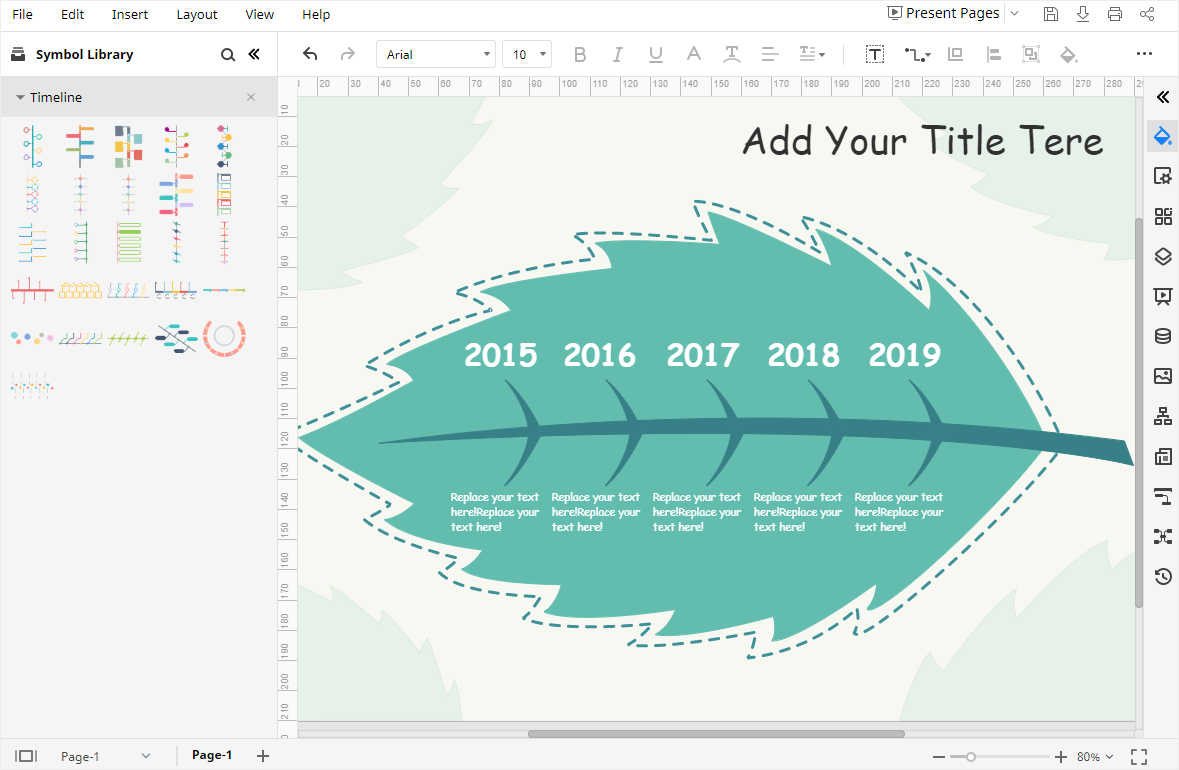
When you open the template, the symbols and shapes of timelines will show up on the left Library pane. So, you can use them to make new timelines or modify the current one.
Double-click on the textboxes and type text in them.
Step 3: Format Your Timeline
To change the fill color of the selected shape, in this case, I choose the leaf, then you need to:
- Drag the cursor to select the leaf;
- Go to Fill/Line/Shadow pane and click to open the fill color menu;
- Pick the desired color and click to switch it on the shape.
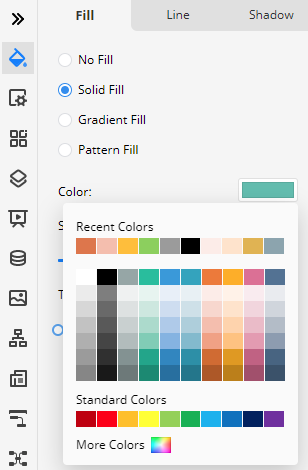
If you want to find a custom color and apply it to the shape, you can click More Color on the color menu to open the Select Color dialog box.
Pick your favorite color on the color slider, adjust the shade of color on the color palette or type the corresponding numbers on the number boxes and click OK.
In addition, on the Fill/Line/Shadow pane, you are able to change the fill style, line color, and shadow effect of the selected shape in the same way.
To insert a watermark on the background of the timeline, you need to:
- Go to the Page pane and click Watermark button to open the Insert Watermark dialog box;
- Choose Text Watermark, type the text, select the font style, font size, color style, orientation.
- Click OK.
How to Save an EdrawMax Timeline as Word File
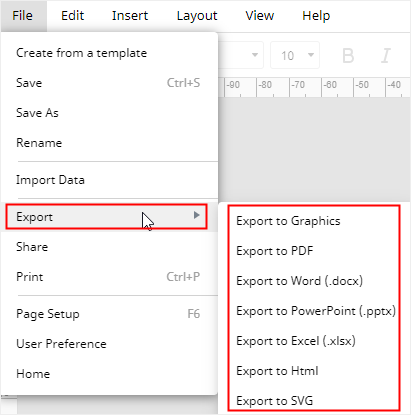
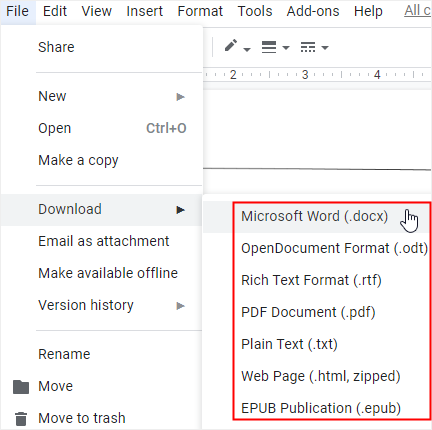
When you finish making a timeline in Google Docs, the application will automatically save the file for you. You are also allowed to download the timeline you have made in some common file types. Here you can see the supported file formats in the below picture.
At the same time, when you have created your own timeline in EdrawMax, you can save the document by pressing Ctrl + S or clicking the Save button on the upper right corner of the main interface.
Moreover, you could export the timeline as a Word file (.docx) or other files of common formats. Go to File tab, click Export > Export to Word, and then EdrawMax will automatically export and save your timeline in your computer as a Word file.
Therefore, it will be much easier and more convenient for you to share and transfer your timelines with anyone else, even if he or she hasn’t used EdrawMax before. Besides, EdrawMax supports users to insert watermarks on their diagrams or charts, which will protect their creation and designs made by EdrawMax.