How to Make a Timeline in Google Slides
A timeline is an efficient tool for visually showing the project process and plan to your team members or partners. Using Google Slides to make a timeline and your team can access to this timeline easily. You will learn how to create a project timeline in Google Slides in this tutorial with step-by-step instructions.
How to Make a Timeline in Google Slides
Step 1 Open a Blank Slide
Enable Google Slides on the browser, click Blank under the Template gallery and then you will see a new slide on the main interface.
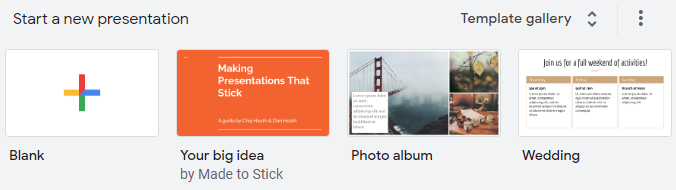
To make the slide more suitable for creating a timeline, go to the Slide tab, click Apply layout on the drop-down menu and choose Blank for the slide. Thus, the layout of the slide will become blank.
Click here to find more free Timeline templates > >
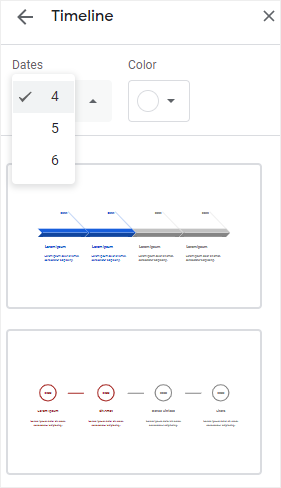
Step 2 Select a Timeline Template
Go to the Insert tab, click Diagram on the drop-down menu to open the Diagram pane.
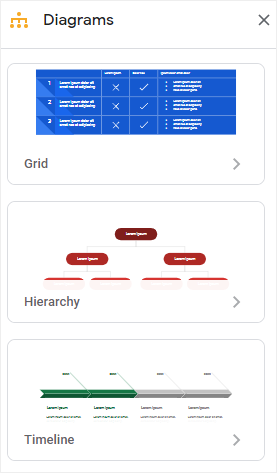
Click the third diagram thumbnail to display more inbuilt timeline templates. You can change the number of the Dates to increase or decrease the number of the shapes.
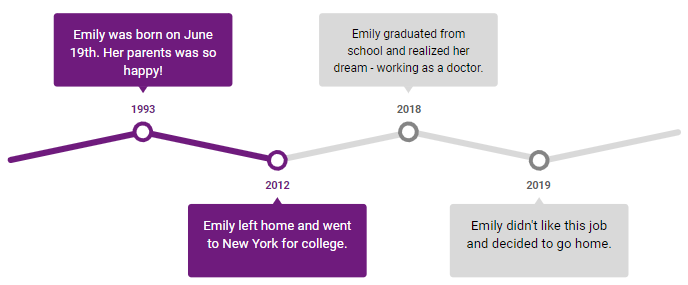
Step 3 Edit Text on the Timeline
After selecting a suitable template, you can type or paste the related content of the timeline into the template. Usually, you can enter the event and date on the timeline.
Step 4 Customize the Timeline
To change the colors of the timeline, you can
- Select the shape whose color you want to change, here I selected the third rectangle;
- Click the icon of Fill color on the toolbar to open the color menu;
- Pick the desired color and click to apply it on the shape.
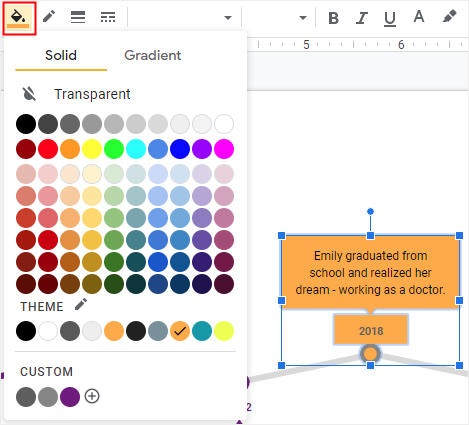
Remember that when you change the fill color of the shape, you’d better select its border, click the icon of Border color (next to Fill color) and change the border color to make it transparent or identical with the fill color.
You are also able to find other formatting tools to modify the font style or line color and customize the timeline until you are satisfied with it.
How to Make a Timeline in EdrawMax
Step 1: Select a Timeline Template
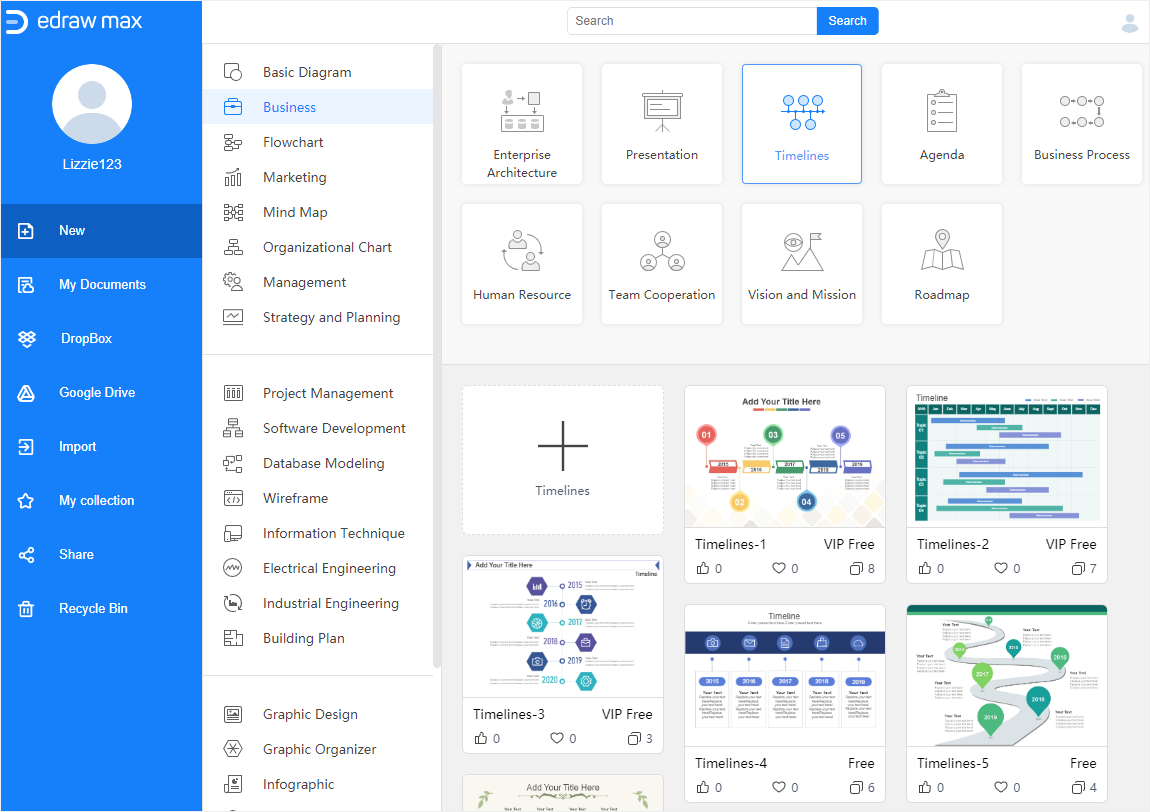
Enable EdrawMax, select Timeline under the category of “Business”, then you will see many delicate and wonderful timeline templates. You can choose one of these templates to make your own timeline.
If you want to see more free timeline templates, you can visit Edraw Template and find your favorite template.
Click here to find more free Timeline templates > >
Step 2: Make Your Own Timeline
Double-click on the thumbnail of the timeline template in the Home page of EdrawMax, then you can enter into the main interface and start to make your own timeline on the basis of the selected template.
Here is the template that I selected and I decide to make a project timeline.

When you open the template, the symbols and shapes of timelines will show up on the left Library pane. So, you can use them to make new timelines or modify the current one.
Double-click on the textboxes and type text in them.
Step 3: Format Your Timeline
To change the fill color of the shapes,for example, the colors of the bars, you can:
- Select one of the bars;
- Click on the Style icon to open the Fill/Line/Shadow pane;
- Open the color menu and pick the desired one;
- Click on the selected color and the color of the car will be changed at once.
To insert a watermark on the background of the timeline, you need to:
- Go to the Page pane and click Watermark button to open the Insert Watermark dialog box;
- Choose Text Watermark, type the text, select the font style, font size, color style, orientation.
- Click OK.
How to Save an EdrawMax Timeline as PowerPoint File
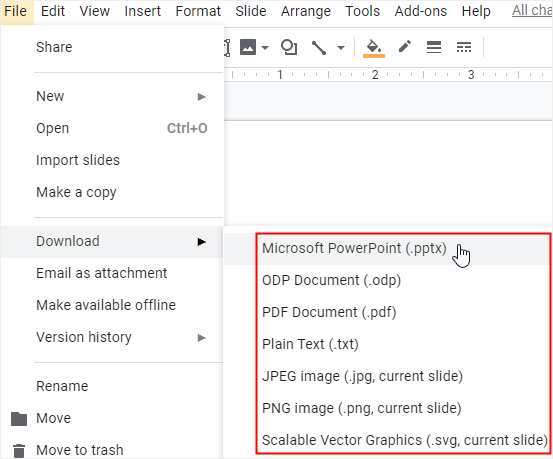
When you finish making a timeline in Google Slides, the application will automatically save the file for you. You are also allowed to download the timeline you have made in some common file types. Here you can see the supported file formats in the below picture.
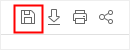
At the same time, when you have created your own timeline in EdrawMax, you can save the document by pressing Ctrl + S or clicking the Save button on the upper right corner of the main interface.
Moreover, you could export the timeline as a PowerPoint file (.pptx) or other files of common formats. Go to File tab, click Export > Export to PowerPoint, and then EdrawMax will automatically export and save your timeline in your computer as a PowerPoint file.
Therefore, it will be much easier and more convenient for you to share and transfer your timelines with anyone else, even if he or she hasn’t used EdrawMax before. Besides, EdrawMax supports users to insert watermarks on their diagrams or charts, which will protect their creation and designs made by EdrawMax.