Quick Guide for EdrawMax Online
Looking for some help? Here you can get quick answers and step-by-step instructions on how to use EdrawMax Online.
EdrawMax Online Guide
-
Get Started with EdrawMax Online
-
Basic Shape Operations
-
Basic Elements
-
Format
-
Insert Object
-
Page Setting
-
Document
-
How to Create an Organizational Chart
-
How to Create a Floor Plan
-
How to Create a Gantt Chart
-
How to Customize Smart Shapes
-
EdrawMax App Guide
-
Video Tutorial
Operations on Multiple Shapes
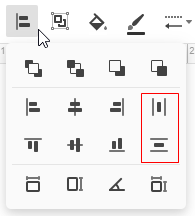
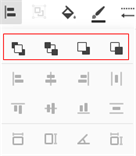
Align Shape
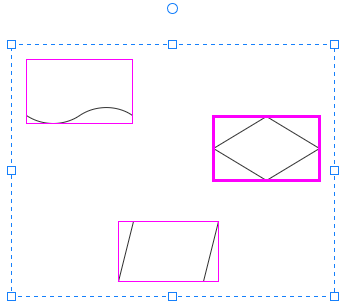
To align shapes (two or more), you need to
- Select shapes that you want to align in the same direction. Press Tab to switch the reference shape which has a thick magenta border (now the other shapes will align with diamond shape);
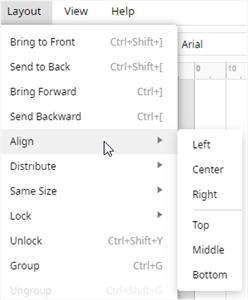
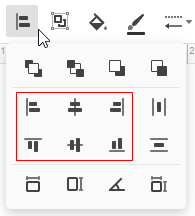
- Go to Layout tab and click Align, or click Alignment button on the ribbon, or right-click on the selected shapes and click Align;
- Select the alignment options that you want to apply.
 |
 |
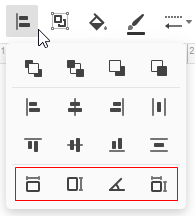
Distribute Shape
To distribute shapes (three or more), you need to
- Select shapes that you want to distribute;
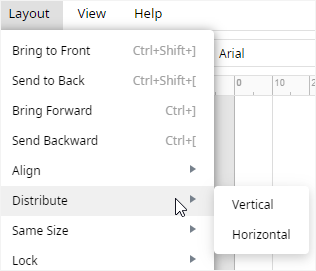
- Go to Layout tab and click Distribute, or click Alignment button on the ribbon, or right-click on the selected shapes and click Distribute;
- Select the desired distribution options.
 |
 |
Match Shape Size
To make shapes keep in the same size or angle with the reference shape, you need to
- Select shapes (two or more);
- Go to Layout tab and click Same Size, or click Alignment button on the ribbon, or right-click on the shapes and select Same Size;
- Select the desired match options:
- Click Width
 to keep shapes in the same width with the reference shape.
 - Click Height
 to keep shapes in the same height with the reference shape.
 - Click Angle
 to keep shapes in the same angle with the reference shape.
 - Click Size
 to keep shapes in the same size with the reference shape.
Group & Ungroup Shape
To group shapes, you can
- Select the shapes that you want to group;
- Go to Layout tab and click Group, press Ctrl + G, or click the Group button on the ribbon.
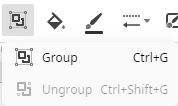
To ungroup shapes, you can
- Select the shapes that you want to ungroup;
- Go to Layout tab and click Ungroup, press Ctrl + Shift + G, or click the UnGroup button on the ribbon.
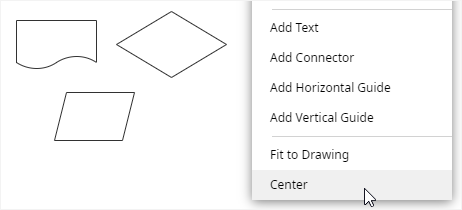
Center Shape
To center a shape or shapes on the drawing page, you can
- Don’t select shapes on the page;
- Right-click on any blank area of the page and choose Center in the context menu;
- If there is only one shape, then the shape will be moved to the center of the page; if there are multiple shapes, these shapes will become like a group and the center point of the group will move to the center of the page.
Arrange Shapes
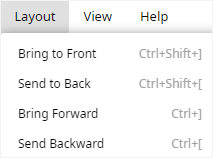 |
 |
To bring the select shape forward one level, you can
- Go to Layout tab and click Bring Forward;
- Click Alignment button on the ribbon and select
 icon;
icon; - Press Ctrl + ] (right bracket).
- Click Layer > Bring Forward on the right-click context menu.
To send the select shape back one level, you can
- Go to Layout tab and click Send Backward;
- Click Alignment button on the ribbon and select
 icon;
icon; - Press Ctrl + [ (left bracket).
- Click Layer > Send Backward on the right-click context menu.
To bring the select shape in front of all other shapes, you can
- Go to Layout tab and click Bring to Front;
- Click Alignment button on the ribbon and select
 icon;
icon; - Press Ctrl + Shift + ] (right bracket).
- Click Layer > Bring to Front on the right-click context menu.
To send the select shape behind all other shapes, you can
- Go to Layout tab and click Send to Back;
- Click Alignment button on the ribbon and select
 icon;
icon; - Press Ctrl + Shift + [ (left bracket).
- Click Layer > Send to Back on the right-click context menu.

