Quick Guide for EdrawMax Online
Looking for some help? Here you can get quick answers and step-by-step instructions on how to use EdrawMax Online.
EdrawMax Online Guide
-
Get Started with EdrawMax Online
-
Basic Shape Operations
-
Basic Elements
-
Format
-
Insert Object
-
Page Setting
-
Document
-
How to Create an Organizational Chart
-
How to Create a Floor Plan
-
How to Create a Gantt Chart
-
How to Customize Smart Shapes
-
EdrawMax App Guide
-
Video Tutorial
Page Display
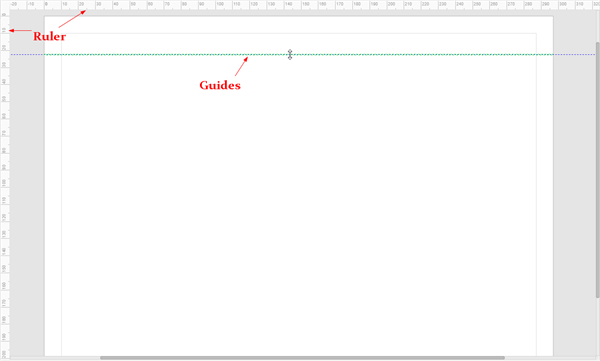
Ruler
To show rulers on the page, you can
- Go to View tab, and click Ruler to tick this option;
- Right-click on blank areas of the page and click Ruler to tick this option.
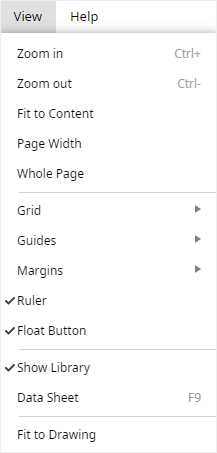
To hide rulers on the page, you can find Ruler button and click on it to cancel the checkmark.
Grid
To show grid on the page, you can
- Go to View tab, and click Grid > Show Grid to tick this option;
- Right-click on blank areas of the page and click Grid > Show Grid to tick this option.
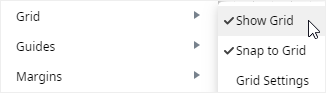
To hide grid on the page, you can find Show Grid button and click on it to cancel the checkmark.
To modify grid settings, you can
- Go to View tab, and click Grid > Grid Settings to enter Page pane;
- Right-click on blank areas of the page and click Grid > Grid Settings to enter Page pane.
Then you can choose to make the grid fit to rulers automatically or adjust the spacing and numbers of subdivisions manually.
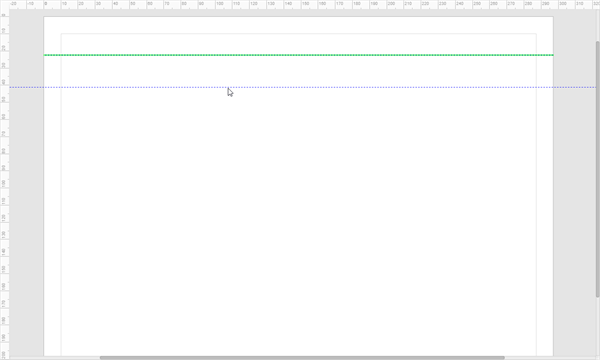
Guides
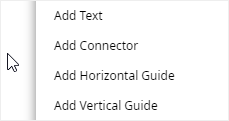
To add guides into the page, whether rulers are shown on the page or not, you can
- Add Horizontal Guide
- Put the cursor on the top of the drawing page (nearly at the position of the horizontal ruler), drag the mouse down to any area of the page.
- Right-click on blank areas of the page and select Add Horizontal Guide.
- Add Vertical Guide
- Put the cursor on the left of the drawing page (nearly at the position of the vertical ruler), drag the mouse across to any area of the page.
- Right-click on blank areas of the page and select Add Vertical Guide.
To move guides, you can
- Put the cursor on the guide and it will turn into a two-way arrow;
- Drag the mouse to move the guide to the destination;
When you move guides with rulers shown on the drawing page, you can see that the extension lines of guides will align with the scale of rulers, thus you will know the distance of each movement.
To show guides on the page, you can
- Go to View tab, and click Guides > Show Guides to tick this option;
- Right-click on blank areas of the page and click Guides > Show Guides to tick this option.

To hide guides on the page, you can find Show Guides and click on it to cancel the checkmark.
To delete guides on the page, you can click the guides and press Backspace or Delete.
To show smart guides, you can go to File tab, click User Preference, select Snap & Glue in the pop-up Option window and tick Smart Guides. Therefore, you will see smart guides when you move shapes on the page.
To hide smart guides, you just need to cancel the checkmark of Smart Guides option in the Option window.
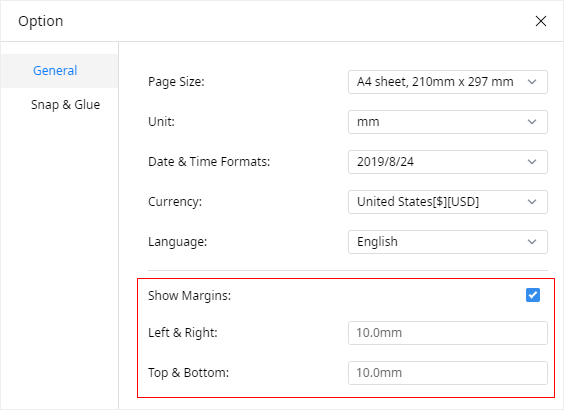
Page Margins
To show page margins on the page, you can
- Go to View tab, and click Margins > Show Margins to tick this option;
- Right-click on blank areas of the page and click Margins > Show Margins to tick this option.

To hide page margins on the page, you can find Show Margins and click on it to cancel the checkmark.
When you add backgrounds on drawing pages, the page margins will become invisible even if you choose Show Margins.
To modify margin setup, you can
- Go to View tab, and click Margins > Margin Settings to open Option window;
- Right-click on blank areas of the page and click Margins > Margin Settings to open Option window.
Then you can set the horizontal and vertical margin sizes for the entire document.
Snap and Glue
Snap refers to the function of pulling shapes and their edges into the positions that align with other shapes, ruler subdivisions, grids or guides.
Glue refers to the function of keeping shapes attached to connection points or other shapes’ vertices.
To find Snap & Glue option, you can you can go to File tab, click User Preference, select Snap & Glue in the pop-up Option window. There you can see a set of options in this window:
- Ruler Subdivisions
- Grid
- Guides
- Shape Vertices
- Connection Points
- Smart Guides
- Drawing Aids
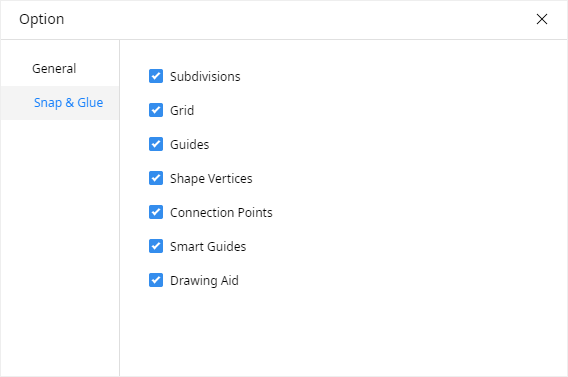
In the default situation, all the options are ticked. You can cancel the checkmarks in the Option window manually. Besides, drawing aids usually appear as a horizontal or vertical baseline when you want to draw a straight line or arrow.
To turn on Snap to Grid, you can
- Go to View tab, and click Grid > Snap to Grid;
- Right-click on blank areas of the page and click Grid > Snap to Grid.
To turn on Snap to Guides, you can
- Go to View tab, and click Guides > Snap to Guides;
- Right-click on blank areas of the page and click Guides > Snap to Guides.
Data Sheet
To show data sheet on the drawing page, you can go to View tab, click Data Sheet to tick this option. Then you can see a sheet that contains shape information.
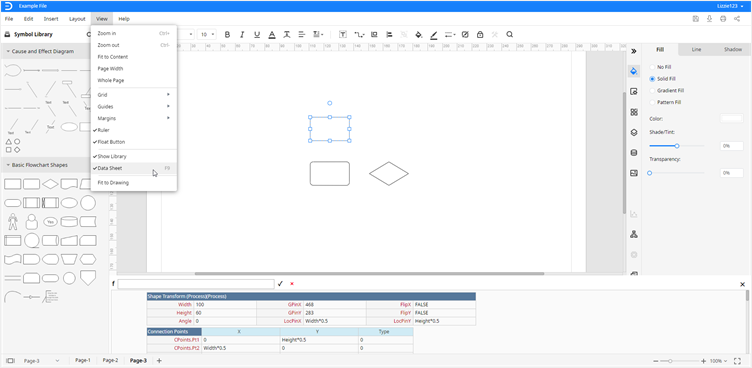
By clicking on any shape on the drawing page, you will see the corresponding shape information in the data sheet.

